

Thinking about painting your hardwood floors? It's a pretty popular idea right now, and for good reason. A good coat of paint can totally change the look of a room. But, like anything, doing it right takes a bit of know-how. This guide is all about hardwood floor paint, covering everything from picking the right kind to getting it on the floor so it actually lasts. We'll break down the steps so you can get that fresh, new look without too many headaches.
Key Takeaways
- Choosing between water-based and oil-based hardwood floor paint depends on your project needs, with water-based options often favored for faster drying and lower odor.
- Proper preparation, including thorough cleaning and sanding, is vital for the paint to stick well and last.
- Applying hardwood floor paint requires attention to detail, like mixing two-component systems correctly and using good applicators for an even finish.
- The sheen of your hardwood floor paint—matte, satin, semi-gloss, or gloss—greatly affects the final look and feel of your space.
- Selecting professional-grade hardwood floor paint and understanding its compatibility and application can lead to more durable and attractive results.
Understanding Hardwood Floor Paint Options
Water-Based vs. Oil-Based Coatings
When you're looking to finish or refinish hardwood floors, you'll run into two main types of coatings: water-based and oil-based. Each has its own set of pros and cons, and knowing the difference can really help you pick the right stuff for your project. Oil-based finishes have been around forever. They tend to give a warmer, amber tone to the wood, which some people really like. They're also known for being super durable. The downside? They take a long time to dry, have strong fumes (high VOCs), and cleanup is a pain, usually requiring mineral spirits. On the flip side, water-based finishes are the newer kid on the block, and they've gotten really good. They dry much faster, have way less odor, and cleanup is a breeze with just soap and water. This makes them a lot more user-friendly, especially for DIYers or when you need to get a room back in use quickly. While they used to be seen as less durable than oil-based, modern water-based polyurethanes, especially the two-component (2K) systems, offer incredible toughness and resistance. They also dry crystal clear, so they won't yellow over time like some oil-based finishes can.
The Rise of Water-Based Polyurethanes
It's pretty clear that water-based polyurethanes are becoming the go-to choice for a lot of flooring pros, and for good reason. The technology has advanced so much that they now compete with, and often surpass, traditional oil-based finishes in terms of durability and performance. Think about it: faster drying times mean you can get more coats down in a day, cutting down project time significantly. Plus, the low VOC content is a huge win for indoor air quality, making the application process safer and healthier for everyone involved. Cleanup with water is just a bonus that makes the whole job less messy. Many contractors are switching because these finishes offer superior abrasion resistance and don't yellow over time, maintaining the natural look of the wood. It’s not just about being eco-friendly anymore; it’s about getting a better, faster, and healthier finish. If you're looking for a modern solution that delivers on all fronts, water-based polyurethanes are definitely worth considering for your next hardwood floor project.
Exploring Premium Hardwood Stains
Beyond the topcoat, stains are what really let you customize the look of your hardwood floors. You can go for anything from a light, natural tone to a deep, rich color. Professional-grade stains are formulated for deep penetration and color consistency, which is key to avoiding blotchiness. Oil-based stains are a classic choice, offering rich colors and good durability, but they can take a while to dry. Water-based stains are also available, often with quick-dry options that are great for tight schedules. Some brands even offer stain and finish systems that work together to give you predictable results. When choosing a stain, consider the wood species, as different woods will take stain differently. Always test your chosen stain in an inconspicuous area first to make sure you love the color before committing to the whole floor. For a wide selection of professional-grade stains, check out options like the LOBA LO-FI oil-based stains or Bona DriFast Quick Dry Stains, which offer different application benefits for various project needs. Getting the stain right is the first big step in transforming your floors. You can find great advice on product selection and application by contacting experts.
Preparing Your Hardwood Floors for Painting
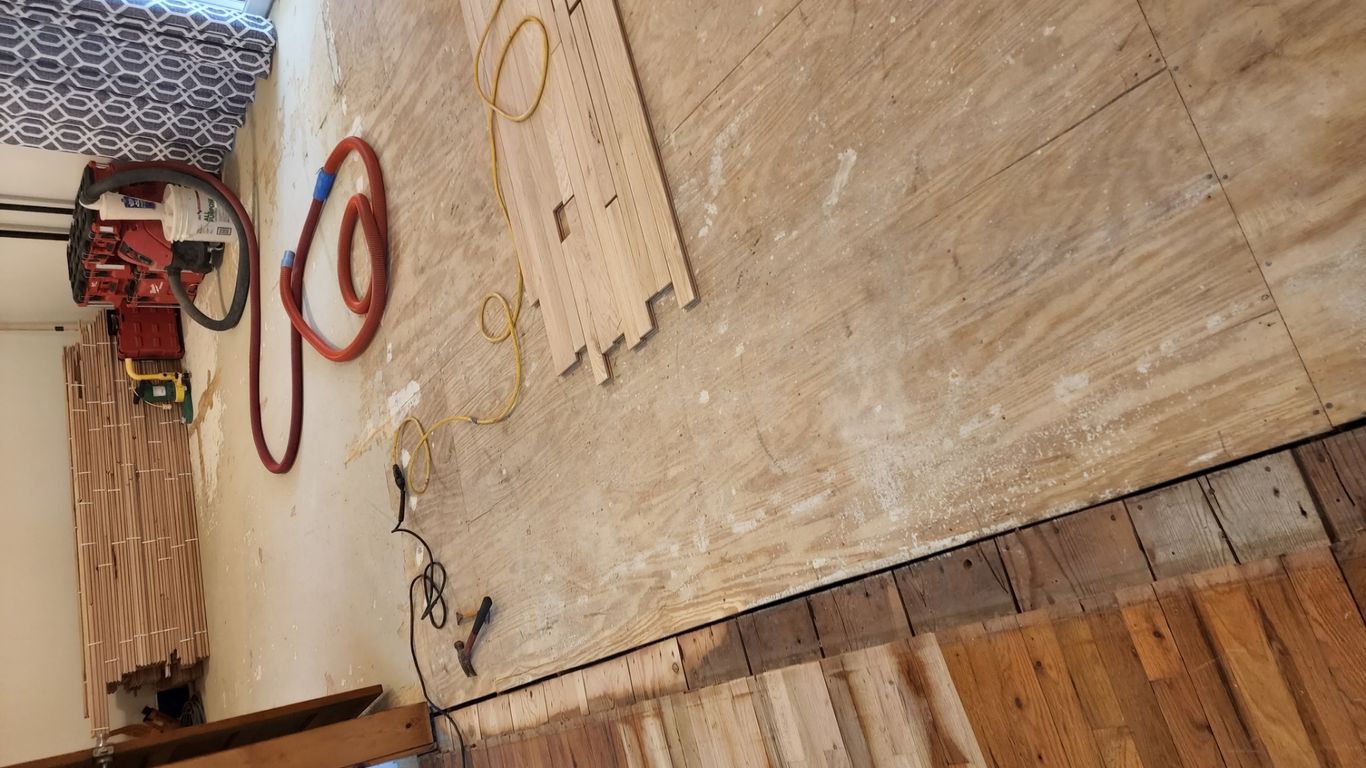
Getting your hardwood floors ready for a new coat of paint is probably the most important step. If you skip this, your paint job might not last as long as you want it to. It’s like building a house; you need a solid foundation.
Thorough Cleaning and Debris Removal
First things first, you need to get rid of all the gunk. Sweep up all the loose stuff – dust bunnies, pet hair, crumbs, you name it. Then, give the floor a good wash. Use a cleaner that’s made for hardwood floors, something that won’t leave a sticky residue behind. You want a clean slate, so to speak. If you have any old wax or polish on the floor, you’ll need to get that off too, as paint won’t stick well to it. A good degreaser might be needed for stubborn spots.
Proper Sanding Techniques for Optimal Adhesion
After cleaning, it’s time to sand. This step is key for making sure the paint sticks properly. You don’t need to take off the old finish completely unless it’s in really bad shape. Usually, a light scuff-sanding is enough. Use a fine-grit sandpaper, something like 120 or 150 grit. The goal here isn’t to make the wood look new, but to create a slightly rough surface that the paint can grip onto. Make sure you sand in the direction of the wood grain. If you’re using a floor sander, go over the whole area evenly. If it’s a small space, you can use a pole sander or even just a sanding block.
Final Dust Removal Protocols
Sanding creates a lot of fine dust, and you absolutely have to get rid of it all before you even think about painting. After you’ve swept and vacuumed up the bulk of the dust, you need to do a final wipe-down. A tack cloth works wonders for picking up those tiny particles that vacuuming might miss. You can also use a slightly damp cloth, but make sure it’s not too wet, and let the floor dry completely. Some pros even use a vacuum with a HEPA filter for the final pass. The cleaner your floor is at this stage, the better your paint job will look and last. It’s a bit of a pain, but it’s worth the effort. If you’re looking for good cleaning supplies, check out options like the Bona Pro Series 18" Hardwood Floor Care System for a professional clean.
Applying Hardwood Floor Paint: A Professional Approach
Getting that perfect finish on your hardwood floors isn't just about slapping on some paint. It takes a bit of know-how, the right tools, and a steady hand. We're talking about making sure the paint sticks, looks even, and lasts for years. This is where the pros really show their stuff, and understanding their methods can make a huge difference for your project.
Mixing and Applying Two-Component Systems
When you step up to professional-grade finishes, you'll often run into two-component (2K) systems. These aren't your average off-the-shelf paints. They come in two parts – a base and a catalyst or hardener – that you mix together right before you use them. This mixing is super important. Get it wrong, and the finish might not cure properly, leading to soft spots or a finish that wears out way too fast. Always follow the manufacturer's instructions to the letter. Measure precisely; don't just eyeball it. Once mixed, you usually have a limited window of time to use it before it starts to harden in the can, so plan your application area accordingly. Work in manageable sections and apply the mixed product evenly.
Achieving Even Coats with Quality Applicators
Nobody wants a floor that looks streaky or blotchy. To get those smooth, consistent coats that professionals are known for, you need the right tools. Forget cheap rollers or brushes that leave lint behind. For water-based finishes, a high-quality microfiber roller or a T-bar applicator designed for floor coatings is your best bet. These tools are designed to lay down a thin, even film of paint without absorbing too much or leaving behind unwanted marks. Work in a consistent direction, usually with the grain of the wood, and maintain a wet edge to avoid lap marks. Overlapping your strokes slightly helps blend each section into the next for a uniform appearance.
Understanding Dry Times and Recoat Windows
This is where patience really pays off. Water-based finishes dry much faster than their oil-based cousins, which is a big plus for getting jobs done quickly. However, 'dry' doesn't always mean 'ready for the next coat.' You need to pay close attention to the manufacturer's specified recoat window. This is the time frame during which the surface is still receptive to the next coat for optimal adhesion. Applying a second coat too soon can trap solvents and cause issues, while waiting too long might require light sanding to ensure proper bonding. Always check the product data sheet for exact times, which can vary based on temperature and humidity on your job site.
Achieving a Flawless Finish with Hardwood Floor Paint
Getting that perfect, smooth finish on your painted hardwood floors isn't just about the paint itself; it's about the steps you take after the main coats are down. This is where the real magic happens, turning a good job into a truly professional one. It’s all about attention to detail and not rushing the process.
Intercoat Abrasion and Dust Removal
After your initial coats of paint have dried, you'll want to do a light sanding or buffing between coats. This isn't about removing paint, but rather knocking down any tiny imperfections, dust nibs, or slight ridges that might have formed. Think of it as smoothing out the surface for the next layer. We usually use a fine-grit abrasive screen, something like 220 grit or even finer, and a buffer or a sanding block. The key is to be gentle. You're just scuffing the surface enough to help the next coat bond well. After you've done this light abrasion, the most critical part is dust removal. You absolutely cannot skip this. Vacuum thoroughly, then use a tack cloth or a slightly damp microfiber cloth to pick up every last bit of dust. Any dust left behind will show up in your final finish, and nobody wants that.
Applying the Final Coat for Durability
The final coat is where you seal everything in and provide the ultimate protection. Apply it with the same care as the previous coats, aiming for an even, consistent layer. Don't try to make this coat thicker to compensate for any perceived issues in previous layers; thin, even coats are always best. Use a high-quality applicator that's designed for the type of paint you're using. A good applicator makes a huge difference in how smoothly the paint lays down. This last coat is what your floor will see every day, so make it count.
Curing Times for Heavy Traffic
This is probably the hardest part for most people: waiting. The paint might feel dry to the touch within a few hours, and you can usually walk on it carefully after 24 hours, but that's just light traffic. Full curing, where the paint reaches its maximum hardness and durability, takes much longer. We're talking about days, sometimes even weeks, depending on the product and the conditions. During this curing period, it's vital to protect the floor. Avoid dragging furniture, placing rugs (unless specified by the manufacturer), and cleaning with harsh chemicals. A general rule of thumb is to wait at least 7 days for full cure before allowing heavy traffic and furniture. For high-traffic areas, it's wise to extend this waiting period if possible. Rushing this step is a common mistake that leads to premature wear and damage. Always check the manufacturer's specific guidelines for their product's cure times.
Selecting the Right Hardwood Floor Paint Sheen
The sheen of your hardwood floor paint is more than just a visual choice; it impacts the overall look, feel, and even the durability of your finished floor. Different sheens reflect light differently and can highlight or minimize imperfections. Understanding these options helps you achieve the exact aesthetic you're going for, from a subtle, natural look to a high-gloss statement.
Matte Finishes for a Natural Look
Matte finishes are the go-to for a natural, understated look. They absorb light rather than reflecting it, which gives the floor a soft, velvety appearance. This low sheen is excellent for hiding minor imperfections and scratches, making it a practical choice for busy households. It mimics the look of raw, unfinished wood, offering a modern, minimalist vibe that pairs well with many decor styles. If you want your hardwood to look like itself, just protected, matte is the way to go. It’s a popular choice for achieving that organic feel.
Satin and Semi-Gloss for Subtle Luster
Satin and semi-gloss sheens offer a middle ground, providing a gentle sheen without being overly reflective. Satin finishes have a soft glow that adds a touch of elegance, while semi-gloss offers a bit more shine, making the wood grain pop slightly more. Both are more reflective than matte, which can help make a room feel a bit brighter. They strike a good balance between a natural look and a polished appearance, making them versatile for various rooms. Many professionals find these sheens offer a good compromise between hiding wear and providing a pleasing visual depth.
Gloss Finishes for Maximum Shine
Gloss finishes, including high-gloss and full-gloss, reflect a significant amount of light, creating a dramatic, mirror-like effect. This high shine can make a room feel larger and more luxurious. It really makes the color and grain of the wood stand out. However, the high reflectivity also means that gloss finishes tend to show dust, dirt, and scratches more readily than lower sheens. They require more diligent cleaning and maintenance to keep them looking their best. For a bold, statement floor that commands attention, gloss is the ultimate choice.
| Sheen Type | Light Reflection | Appearance |
|---|---|---|
| Matte | Low | Natural, velvety, hides imperfections |
| Satin | Moderate | Soft glow, elegant, subtle luster |
| Semi-Gloss | Moderate-High | Noticeable shine, highlights wood grain |
| Gloss | High | Mirror-like, dramatic, luxurious |
When choosing, consider the room's lighting, the amount of foot traffic, and your personal style. For a professional finish that stands the test of time, consider using high-quality products like those from Bailey Flooring Supplies. Their range of finishes can help you achieve any desired sheen with confidence. If you're unsure, getting samples or consulting with a flooring professional can be incredibly helpful. Remember, the right sheen can truly transform your space.
Durability and Performance of Painted Hardwood Floors
Superior Abrasion Resistance in High-Traffic Areas
When you're looking at painting your hardwood floors, one of the biggest questions is how well it's going to hold up. Especially if you've got kids, pets, or just a lot of foot traffic coming through your home, you need a finish that can take a beating. Professional-grade water-based finishes, particularly the two-component (2K) systems, are built for this. They create a really tough surface that resists scratches and wear much better than you might expect. Think about it – these are the same kinds of finishes used in commercial spaces, so they're definitely up to the task for a busy household. The right paint system will make your floors look great for years, even with daily use.
Chemical and Moisture Protection
Beyond just scuffs and scratches, painted floors need to handle spills and cleaning. Modern water-based paints offer a good level of protection against common household chemicals and moisture. This means that if you spill your coffee or your dog has an accident, you don't have to panic. A well-applied finish will prevent liquids from soaking into the wood and causing damage or stains. It's not about making the floor waterproof, but it does add a significant layer of defense against everyday messes. This protection is key to keeping your floors looking good and preventing costly repairs down the line.
Long-Term Clarity Without Yellowing
One of the downsides of some older finishes is that they tend to yellow over time, especially when exposed to sunlight. This can really change the look of your floor, often making it appear dingy or dated. The newer water-based polyurethane finishes are formulated to stay clear. They maintain the original color of your painted floor without developing that unwanted amber tone. This means your floor will look pretty much the same as it did the day you finished it, for a long time. It’s a big deal if you’ve put a lot of effort into choosing the perfect paint color and want it to stay true.
| Feature | Water-Based Finish (e.g., Loba Easy Finish) | Traditional Oil-Based Finish |
|---|---|---|
| Abrasion Resistance | Excellent | Very Good |
| Chemical Resistance | Good to Very Good | Good |
| Moisture Resistance | Good | Fair to Good |
| Yellowing Over Time | Minimal to None | Noticeable Ambering |
| VOC Content | Low | High |
| Cleanup | Water | Mineral Spirits |
Choosing a professional-grade finish is an investment. While the upfront cost might be a bit higher, the long-term durability and performance mean fewer headaches and a better-looking floor for years to come. It’s about getting a finish that works as hard as you do to keep your home looking its best.
Maintenance Best Practices for Painted Hardwood
Regular Cleaning Routines
Keeping your painted hardwood floors looking good is pretty straightforward, but you do need to be consistent. The best approach is to sweep or vacuum them regularly, like a few times a week, depending on how much foot traffic you get. This gets rid of the grit and dust that can scratch the finish over time. Don't let dirt build up, especially in entryways. A good quality broom or a vacuum with a soft brush attachment works wonders. Just make sure to turn off any beater bars on your vacuum, as those can damage the paint.
Using Approved Cleaning Solutions
When it's time for a deeper clean, you can't just grab any old cleaner. Stick to products specifically made for hardwood floors, and ideally, ones recommended by the paint manufacturer. For painted floors, a pH-neutral cleaner is usually the way to go. Something like LOBA Parkett Soap R2U is a solid choice because it's ready-to-use and won't mess with the finish. You want something that cleans effectively without stripping away the protective coating you worked so hard to apply. A damp mop is usually sufficient; avoid soaking the floor, as excess water can seep into the wood and cause problems down the line.
Protecting Floors from Furniture and Wear
Little things can make a big difference in how long your painted floors last. Put felt pads on the bottom of all your furniture legs – chairs, tables, sofas, you name it. This stops them from scratching or denting the painted surface when they're moved. For rugs, make sure they have a non-slip backing that won't discolor the paint. Also, try to avoid dragging heavy items across the floor. If you have to move something big, use furniture sliders or blankets to protect the finish. It’s all about being mindful of the surface.
Taking a few extra minutes for proper maintenance can significantly extend the life and appearance of your painted hardwood floors. It’s about preventative care rather than dealing with damage later on.
Here’s a quick rundown of what to do:
- Daily/Regular: Sweep or vacuum to remove loose debris.
- Weekly/As Needed: Spot clean spills immediately. Use a damp mop with an approved cleaner for general cleaning.
- Monthly/Quarterly: Check furniture pads and replace if worn. Consider a light refresh if the manufacturer offers a compatible maintenance product.
- Annually: Inspect for any wear or damage that might need touch-ups.
Remember, the goal is to keep the surface clean and protected without being too aggressive. A little bit of care goes a long way in keeping your floors looking fresh and new for years to come.
Choosing Professional-Grade Hardwood Floor Paint
Benefits of Contractor-Trusted Brands
When you're looking to paint your hardwood floors, going with brands that pros rely on makes a big difference. These aren't the kinds of paints you find at just any big box store. We're talking about finishes that are built tough, designed to handle daily life without chipping or scratching too easily. Think about it: contractors use these products on jobs where they can't afford callbacks. They need something that performs consistently, job after job. That means better ingredients, more rigorous testing, and a finish that actually lasts. For example, Bailey Flooring Supplies carries a range of Bona Pro Series products that are a staple in the professional world for a reason. They hold up.
Understanding Product Compatibility
This is where things can get a little tricky, but it's super important. Not all paints and finishes play nice with each other. If you're using a specific primer, you need to make sure your topcoat is compatible. Using the wrong combination can lead to peeling, bubbling, or a finish that just doesn't cure right. It's always best to stick within a manufacturer's system if you can. For instance, if you're using a LOBA primer, you'll want to use a LOBA topcoat. This takes a lot of the guesswork out of it. Always check the product data sheets or ask for advice if you're unsure about mixing different brands or types of finishes.
Expert Guidance for Product Selection
Honestly, sometimes you just need to ask someone who knows. The world of hardwood floor finishes can be overwhelming with all the different types, sheens, and brands out there. That's why getting expert advice is so helpful. Companies like Bailey Flooring Supplies have people who can guide you. They can help you figure out not just what paint to use, but also the right primer, the best applicators, and even how much product you'll need. They can help you calculate product coverage accurately, which saves you money and hassle. Don't be afraid to reach out; they're there to help you get the best results for your specific project, whether it's a small bathroom or a large living area. It's better to get it right the first time.
Advanced Hardwood Floor Finishing Systems
The Role of Primers in Hardwood Finishing
Primers are often overlooked, but they play a big part in how your hardwood floor finish turns out. Think of it like painting a wall – you wouldn't just slap paint on drywall, right? Same idea here. A good primer creates a solid base for your topcoats. It helps everything stick better, which means your finish lasts longer. It can also help even out the color, especially if you're working with wood that has a lot of natural variation or if you're applying a lighter stain. Some primers even add an extra layer of protection against moisture or chemicals. For example, LOBA Amber Prime is designed to give a nice, warm base and make sure your topcoat adheres well, which is pretty important for a long-lasting finish.
Understanding 1K vs. 2K Systems
When you're looking at finishes, you'll see terms like 1K and 2K. A 1K system is pretty straightforward – it's a single-component product, meaning you just open the can and use it. These are usually water-based polyurethanes that are easy to apply and clean up. They're good for most residential jobs. A 2K system, on the other hand, is a two-component product. This means you have a main finish (the '1K' part) and a separate hardener or catalyst that you mix in just before you use it. Mixing these two parts creates a chemical reaction that makes the finish much tougher and more durable. These 2K finishes, like Loba 2K Duo or Loba 2K Invisible Protect A.T., are ideal for high-traffic areas, commercial spaces, or anywhere you need maximum scratch and chemical resistance. They usually have a shorter pot life once mixed, so you need to work a bit faster, but the payoff is a seriously robust finish.
Invisible Finishes for Natural Wood Tones
Sometimes, you just want the wood to look like wood, but protected. That's where "invisible" or ultra-matte finishes come in. These aren't like the old-school polyurethanes that gave wood a deep amber glow and a noticeable sheen. Instead, they're designed to maintain the wood's natural color and grain as much as possible, with very little added shine. They offer all the protection of a standard finish but without changing the look of the wood. This is great for modern design styles or when you're working with beautiful woods like white oak that you don't want to alter too much. Products like Loba 2K Invisible Protect A.T. are made for this exact purpose, giving you that raw, natural look with professional-grade durability.
Optimizing Your Hardwood Floor Paint Project
Calculating Product Coverage Accurately
Figuring out how much paint you actually need can feel like a guessing game, but it doesn't have to be. Most professional-grade hardwood floor paints, like those from Loba, list their coverage rates. For example, Loba Easy Finish typically covers around 500 square feet per gallon, per coat. It's always better to have a little extra than to run out mid-project.
Here’s a quick look at typical coverage:
| Product Type | Approx. Coverage (per gallon, per coat) |
|---|---|
| Water-Based Finish | 400-500 sq ft |
| Primer (e.g., Loba) | 400-500 sq ft |
Remember, these are estimates. Factors like the wood's porosity, the application method, and how thin or thick you lay the coats can affect the actual amount used. Always check the specific product's technical data sheet for the most accurate information.
Environmental Conditions for Application
Temperature and humidity play a bigger role than you might think when you're painting hardwood floors. Most water-based finishes, like those offered by Bailey Flooring Supplies, perform best when the temperature is between 65-75°F (18-24°C) and the relative humidity is between 40-60%. Too cold, and the finish might not cure properly, leading to a weak surface. Too hot or humid, and you could run into issues with drying times, leveling, and potential bubbling.
Always check the weather forecast and try to control the environment in your workspace as much as possible. Using fans can help with air circulation, but avoid pointing them directly at the wet finish, as this can cause uneven drying.
Project Timelines and Turnaround Times
When you're working on a floor, time is often money. Water-based finishes have a big advantage here over older oil-based options. You can usually recoat a water-based finish in as little as 2-3 hours, sometimes even faster with specific primers like LOBA EasyPrime. This means you can often complete a multi-coat system in just a couple of days.
- Preparation: Allow ample time for thorough cleaning and sanding. This is non-negotiable for a good finish.
- Priming: If using a primer, factor in its specific dry and recoat times.
- Topcoats: Most projects will need 2-3 coats for residential use, and 3-4 for commercial. Each coat adds to the overall timeline.
- Curing: While you can walk on the floor lightly after about 24 hours, full cure (when it can handle heavy traffic and furniture) typically takes 7 days. Don't rush this part.
Planning your project around these timelines helps manage expectations and ensures you get the best possible result. For quick touch-ups or maintenance, products like Bona Deep Clean are great for keeping your floors looking good between major refinishing jobs.
Ready to make your hardwood floors look amazing? Painting them can totally change your space! To get the best results, make sure you prep the floor right. This means cleaning it well and maybe even sanding it down a bit. Picking the right paint is also super important. For a long-lasting finish, check out our selection of top-notch water-based wood floor finishes. Visit our website today to find everything you need for a beautiful, painted floor!
Wrapping It Up
So, painting your hardwood floors is definitely a project you can tackle. It's not rocket science, but it does take some patience and the right materials. We've gone over the prep work, the actual painting, and how to keep it looking good. Remember, using quality products, like the ones from brands we trust, makes a big difference. Don't be afraid to ask for help if you need it, and take your time. A little effort now means you'll have floors you're proud of for a long time. Happy painting!
Frequently Asked Questions
Can I paint over existing hardwood floor finish?
Yes, you can paint over an existing finish, but proper preparation is key. You'll need to clean the floor thoroughly and lightly sand it to help the new paint stick well. Skipping these steps can lead to peeling or chipping paint later on.
What's the best way to prepare my floors before painting?
First, give your floors a really good cleaning to get rid of all dirt, grime, and anything sticky. Then, you need to sand them down a bit. This creates a slightly rough surface that the paint can grab onto. Finally, make sure to remove every last bit of dust before you start painting.
How many coats of paint do I need?
Generally, two to three coats are recommended for most home floors. If your floor gets a lot of foot traffic, like in a busy hallway or entryway, you might want to consider three or even four coats for extra protection and durability.
How long does it take for painted hardwood floors to dry?
Paint dries pretty quickly these days. You can usually walk on the floors lightly after about 24 hours. However, it takes several days, sometimes up to a week or more, for the paint to fully harden and be ready for heavy furniture or lots of activity. Always check the product's instructions.
What kind of paint should I use for hardwood floors?
Look for paints specifically made for floors, often called floor paint or porch and floor enamel. Water-based polyurethanes are also a great choice because they're durable, dry fast, and don't have a strong smell. They come in different finishes like matte, satin, or gloss.
Will painted hardwood floors be durable?
Yes, when painted with the right products and prepared correctly, hardwood floors can be very durable. Modern floor paints are designed to resist scratches, wear, and even some moisture, making them a good option for busy homes.
How do I clean my painted hardwood floors?
Cleaning is simple! Just sweep or vacuum your floors regularly. For tougher spots, use a damp mop with a cleaner that's approved for painted or sealed wood floors. Avoid harsh chemicals or too much water, as this can damage the paint over time.
Can I paint my floors a dark color?
Absolutely! Dark colors can look very stylish on hardwood floors. Just remember that darker colors might show dust or scratches more easily than lighter ones, so regular cleaning is important to keep them looking their best.

0 comments