

Thinking about fixing up your wood floors? It can seem like a big job, but with the right approach, you can really make them look great again. Whether you're going for a natural look or something more protective, there's a wood floor treatment out there for you. This guide breaks down the options, how to prep your floors, and what to use to get that polished look.
Key Takeaways
- Choosing the right wood floor treatment depends on your floor's condition, the type of wood, and how much foot traffic it gets.
- Proper surface preparation, including cleaning and sanding, is super important for a good finish.
- Water-based and oil-based finishes offer different looks and drying times, so pick one that fits your project.
- Brands like LOBA and Bona have professional-grade products that can help you achieve great results.
- Regular cleaning and using the right maintenance products will help your treated wood floors last longer.
Understanding Wood Floor Treatment Options
Water-Based Finishes: The Modern Standard
Water-based finishes have really become the go-to for a lot of us in the flooring trade. They're a big step up from the old days. The biggest win is how fast they dry, which means you can get a floor done and back to normal much quicker. Plus, the smell isn't nearly as bad as oil-based stuff, and cleanup is a breeze – just soap and water. They don't yellow over time either, keeping your floors looking like they did the day you finished them. We're talking about finishes that are tough, too. The newer two-component (2K) systems are seriously durable, standing up to heavy foot traffic, pets, and whatever else life throws at them. They create a strong barrier that resists scratches and chemicals.
- Low VOCs: Better for air quality in homes and job sites.
- Fast Drying: Recoat in a few hours, not a full day.
- Clarity: Maintains the natural wood color without yellowing.
- Durability: Modern formulations offer excellent wear resistance.
When you're looking at water-based options, you'll see terms like 1K and 2K. The '1K' means it's a single-component system, ready to go right out of the can. The '2K' means it's a two-component system – you mix a hardener or catalyst into the finish before applying. That 2K stuff is usually the toughest and best for high-traffic areas. Brands like LOBA offer some really solid 2K options, like their 2K Duo or the "invisible" style finishes that barely change the wood's look.
Proper surface prep is non-negotiable with any finish, but especially with water-based ones. Any dust or contamination left behind will show up, and you can't just buff it out easily later. Make sure your sanding is on point and you've cleaned everything meticulously.
Oil-Based Stains: Traditional Depth and Richness
Oil-based stains have been around forever, and for good reason. They soak into the wood differently than water-based ones, giving you this deep, rich color that really makes the grain pop. It’s a look that’s hard to beat for that classic, warm feel. The downside? They take a lot longer to dry. You're usually looking at 8-24 hours between coats, which can really slow down a project. And the smell – it’s strong. You definitely need good ventilation. Cleanup also requires mineral spirits, which is just another step to deal with. But if you want that traditional, deep color penetration that oil provides, it's still a top choice for many.
- Deep Penetration: Colors the wood from within.
- Rich Tones: Creates a warm, traditional look.
- Long Open Time: Allows for more working time during application.
When using oil-based stains, especially if you're trying to get a really even color, working with the grain and not overworking the stain is key. Some systems are designed to dry faster, which can help with turnaround time, but you still need to be careful about lap marks. You'll often see these used with oil-based topcoats, which also have their own drying and smell considerations.
Hardwax Oils: Natural Beauty and Repairability
Hardwax oils are a bit of a hybrid, combining natural oils and waxes. They penetrate the wood like an oil but also provide a protective surface layer like a finish. The big draw here is the natural look and feel. It’s not a thick film on top; it feels more like the wood itself. This makes them great for that modern, minimalist aesthetic. Plus, they're really easy to repair. If you get a scratch or a worn spot, you can often just reapply a bit of oil to that area without having to refinish the whole floor. It’s a very forgiving system.
- Natural Feel: Doesn't create a plastic-like surface.
- Easy Spot Repair: Worn areas can be touched up easily.
- Breathable: Allows the wood to move naturally.
Application usually involves wiping or buffing the product into the wood. It’s a different process than rolling on a poly finish. While they offer good protection, they might not be as tough against spills or heavy wear as a high-quality water-based or oil-based polyurethane. For areas with less traffic or where a natural look is the top priority, they're a fantastic option. You can find good hardwax oils from brands like WoodWise that are designed for professional use.
Selecting the Right Wood Floor Treatment
Assessing Your Floor's Needs
Before you even think about picking out a finish, you gotta look at your floor. Is it brand new, or has it seen better days and needs a full refinish? A new floor might just need a good cleaning and a coat or two of finish, while an old one might have scratches, dents, or old finish that needs to be stripped. The condition of your floor is the biggest factor in what treatment you'll need. You also need to think about the type of wood. Some woods are softer and scratch easier, while others are harder and can take more abuse. It’s not just about looks; it’s about making sure the treatment lasts.
Matching Treatment to Wood Species
Different wood species have different characteristics. For example, oak is pretty tough and takes stains well, but pine is softer and can get dented easily. Maple is dense and might need a specific type of finish to adhere properly. You wouldn't use the same treatment on a soft, porous wood like pine as you would on a dense hardwood like Brazilian cherry. Always check if the finish you're considering is recommended for your specific wood type. Some finishes can even change the color of certain woods, so keep that in mind.
Considering Traffic and Durability Requirements
How much foot traffic does your floor get? A busy entryway or a family room with kids and pets needs a much tougher finish than a guest bedroom that's rarely used. For high-traffic areas, you'll want something really durable, like a professional-grade water-based finish. These modern finishes are built to last and resist scratches and wear. If you're looking for something that can handle a lot of action, check out options like LOBA's advanced finishing systems. They're made for the long haul.
Choosing the right treatment isn't just about aesthetics; it's about performance and longevity. A finish that looks great but wears out quickly will cost you more in the long run.
Here's a quick rundown:
- High Traffic: Look for two-component (2K) water-based finishes. They offer superior durability and chemical resistance.
- Low Traffic: Standard water-based finishes or even some oil-based options can work well.
- Pets & Kids: Durability is key. Scratches and spills are common, so a robust finish is a must.
- Moisture Concerns: Areas prone to spills or humidity might benefit from finishes with good moisture resistance.
Surface Preparation for Optimal Treatment
Getting your wood floors ready before you apply any finish is super important. It’s like prepping a canvas before painting – you wouldn't just slap paint on a dirty, bumpy surface, right? Same idea here. If you skip this part, your finish might not stick right, it could look uneven, or worse, it might peel off later. We're talking about making sure the wood is clean, smooth, and totally free of anything that could mess with the new coating.
Thorough Cleaning and Debris Removal
First things first, you gotta get rid of all the gunk. This means sweeping or vacuuming up all the loose stuff like dust bunnies, pet hair, and any little bits of dirt. If there's any old wax, grease, or sticky residue on the floor, you'll need to tackle that too. Sometimes a good degreaser or a specific wood floor cleaner works wonders. You want a surface that's completely free of anything that could get trapped under the finish.
- Sweep or vacuum the entire floor.
- Use a wood floor cleaner or degreaser for stubborn spots.
- Wipe down with a damp (not wet!) cloth to pick up any remaining fine dust.
Proper Sanding Techniques
Sanding is where you really smooth things out and create a good surface for the finish to grab onto. If the floor is already finished, you'll need to sand off the old coating. If it's raw wood, you're just smoothing it. The key is to use the right grit sandpaper and work your way up. Start with a coarser grit to get rid of imperfections and then move to finer grits to make it smooth. Most pros recommend finishing with a grit around 100-120 for most finishes. You've got to be consistent with your sanding, going in the same direction as the wood grain. Skipping grits or sanding unevenly will show up later, trust me.
Sanding is a critical step that removes old finishes and creates a uniform surface profile for optimal adhesion of new coatings. Proper grit progression is key to achieving a smooth, defect-free substrate.
Final Dust Elimination Protocols
After all that sanding, there's going to be a ton of fine dust. You absolutely have to get rid of it all. Vacuuming again is a must, but it's not usually enough on its own. Most pros use a tack cloth or a microfiber cloth that's slightly damp with a wood floor cleaner or mineral spirits (check your finish manufacturer's recommendation here) to wipe down the entire floor. This picks up that super-fine dust that vacuuming misses. Don't skimp on this step; it's the last chance to get a perfectly clean surface before you apply your finish.
- Vacuum the floor thoroughly.
- Wipe down the entire surface with a tack cloth or a slightly damp microfiber cloth.
- Ensure all edges and corners are dust-free.
Doing all this prep work might seem like a lot, but it really makes a huge difference in how your finished floor looks and how long it lasts. It's the foundation for a great finish. If you're looking for good cleaning supplies to start with, check out this Multisurface Floor Care Kit.
Applying Water-Based Wood Floor Treatments
Water-based finishes have really become the go-to for a lot of us in the flooring trade, and for good reason. They dry fast, don't stink up the place like the old oil-based stuff, and cleanup is a breeze with just soap and water. But getting that perfect, smooth finish takes a bit of know-how. It's not just about slapping it on; there's a rhythm to it, and you've got to pay attention to the details.
Mixing and Application of 1K and 2K Systems
First off, you've got your 1K (one-component) and 2K (two-component) water-based finishes. The 1K stuff is ready to go right out of the can, which is super convenient. You just give it a good stir and start rolling. The 2K systems, though, they're a bit more involved. These usually come with a separate hardener or catalyst that you have to mix in. It's critical to follow the manufacturer's exact ratio and mixing instructions. Get that wrong, and your finish might not cure properly, leading to all sorts of problems down the line. Most 2K finishes have a pot life, meaning once you mix them, you've only got a certain amount of time to use them before they start to harden in the can. So, only mix what you can use within that window.
When it comes to application, a good quality roller is your best friend. We usually go for a microfiber roller designed for water-based finishes. You want to apply it in thin, even coats. Don't try to lay it on too thick, thinking you'll get better coverage or protection. That usually just leads to drips, puddles, and an uneven sheen. Work in sections, keeping a wet edge to avoid lap marks. That means as you finish one section, you immediately start the next, overlapping slightly with the wet finish. This helps everything blend together smoothly.
Achieving a Uniform, Streak-Free Finish
Getting that perfectly uniform look is all about technique and patience. Start by making sure your floor is prepped perfectly – no dust, no debris. Any little speck can get trapped in the finish. When you're rolling, use consistent pressure and speed. Think of it like painting a wall, but with a bit more finesse. Roll in long, straight passes, always going in the direction of the wood grain. If you're using a 2K system, remember that pot life we talked about. If it starts to get thick or stringy in the can, it's time to toss it and mix a fresh batch. Trying to force a bad batch will just result in streaks and an ugly finish.
Some guys like to do a light buffing between coats with a fine-grit screen or sandpaper. This knocks down any little imperfections or dust nibs that might have settled. Just make sure you vacuum and tack cloth the floor thoroughly after sanding, or you'll just be spreading dust around. A clean floor is key to a clean finish.
Understanding Recoat Windows and Drying Times
This is where water-based finishes really shine compared to oil-based ones. They dry fast. You can usually recoat in about 2 to 4 hours, depending on the product and the conditions in the room (temperature and humidity play a big role). Always check the product's technical data sheet for the specific recoat window. Don't rush it, but don't wait too long either. If you wait too long, the next coat might not bond as well. If you try to recoat too soon, you risk disturbing the previous coat, causing streaks or an uneven appearance.
Light traffic is usually okay after about 24 hours, but the finish isn't fully cured for several days, sometimes up to a week or more. That means no rugs, no heavy furniture moving, and being careful with pets or kids for a while. It's tempting to get the room back in use, but giving the finish adequate time to cure is what makes it last.
Here's a quick rundown of what to expect:
- Recoat Window: Typically 2-4 hours for most water-based finishes.
- Light Traffic: Usually 24 hours after the final coat.
- Full Cure: Can take 3-7 days, sometimes longer. Avoid heavy use during this period.
Always read and follow the specific instructions provided by the finish manufacturer. Environmental conditions like temperature and humidity can significantly affect drying and recoat times. Proper ventilation is also important, even with low-VOC products.
When you're looking for reliable water-based finishes, brands like LOBA offer some solid options. Their LOBA EasyFinish is a popular choice for its balance of performance and ease of application, making it suitable for both pros and serious DIYers. It's a good example of the quality you can expect from modern water-based systems.
Mastering Oil-Based Stain Application
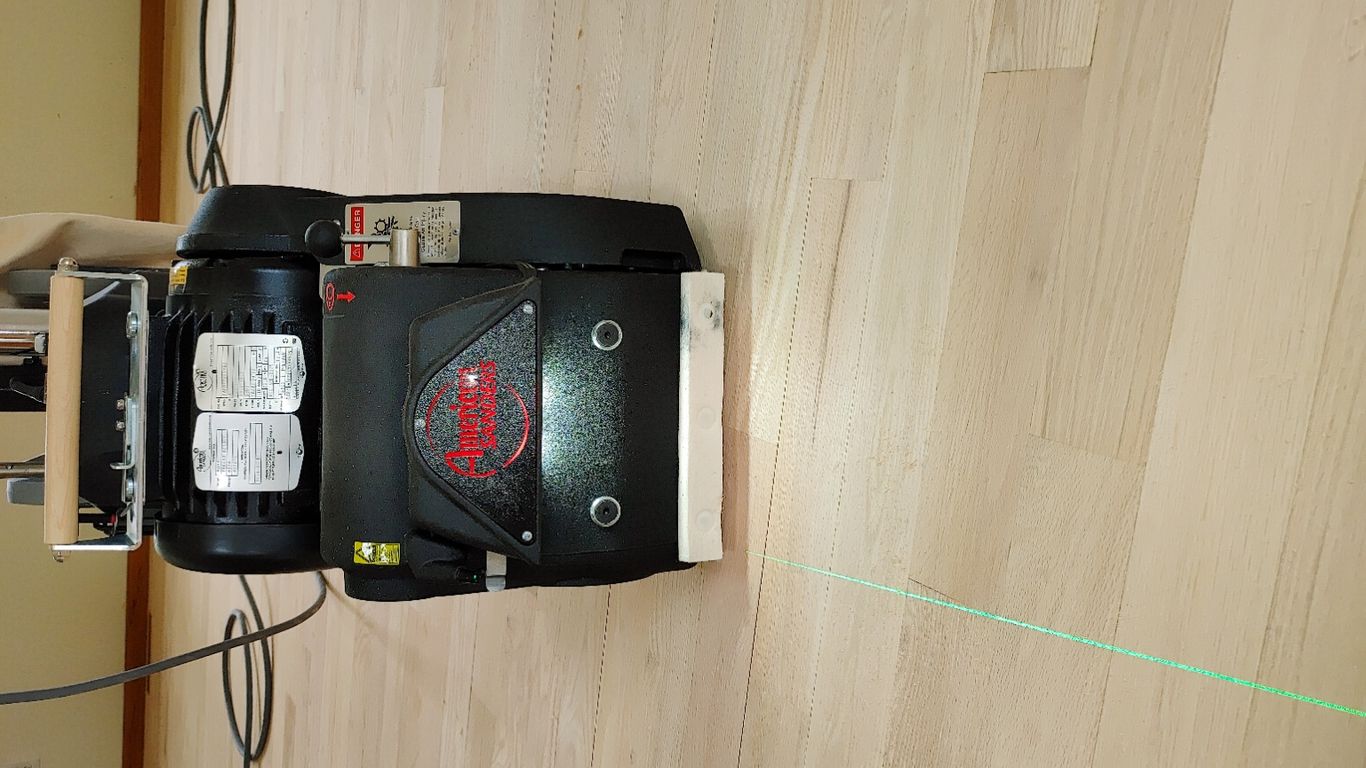
Getting an oil-based stain right on hardwood floors takes a steady approach and close attention to each step. When applied with care, these stains give wood floors a classic, rich tone and highlight grain like nothing else. If you've got a project lined up, here’s how to make sure you end up with even color, no distracting marks, and a finish that will keep looking good through everyday wear.
Achieving Consistent Color Penetration
Oil-based stains have real staying power—but only if they get deep into the wood fibers. Start by checking that your sanding job is even from wall to wall. Any swirl marks or skipped patches will show up once stain is applied.
- Use a final sanding grit between 100 and 120 for most hardwoods.
- Always sand along the wood grain, not against it.
- Check for spots that look shiny (still burnished from old finish) and hit them again lightly.
Apply stain liberally using a clean cloth or a brush meant for oil-based products. Let the stain sit for the time recommended—don’t rush this part. Wipe off any excess using the grain as your guide to avoid streaks.
Letting stain sit too short makes for a washed-out tone. Too long, and the color may turn blotchy. It's worth pausing for a quick check in natural light before moving on.
Working with Quick-Dry Stain Systems
If you’re on the clock, quick-dry oil stain systems can help speed things up. These still provide the deep color of traditional oil-based stains but can be recoated much sooner.
A few practical steps for a consistent result:
- Stir stain thoroughly before each use—never shake, as this can cause bubbles.
- Work in manageable sections so you finish each area before moving to the next.
- Wipe excess promptly, since quick-dry stains flash off the solvent much faster.
Here’s a quick comparison of typical dry times:
| Stain Type | Recoat Time | Color Penetration |
|---|---|---|
| Oil-Based Standard | 8-24 hrs | Deep |
| Oil-Based Quick-Dry | 2-4 hrs | Medium-Deep |
Note: Fast drying can be tricky if you lose track of where you started, so always plan your route across the floor.
Ensuring Even Distribution and Avoiding Lap Marks
Lap marks—those distinct lines where wet stain overlaps with areas that have already started to dry—are one of the main headaches for pros and DIYers.
- Keep a wet edge by working across the floor methodically, especially in larger rooms.
- Don't skimp on stain for fear of over-applying. Excess will be wiped away anyway; uneven dry spots are harder to fix.
- Use the right tools: Pads or brushes made for oil-based stains stop streaks before they start.
A few habits help here:
- Always blend freshly applied stain into the previous section.
- Check your work from different angles and lighting as you go—the sheen of wet stain shows you where you’ve missed.
- If you see a lap mark, immediately smooth it out with a clean cloth or brush.
Good prep and steady progress are key—once oil-based stains start drying unevenly, it's tough to erase those marks short of sanding again.
With a careful, steady hand, oil-based stains can transform wood floors into something really special—deep color, loads of character, and a finish that makes a room stand out for all the right reasons.
The Benefits of Invisible Wood Floor Treatments
Preserving the Natural Wood Aesthetic
When you've picked out a beautiful hardwood floor, you probably want to see the wood itself, right? That's where invisible finishes come in. They're designed to protect the wood without adding a noticeable sheen or changing its color. Think of it like a clear shield that lets the natural grain and tone of the wood shine through. This is especially popular for lighter woods like white oak, or for homes with a modern, minimalist style. The goal is to make the floor look as natural as possible, almost like it's untreated, but still have that tough layer of protection. It’s a way to keep that raw, authentic look that many people love.
Protecting Without Altering Color
Unlike some older finishes that can give wood a yellowish or amber tint over time, invisible treatments aim to keep the wood's original color. This is a big deal if you've spent time selecting a specific wood species for its unique hue. These finishes are typically water-based and dry crystal clear. They don't add any color themselves, so what you see during application is pretty much what you get when it's dry. This means your maple floor stays light and airy, and your walnut floor keeps its deep, rich tones without any added warmth from the finish itself. It’s all about maintaining the integrity of the wood's natural appearance.
Ideal for Modern and Scandinavian Designs
If you're going for a clean, contemporary look, especially the popular Scandinavian style, invisible finishes are a perfect fit. These designs often feature light colors, natural materials, and a sense of spaciousness. An invisible finish complements this by keeping the floors light and airy, not adding a heavy or glossy look. It helps create that bright, open feel that’s characteristic of these design trends. It’s about letting the wood be the star, supported by a protective layer that doesn’t draw attention to itself. This approach works well with furniture and decor that also emphasizes natural materials and simple lines. For a truly natural look, consider using a product like LOBA 2K Invisible Protect A.T. which is designed for this exact purpose.
Professional-Grade Wood Floor Treatment Products
LOBA's Advanced Finishing Systems
When you're looking for finishes that stand up to serious use, LOBA is a name that comes up a lot among the pros. They've got a whole line of water-based systems that are pretty impressive. We're talking about finishes that are tough, dry fast, and don't make your shop smell like a chemical factory. Their 1K and 2K systems are designed for different needs, but both aim for that professional, durable result. The 2K stuff, for example, uses a hardener to make the finish extra tough, which is great for places with a lot of foot traffic or if you have pets running around. It's a bit more involved to mix, but the payoff in durability is usually worth it. They also have primers like LOBA Amber Prime that help make sure your topcoat sticks well and gives a nice, consistent color, especially on woods that can be tricky. It’s all about building a solid foundation for a floor that looks good and lasts.
Bona's Trusted Floor Care Solutions
Bona is another brand that flooring guys rely on. They've got a solid reputation for making products that work. Their water-based finishes are popular because they dry quickly, which means you can get a job done faster and move on to the next. This is a big deal when you're on a tight schedule. Bona also makes a range of cleaners and refreshers, like their Pro Series Hardwood Floor Refresher, that help keep floors looking good between full refinishes. These products are designed to be gentle on the finish but tough on dirt and grime. Using the right cleaner and refresher can really extend the life of your floor and keep it looking its best without a lot of extra work. It’s about having a system that works together, from the initial finish to the ongoing maintenance.
WoodWise for Specialized Applications
While LOBA and Bona cover a lot of ground, sometimes you need something a bit more specific, and that's where brands like WoodWise come in. They often focus on more natural finishes, like hardwax oils, which give wood a beautiful, matte look that many people love. These finishes penetrate the wood rather than just sitting on top, which can make them feel more natural and also easier to repair if you get a scratch or a worn spot. You can often just reapply a bit of oil to the affected area without having to refinish the whole floor. It’s a different approach than the super-hard polyurethane finishes, but it has its own set of advantages, especially for certain design styles or if you want that really authentic wood feel. They also have products for surface preparation, which is always the first step to a good finish.
Maintaining Your Treated Wood Floors
Keeping your hardwood floors looking their best after treatment is all about a consistent, gentle approach. It’s not complicated, but it does require a bit of attention to detail. Think of it like caring for a good piece of furniture; you wouldn't use harsh chemicals on it, right? The same applies to your floors. The goal is to protect the finish and the wood underneath without causing any damage.
Regular Cleaning with pH-Neutral Products
Daily upkeep is key. For routine cleaning, stick to dry methods like sweeping or vacuuming with a soft brush attachment. This gets rid of grit and dust that can scratch the finish over time. When it's time for a damp clean, always use a pH-neutral cleaner specifically made for hardwood floors. These cleaners are formulated to lift dirt without stripping the finish or leaving behind residue that can dull the surface. Avoid steam mops, as the excess moisture can damage the wood, and steer clear of all-purpose cleaners, ammonia, or vinegar-based solutions, as they can break down the protective coating.
- Sweep or vacuum daily.
- Use a damp mop (not wet!) for deeper cleaning.
- Always opt for pH-neutral hardwood floor cleaners.
- Never use steam mops or abrasive cleaners.
A little bit of regular care goes a long way in preserving the look and longevity of your wood floors. It’s about consistency, not intensity.
Using Manufacturer-Approved Maintenance Oils
If your floor has been treated with an oil-based finish or a hardwax oil, periodic reapplication of a maintenance oil is a good idea. This isn't a full refinishing job; it's more like a conditioning treatment. These maintenance oils replenish the wood's natural oils, keeping it from drying out and helping to repair minor scuffs or wear marks. It also helps to refresh the protective layer. Always use a product recommended by the finish manufacturer, as different oils can react differently. For example, LOBA Nature Oil Care is a professional option designed to nourish and protect oiled hardwood floors, maintaining their natural luster without creating an artificial sheen. Application is usually straightforward – apply a thin coat with a cloth or applicator, let it soak in, and buff off any excess. Check the product's instructions for specific drying times and recommended application frequency.
Protecting Against Wear and Moisture
Prevention is always better than cure. Simple measures can significantly extend the life of your floor's finish. Place felt pads under furniture legs to prevent scratches when chairs or tables are moved. Use doormats at all entrances to trap dirt and moisture before it gets tracked onto the wood. For kitchens and bathrooms, consider using area rugs or runners. Clean up spills immediately; don't let liquids sit on the surface, as even a well-sealed floor can be damaged by prolonged moisture exposure. Maintaining a consistent indoor humidity level also helps prevent the wood from expanding and contracting excessively, which can stress the finish over time.
Troubleshooting Common Wood Floor Treatment Issues
Even with the best prep and the finest products, sometimes things don't go exactly as planned when you're finishing wood floors. It happens to all of us, from seasoned pros to weekend warriors. The good news is, most common problems can be fixed with a little know-how. Let's break down a few of the usual suspects and how to get your floor looking right.
Addressing Uneven Staining
This is a big one, especially with oil-based stains. You might end up with dark patches or light streaks where the stain didn't soak in evenly. It usually comes down to how the wood absorbed the stain, or sometimes, how it was applied. If you notice it right away, you might be able to wipe it down with a clean rag and some mineral spirits to even it out before it dries too much. For dried-in issues, you're likely looking at a light sanding to remove the uneven stain and then reapplying. Making sure the wood is uniformly clean and free of any old finish or contaminants before you start is key. Sometimes, using a pre-stain conditioner can help the wood take the stain more evenly, especially on softer woods like pine.
- Problem: Dark spots or light streaks after staining.
- Cause: Uneven absorption, contaminants on the wood, or improper application.
- Solution: Wipe with mineral spirits (if wet), light sanding and reapplication, or use a pre-stain conditioner.
Resolving Application Marks and Streaks
These can pop up with both stains and finishes. With stains, it's often lap marks where one section started to dry before you overlapped it. With finishes, you might see roller marks, brush strokes, or "fisheyes" (small, circular imperfections). For lap marks in stain, you're often stuck with sanding and redoing that section. For finishes, it's usually about the applicator. Using a high-quality roller or brush designed for the product you're using is a must. Applying thin, even coats and maintaining a wet edge helps a lot. If you get streaks from a roller, sometimes a light sanding with a fine grit (like 220 or higher) after it dries can help smooth things out before the next coat. Fisheyes are tricky and often mean there was some kind of silicone or wax contamination on the surface – a thorough cleaning and tack cloth wipe-down is your best bet before applying the finish.
Dealing with Finish Adhesion Problems
This is when a coat of finish doesn't stick well to the coat underneath, leading to peeling or flaking. The most common reason? Not following the recoat window. Most finishes have a specific time frame where the surface is still receptive for the next coat to bond properly. If you wait too long, the surface can become too hard, and you'll need to lightly abrade it (usually with a fine screen or sandpaper) to give the next coat something to grip. Another cause can be contamination between coats – dust, oil from your hands, or even cleaning residue. Always vacuum and tack cloth between coats. If you're using a water-based finish over an oil-based one (or vice versa) without the proper transition coats, you can also run into adhesion issues. Always check product compatibility.
Always remember that surface preparation is about 80% of the job. If you cut corners there, you're just asking for trouble down the line, no matter how good your product is.
When you're looking for reliable water-based finishes that are known for their performance and ease of use, Bailey Flooring Supplies has some solid options. Their selection often includes professional-grade products designed for durability and a clean finish. For instance, products like Loba 2K Duo are a popular choice among tradesmen for their balance of performance and application. It's always a good idea to check the manufacturer's recommendations for recoat windows and surface prep to avoid common issues.
Choosing Eco-Friendly Wood Floor Treatments
When it comes to finishing your wood floors, you don't have to choose between a beautiful look and a healthy home. More and more, people are looking for treatments that are better for the environment and for the air quality inside their houses. Luckily, the flooring industry has really stepped up, offering some great options that are both effective and eco-conscious.
Low-VOC Water-Based Options
Water-based finishes have really become the go-to for a lot of pros and homeowners alike, and for good reason. They generally have much lower Volatile Organic Compound (VOC) levels compared to older oil-based finishes. This means less of those chemical smells lingering in the air while you're working and after the job is done. It makes a big difference for anyone sensitive to fumes, or if you just want to get back into your space sooner without worrying about breathing in harsh chemicals. Brands like Loba and Bona offer a range of water-based finishes that are known for their durability and clear finish that doesn't yellow over time. These are often available in different sheens, from matte to gloss, so you can get the look you want without the environmental downside.
Understanding Environmental Certifications
It's not just about low VOCs, though. You might see different labels or certifications on products that tell you more about their environmental impact. Things like GreenGuard or FloorScore certifications mean the product has been tested and meets certain standards for low chemical emissions. This gives you a bit more confidence that you're picking something that's genuinely better for indoor air quality. It's always a good idea to check the product details or the manufacturer's website to see if they highlight any of these certifications. It’s a good way to compare products if you’re trying to make the most responsible choice for your home and the planet.
Benefits for Indoor Air Quality
Using eco-friendly treatments, especially low-VOC water-based finishes, has a direct impact on the air you breathe every day. Traditional finishes can release VOCs for weeks or even months after application, which can contribute to poor indoor air quality and potential health issues. By choosing products with low or zero VOCs, you significantly reduce this off-gassing. This is particularly important for homes with children, pets, or individuals with respiratory problems. It creates a healthier living environment from the start. Plus, many of these eco-friendly options dry faster, meaning less time spent with the windows open and less disruption to your home life. It’s a win-win for your floors and your family's well-being. For regular cleaning, using a pH-neutral cleaner like Bona Deep Clean helps maintain this healthy environment long-term.
Picking the right eco-friendly wood floor treatments is important for your home and the planet. You want finishes that are safe and look great. We have a wide selection of options that are good for the environment. Visit our website to explore the best choices for your wood floors and make a green decision today!
Wrapping It Up
So, there you have it. Taking care of your wood floors isn't some big mystery. Whether you're just cleaning them up or doing a full refinish, the right products and a bit of patience go a long way. We've talked about different finishes, how to put them on, and what to use to keep them looking good. Remember, good prep work is half the battle, and using quality stuff, like the professional-grade options out there, makes a real difference. Don't be afraid to ask for help if you need it; that's what folks like us are here for. With a little effort, you can keep those floors looking great for years to come.
Frequently Asked Questions
What's the main difference between water-based and oil-based wood floor finishes?
Think of water-based finishes as the speedy, modern choice. They dry fast, don't smell as strong, and stay clear over time without turning yellow. Oil-based finishes are more traditional; they give wood a deeper, richer color and take longer to dry. They can also add a warm, amber tone.
How do I know which type of finish is best for my floors?
It depends on what you want! If you like the natural look of your wood and want it to stay that way, a clear or 'invisible' finish is great. For a richer color, an oil-based stain might be better. Also, think about how much foot traffic your floors get. High-traffic areas need tougher finishes.
Is it important to prepare my floors before applying a finish?
Absolutely! Preparing the floor is super important for a good result. You need to clean it really well to get rid of all the dirt and dust. Sometimes, you'll need to sand it down to make it smooth. This makes sure the new finish sticks properly and looks even.
What are 'invisible' wood floor treatments?
Invisible treatments are finishes that protect your wood floors without changing their color or adding a lot of shine. They're designed to make the wood look as natural as possible, almost like it's not even finished. This is popular for modern or light-colored wood styles.
How often should I clean my wood floors after they're treated?
You should sweep or vacuum your floors regularly to pick up everyday dirt. For cleaning, use a cleaner that's mild and made specifically for wood floors, like a pH-neutral one. Avoid harsh chemicals or too much water, as they can damage the finish over time.
Can I apply a wood floor finish myself, or should I hire a pro?
Many modern finishes, especially water-based ones, are designed to be easier for DIYers. However, getting a truly professional look can be tricky. If you're unsure or want the best possible result, especially for large or expensive floors, hiring a professional is often a good idea.
What does 'VOC' mean when talking about wood floor treatments?
VOC stands for Volatile Organic Compounds. These are chemicals that can be released into the air, and some can be harmful to breathe. Products with low VOCs are better for your health and the environment because they release fewer of these chemicals.
How long do wood floor finishes typically last?
The lifespan of a wood floor finish can vary a lot. It depends on the type of finish used, how much wear and tear the floor gets, and how well you maintain it. High-quality finishes in normal home settings can last anywhere from 5 to 15 years or even longer before needing a recoat or refinish.

0 comments