

So, you've got beautiful hardwood floors, and you want to keep them looking good, right? That's where polyurethane comes in. It's like a shield for your wood, protecting it from all the everyday wear and tear. But choosing the right one and putting it on correctly can feel like a puzzle. This guide is here to break down everything you need to know about hardwood floors polyurethane, from picking the best type to making sure it looks great and lasts.
Key Takeaways
- Polyurethane is key for protecting your hardwood floors from scratches and spills, but there are different kinds to choose from.
- Water-based polyurethane dries fast, has less smell, and stays clear, making it a popular choice these days.
- Oil-based polyurethane is a classic option that gives a warmer, amber tone to the wood, but it takes longer to dry and has a stronger smell.
- Proper prep work, like cleaning and sanding, is super important for the polyurethane to stick well and look smooth.
- Once it's on, taking care of your floors with the right cleaning methods will help the polyurethane finish last longer.
Understanding Hardwood Floors Polyurethane Finishes
The Role of Polyurethane in Wood Floor Protection
Polyurethane is the go-to finish for most hardwood floors these days, and for good reason. It's basically a liquid plastic that, once dried, forms a tough, protective layer over the wood. Think of it like a shield. This shield is what keeps your floors safe from everyday wear and tear. Without it, your beautiful wood would be much more susceptible to scratches, scuffs, spills, and general damage from foot traffic. It’s the barrier that allows you to actually live on your wood floors without constantly worrying about every little thing that happens.
The main job of polyurethane is to protect the wood itself. It prevents moisture from seeping in, which can cause swelling or staining. It also resists abrasion, meaning it can take a beating from shoes, furniture being moved, and pets running around. Different types of polyurethane offer varying levels of protection, but they all share this core function of creating a durable surface.
Water-Based vs. Oil-Based Polyurethane: A Professional Comparison
When you're looking at polyurethane finishes, you'll mostly run into two main types: water-based and oil-based. They do the same basic job, but they get there in different ways, and that makes a big difference on the job site and for the homeowner.
Water-based polyurethanes are the newer kids on the block, and they've really taken over in professional circles. They dry much faster, often in just a couple of hours between coats. This means you can get a floor finished and ready for light use in a day or two, which is a huge time saver. They also have a low odor and low VOC (volatile organic compound) content, making them much better for indoor air quality during application and for the people living in the house. A big plus is that they dry clear and don't really yellow over time, so they keep the natural color of the wood looking true. The downside? They can sometimes be a bit more expensive upfront, and they might not feel quite as thick or 'substantial' as oil-based finishes to some people, though modern formulations are incredibly durable.
Oil-based polyurethanes, on the other hand, are the old guard. They've been around forever and are known for their classic look. They tend to dry slower, often taking 8-24 hours between coats, which can really stretch out a project. They also have a strong, lingering odor and higher VOCs, so you need good ventilation and people usually have to stay out of the house for a few days. Oil-based poly tends to give a warmer, amber tone to the wood, which some people love, but it also means the finish will continue to yellow over time, changing the wood's color. They are generally a bit cheaper than water-based options and can feel very robust. However, the long drying times and strong fumes are major drawbacks for many contractors and homeowners today.
Here’s a quick rundown:
| Feature | Water-Based Polyurethane | Oil-Based Polyurethane |
|---|---|---|
| Dry Time | Fast (2-4 hours recoat) | Slow (8-24 hours recoat) |
| Odor/VOCs | Low odor, low VOCs | Strong odor, high VOCs |
| Color | Clear, non-yellowing | Amber tone, yellows over time |
| Application | Easier cleanup (water) | Requires mineral spirits |
| Cost | Generally higher upfront | Generally lower upfront |
| Durability | Excellent (modern formulations) | Excellent (traditional) |
Key Performance Indicators for Hardwood Floor Polyurethane
When you're picking out a polyurethane, you don't just grab the first can you see. Professionals look at a few key things to make sure the finish will hold up and look good for years. These are the performance indicators that really matter:
- Abrasion Resistance: This is how well the finish stands up to scratching and scuffing. High-traffic areas need a finish with top-notch abrasion resistance. Think about floors in busy homes with kids and pets, or even commercial spaces. A good polyurethane will have a high rating here, meaning it won't wear through easily.
- Chemical Resistance: Floors get exposed to all sorts of things – spills, cleaning products, pet accidents. A finish that resists chemicals won't break down, stain, or get damaged by these common household substances. This is especially important for preventing damage from spills that sit for a bit.
- Clarity and Color Stability: Does the finish stay clear, or does it add a noticeable color? Does it yellow over time? Most people want their polyurethane to either be completely clear, preserving the wood's natural look, or to add a consistent, warm tone that doesn't change drastically as it ages. Water-based finishes generally excel at staying clear and not yellowing, while oil-based ones develop an amber hue.
- Drying and Curing Time: This isn't just about convenience; it's about the integrity of the finish. Faster drying times between coats mean less waiting and a quicker project completion. However, the cure time is when the finish reaches its maximum hardness and durability. Knowing these times helps you advise clients on when they can move furniture back and resume normal life on their floors.
Understanding these performance metrics helps you choose a product that not only looks good when first applied but will continue to protect and beautify your hardwood floors for the long haul. It's about making an informed decision that balances aesthetics with practical, lasting protection.
Selecting the Right Polyurethane for Your Project
Assessing Traffic Levels and Durability Needs
When you're picking out a polyurethane finish for your hardwood floors, the first thing you gotta think about is how much foot traffic the floor is going to see. It sounds simple, but it makes a big difference. A floor in a busy entryway or a commercial space needs something way tougher than a bedroom floor that barely gets walked on. We're talking about how well the finish can stand up to scratches, scuffs, and general wear and tear over time. If you've got kids, pets, or just a lot of people coming and going, you'll want a finish that's built for the long haul. Skipping this step is like putting a flimsy screen door on a bank vault – it just won't hold up.
Here's a quick rundown:
- Low Traffic Areas: Think bedrooms, guest rooms, or formal living rooms. A standard finish might be fine here.
- Medium Traffic Areas: Hallways, family rooms, dining rooms. You'll want a good quality, durable finish.
- High Traffic Areas: Entryways, kitchens, commercial spaces, or homes with lots of pets and kids. This is where you need the heavy-duty stuff, often a two-component (2K) system.
Don't skimp on durability if you want your floors to look good for years.
Choosing the Appropriate Sheen: Matte to Gloss
The sheen level of your polyurethane is all about the look you're going for. It's not just about how shiny the floor is; it affects how the color of the wood looks and even how well it hides imperfections. You've got a range to choose from, and each one gives a different vibe.
- Matte: This is the most natural look. It has almost no shine, which is great for hiding scratches and maintaining a raw wood appearance. It's popular for modern or rustic styles.
- Satin: A bit more sheen than matte, but still pretty subtle. It offers a soft luster that's easy to live with and hides wear pretty well.
- Semi-Gloss: You'll see a noticeable shine here. It reflects more light, making the floor look brighter, but it also shows scratches and dirt more easily.
- Gloss: This is the shiniest option, giving a mirror-like finish. It can make a room feel more dramatic and luxurious, but it's also the most prone to showing every little mark.
The sheen you pick can really change the whole feel of the room. Think about the style you want before you decide.
Considering VOC Content and Environmental Impact
When we're talking about polyurethane, the amount of Volatile Organic Compounds (VOCs) is a big deal, both for your health and the environment. VOCs are chemicals that can be released into the air as the finish dries. Older oil-based polyurethanes had high VOCs, which meant strong smells and potential health issues, especially if you were working indoors or living in the house while it was being done. Modern water-based finishes have come a long way. Many are now low-VOC or even zero-VOC, which means they're much better for indoor air quality and easier on the planet. If you're working in a home with people or pets, or if you're just trying to be more eco-friendly, paying attention to the VOC content is a smart move. It can also affect how quickly you can get back into the room after the job is done.
Professional Application Techniques for Polyurethane
Surface Preparation: The Foundation for a Flawless Finish
Getting the surface ready is probably the most important step. If you mess this up, the rest of your work won't matter much. You've got to make sure the floor is totally clean. We're talking dust, grease, old wax, anything that could get in the way. Sanding is key here, too. You need to go through the grits properly to get a smooth surface. After sanding, vacuum everything up, then wipe it down. A good tack cloth or a recommended cleaner will get those last bits of dust off. A clean, smooth surface is the bedrock of a good polyurethane job.
Application Methods: Rollers, T-Bars, and Sprayers
There are a few ways to get that polyurethane onto the floor. For most jobs, a good quality microfiber roller or a T-bar applicator works well. These give you good control and help lay down a nice, even coat. If you're doing a really big space or need a super smooth finish, spraying might be an option, but that takes special equipment and a lot of skill. For most of us, sticking with a roller or T-bar is the way to go. Just make sure whatever you use is designed for water-based finishes if that's what you're working with.
Achieving Even Coats and Avoiding Streaks
This is where technique really shows. You want to apply the polyurethane in thin, even coats. Don't try to lay it on too thick, thinking you'll save time. That just leads to drips and uneven drying. Always work in the direction of the wood grain. Overlap your passes slightly to avoid leaving lines. If you're using a roller, keep a wet edge so you don't get lap marks. For T-bars, a steady, consistent motion is best. The goal is a uniform sheen across the entire floor.
- Thin Coats: Apply polyurethane in thin, consistent layers.
- Work with the Grain: Always move your applicator parallel to the wood planks.
- Maintain a Wet Edge: Overlap your passes to blend wet and dry areas.
- Steady Pace: Use a consistent speed and pressure for even coverage.
Avoiding streaks and lap marks comes down to patience and practice. Rushing the job is the quickest way to end up with a finish that looks less than professional. Take your time, follow the grain, and keep your applicator moving smoothly.
Water-Based Polyurethane: The Modern Professional Choice
When you're looking for a finish that dries fast and stays clear, water-based polyurethane is the way to go. It's become a favorite for a lot of pros, and for good reason. Unlike the old oil-based stuff that can take forever to dry and turn everything a bit yellow, water-based finishes are quick and keep the wood looking like, well, wood. They're also way easier to clean up – just soap and water, no harsh chemicals needed. This makes them a much better choice for jobs where you need to get in and out quickly, or when you're working in a home where people are still living.
Advantages of Water-Based Systems: Speed and Clarity
The biggest win with water-based polyurethane is the speed. You can often recoat in just a couple of hours. This means you can finish a whole floor in a day or two, which is a huge time saver. Plus, they don't have that strong smell that oil-based finishes do, so the air quality is much better for everyone on the job site and in the house. Another big plus is clarity. These finishes dry crystal clear, so they don't add any amber tone to the wood. This is perfect if you've got a light-colored wood like maple or white oak, or if you're going for that natural, unfinished look. You get all the protection without changing the wood's natural color. It’s a real game-changer for modern interiors.
Understanding 1K and 2K Water-Based Formulations
Water-based polyurethanes come in two main types: 1K and 2K. A 1K system is a single component, meaning you just open the can and start applying. It's simpler and good for less demanding jobs or areas with lower traffic. However, for serious durability, especially in high-traffic areas or commercial spaces, a 2K system is what you want. This is a two-component system where you mix a catalyst or hardener with the base polyurethane just before you use it. This mixing creates a much tougher, more chemical-resistant finish that stands up better to wear and tear. Think of it like mixing paint – you need to get the ratio right for the best results. While it takes an extra step, the performance boost is significant. Bailey Flooring Supplies has a good selection of these professional-grade finishes.
Top Brands and Products for Professional Results
When it comes to professional results, you can't just grab any can off the shelf. We're talking about finishes that are built to last and apply smoothly. Brands like Loba offer some top-notch water-based options. Their Easy Finish, for example, is a popular choice among contractors because it's forgiving to apply, dries fast, and provides excellent durability. It comes in different sheens, from matte to gloss, so you can match the look you're going for. For those really tough jobs, their 2K systems offer that extra layer of protection. It’s worth checking out what Bailey Flooring Supplies has in their professional line; they focus on products that contractors trust for consistent, high-quality finishes. Getting the right product is half the battle for a floor that looks great and holds up over time. For example, Bona Hardwood Floor Polish is a well-regarded option for maintaining that shine. Bona Hardwood Floor Polish is available in High Gloss and comes in a 32 oz size.
Oil-Based Polyurethane: Traditional Performance
The Enduring Appeal of Oil-Based Finishes
For a long time, oil-based polyurethane was the go-to for finishing hardwood floors. It’s known for creating a really durable finish that can stand up to a lot of wear and tear. Many pros still prefer it because it’s forgiving during application, meaning it tends to level out nicely and doesn't dry quite as fast as some of the newer water-based options. This gives you a bit more working time, which can be a lifesaver on large jobs or if you're new to finishing.
One of the main reasons people stick with oil-based finishes is the look it gives the wood. It tends to bring out a warmer, richer tone, giving the wood a classic, almost amber glow. This can be really beautiful, especially on certain wood species like oak or walnut. It’s a look that many people associate with traditional, high-quality wood floors.
Application Nuances and Drying Times
When you're working with oil-based polyurethane, you'll notice it has a distinct smell – that's the solvents at work. Ventilation is key here; you need to make sure the area is well-aired out, both during application and drying. Cleanup is also a bit more involved; you'll need mineral spirits or a similar solvent to clean your brushes, rollers, and any spills. Water just won't cut it.
Drying times are where oil-based poly really differs from water-based. You're looking at a longer wait between coats. While it might feel dry to the touch in a few hours, you usually need to wait at least 8 to 24 hours before applying the next coat. This means a project can take significantly longer from start to finish. Full cure, when the floor can handle heavy traffic and furniture, can take several days, sometimes even a week or more.
Color Characteristics and Potential for Yellowing
The amber tone that oil-based polyurethane imparts is a big part of its appeal for many. It deepens the natural color of the wood and can make it look more luxurious. However, this ambering effect isn't static. Over time, especially when exposed to sunlight, oil-based finishes can continue to yellow. This can alter the original color of the wood, sometimes in ways that aren't desired, particularly if you were going for a very light or natural look. For floors where maintaining the original, true color of the wood is paramount, this characteristic is something to seriously consider.
| Feature | Oil-Based Polyurethane |
|---|---|
| Appearance | Warm amber tone, deepens wood color |
| Drying Time | Slow (8-24 hours recoat, days to cure) |
| Odor | Strong solvent odor, requires good ventilation |
| Cleanup | Requires mineral spirits or solvents |
| Yellowing | Tends to yellow over time, especially with UV exposure |
| Durability | Excellent, known for toughness |
| Application | Forgiving, good leveling properties |
Primers and Sealers for Enhanced Polyurethane Performance
The Importance of a Proper Sealer Coat
Before you even think about applying your topcoats of polyurethane, you need to consider what goes down first. A good primer or sealer isn't just an extra step; it's the foundation for a finish that lasts. It helps the polyurethane stick better, especially on tricky wood species, and can even help even out the color. Skipping this can lead to adhesion problems down the road, and nobody wants that. It’s like building a house – you wouldn’t skip the foundation, right?
Choosing Between Amber and Clear Primers
When you're looking at primers, you'll usually see two main types: amber and clear. Amber primers have a slight tint that can add a bit of warmth to the wood. This is great if you're going for a richer, deeper look, especially with certain wood types like oak. Clear primers, on the other hand, are designed to be more neutral. They let the natural color of the wood shine through without adding any color cast. The choice really depends on the final look you're aiming for. For a more natural, bare-wood appearance, clear is usually the way to go. If you want a bit more depth or are working with wood that tends to look a bit dull, amber can be a good option.
Optimizing Adhesion with Professional Primers
Getting your polyurethane to stick properly is key to a durable finish. Professional-grade primers are formulated to create a surface that the polyurethane can really grab onto. This is especially important on woods that might be naturally oily or have a very smooth surface. Using the right primer means you're less likely to see issues like peeling or delamination later on. It’s about making sure every layer of your finish works together. For example, LOBA EasyPrime is a water-based option that's made to bond well with their topcoats, giving you that professional, long-lasting result. It dries fast, too, so you can keep your project moving. Remember, proper surface prep, including the right primer, is what separates a good job from a great one.
Achieving an 'Invisible' Finish with Polyurethane
Formulations Designed to Maintain Natural Wood Tones
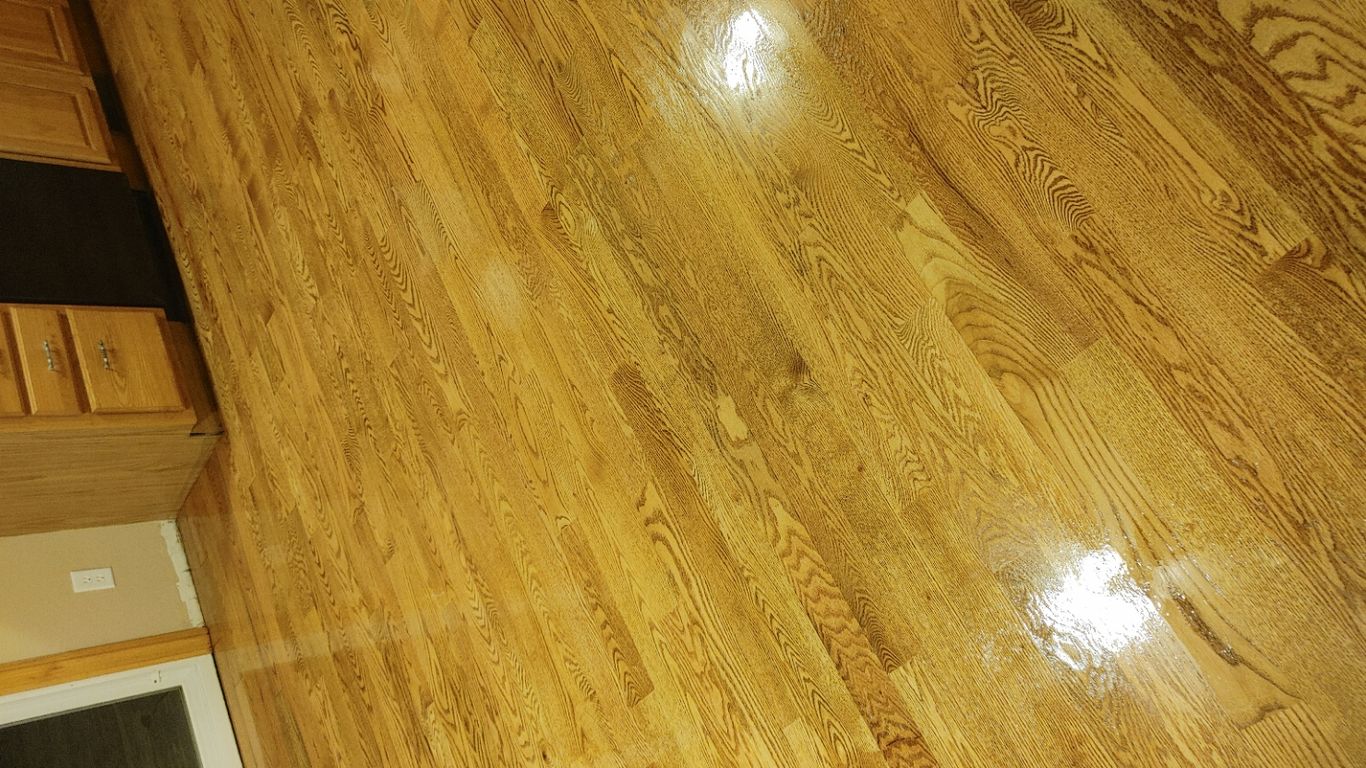
Sometimes, you just want the wood to look like wood. No gloss, no added color, just the natural beauty of the grain. That's where "invisible" finishes come in. These aren't just any polyurethane; they're specifically made to protect the floor without changing its look. Think of it like a clear shield that doesn't add shine or make the wood look darker or more amber. It's all about keeping that raw, natural feel. This is especially popular for lighter woods like white oak or for modern design styles where you want a clean, minimalist look. The goal is to get all the protection of polyurethane but have it disappear visually. It’s a tricky balance, but when done right, it looks fantastic.
Application Tips for a Bare-Wood Look
Getting that invisible finish isn't just about the product; it's about how you put it on. Preparation is key, as always. You need a perfectly smooth surface, free of any dust or contaminants. When you apply the polyurethane, you have to be really careful. Thin, even coats are the way to go. Using the right applicator, like a high-quality microfiber roller or a T-bar designed for water-based finishes, makes a big difference. You don't want to leave any lap marks or streaks, because with an invisible finish, any mistake really shows. It’s about patience and a steady hand. You might need to do a light sanding between coats, but be gentle. The idea is to build up protection without adding any visible layer.
Balancing Protection with Unaltered Aesthetics
So, how do you get that protected floor that still looks untouched? It comes down to choosing the right product. We're talking about modern water-based polyurethanes, often the two-component (2K) kind. These are built for serious durability without the yellowing or gloss that can change the wood's appearance. They offer great resistance to scratches and chemicals, which is what you need for a floor that gets used. Brands like Loba offer specific "invisible" or ultra-matte finishes designed for this exact purpose. For example, Loba 2K Invisible Protect A.T. is a professional-grade option that aims to keep the wood's natural color and feel while providing robust protection. It’s a smart choice for contractors who want to deliver a high-end, natural look that lasts. You get the best of both worlds: a floor that's tough enough for daily life but looks like it was never finished at all.
Here's a quick look at what makes these finishes work:
- Low Sheen: Designed to have minimal to no gloss, preserving the natural look.
- Clarity: Formulated to be crystal clear, avoiding amber tones that can darken the wood.
- Durability: Often uses advanced resin technology for strong protection without altering appearance.
When you're aiming for that natural, untouched look, using a quality product is half the battle. Bailey Flooring Supplies carries professional-grade finishes that are up to the task. You can find options like the Loba 2K Invisible Protect A.T. that are specifically made to maintain the wood's original character while providing the protection your floors need. It’s a solid choice for anyone who wants their hardwood to look its best, naturally.
Polyurethane Application on Stairs and High-Traffic Areas
Specific Challenges of Stair Finishing
Stairs are arguably the toughest part of any hardwood floor finishing job. They take a beating from constant foot traffic, and the vertical and horizontal surfaces mean you're always working against gravity and awkward angles. Getting a smooth, even coat without drips or puddles is a real challenge. Plus, the edges and nosings are prone to chipping and wear. You need a finish that's not only tough but also easy to control in these tricky spots.
Selecting Polyurethane for Maximum Wear Resistance
When you're dealing with stairs or areas that see a lot of action, like entryways or main hallways, you can't just use any old polyurethane. You need something built for the long haul. Two-component (2K) water-based polyurethanes are the pros' choice here. They cross-link as they cure, creating a much harder, more durable surface than standard one-component (1K) finishes. Look for products specifically marketed for high-traffic areas or commercial use. These usually have higher solids content and advanced resin technology designed to resist abrasion and impact.
Here's a quick rundown of what to look for:
- Type: 2K Water-Based Polyurethane
- Durability Rating: Commercial or High-Traffic
- Sheen: Matte or Satin (hides wear better than gloss)
- Brand Reputation: Stick with trusted professional brands like Loba.
Ensuring Slip Resistance in Critical Zones
Nobody wants a slippery staircase. While polyurethane itself can be a bit slick, especially in glossier sheens, there are ways to manage this. Some professionals add a very fine anti-slip additive to the final coat of polyurethane. These additives are usually tiny, clear particles that create a subtle texture on the surface, providing better grip without significantly altering the look or feel of the finish. Always test this in an inconspicuous area first. Another approach is to choose a lower sheen, like a matte or satin finish, as these naturally offer more grip than high-gloss options. For stairs, a matte or satin finish is almost always the way to go.
Drying, Curing, and Recoat Windows
Understanding the Difference Between Dry and Cure Times
When you're working with polyurethane finishes, especially the water-based ones that are becoming the go-to for pros, you'll hear a lot about "dry time" and "cure time." It's easy to mix these up, but they mean totally different things for your project. Dry time is basically when the finish feels dry to the touch. You can usually walk on it very lightly, maybe with socks on, after a certain period. But that doesn't mean it's ready for anything serious. Cure time is the real deal. This is when the finish reaches its maximum hardness and durability. It's a much longer process, and rushing it is how you end up with scratches and damage down the road.
Adhering to Manufacturer Recoat Specifications
This is super important, and honestly, it's where a lot of guys cut corners. Every product, whether it's oil-based or water-based, has specific instructions from the manufacturer about when you can apply the next coat. For water-based finishes, like the ones from Bailey Flooring Supplies, these recoat windows are usually pretty short, which is a big plus for getting jobs done faster. For example, some water-based polys can be recoated in as little as 2-3 hours. If you try to recoat too soon, you risk lifting the previous coat or not getting good adhesion. Wait too long, and you might need to do a light scuff sand to ensure the new coat sticks properly. Always check the product data sheet – it's your best friend here.
Factors Affecting Drying and Curing: Temperature and Humidity
So, you've got your recoat window, but what if the conditions aren't perfect? Temperature and humidity play a massive role in how fast your polyurethane dries and cures. If it's too cold or too humid, things slow down. I've seen jobs where it felt like the finish would never dry because the basement was damp and chilly. On the flip side, if it's too hot and dry, the finish can dry too quickly on the surface, leading to lap marks or an uneven appearance. The sweet spot for most water-based finishes is usually around 65-75°F with 40-60% relative humidity. It’s why pros always check the weather and the job site conditions before they start applying finish. You can sometimes use fans to help with air circulation, but you don't want to blast air directly onto a wet finish. It's all about finding that balance to get the best possible result.
Maintenance and Care for Polyurethane-Finished Floors
Routine Cleaning Best Practices
Keeping your polyurethane-finished hardwood floors looking good is pretty straightforward, honestly. The biggest thing is just to be consistent with the cleaning. Don't let dirt and grit build up, because that stuff acts like sandpaper on your finish over time. So, a quick sweep or vacuum with a soft brush attachment a few times a week is a good habit to get into. If you've got pets or kids, you might need to do it more often, especially in high-traffic areas like hallways and entryways. Avoid using too much water when you're cleaning; damp is good, wet is bad. You don't want water sitting on the surface, as it can eventually find its way into seams and cause problems down the road. For spills, just wipe them up right away. It’s way easier to deal with a fresh spill than something that’s dried and stuck on.
Recommended Cleaning Products for Polyurethane
When it comes to cleaning products, you've got to be a bit picky. Most general household cleaners aren't really made for hardwood floors, and some can actually damage the polyurethane. You want something that's specifically designed for wood floors, and ideally, something that's pH-balanced. A lot of pros, myself included, have found that using a dedicated wood floor cleaner is the way to go. For example, LOBA Parkett Soap R2U is a ready-to-use cleaner that works well. It gets the job done without leaving any residue behind, which is a big plus. You just mop it on and wipe it up. If your floors are oiled instead of polyurethaned, you'd use something different, like a maintenance oil. But for polyurethane, stick to cleaners made for that finish. Using the right stuff means your floors will look better for longer and you won't have to worry about stripping away the protection you worked so hard to put down.
Protecting Your Finish from Damage
Beyond just regular cleaning, there are a few other things you can do to keep your polyurethane finish from getting beat up. First off, put felt pads on the bottom of all your furniture legs. Seriously, this is a game-changer. It stops chairs and tables from scratching the floor when you move them. You can get these in packs at most hardware stores, and they're super cheap. Also, try to keep doormats at all your entrances, both inside and out. This catches a lot of the dirt and grit before it even gets tracked onto your nice floors. For rugs, make sure they have a good backing so they don't rub the finish. And if you have pets, keep their nails trimmed. It might sound like a lot, but these little steps really add up to protect your investment. It's all about being proactive to keep that shine looking fresh. If you're looking for some of the best water-based finishes to start with, Bailey Flooring Supplies has some great options for contractors like Loba Easy Finish.
Keeping your polyurethane-finished floors looking great is simple! Regular cleaning with the right products prevents dirt from scratching the surface. For deeper cleaning or to refresh the finish, we have specialized solutions. Visit our website to find the best care products for your beautiful floors.
Wrapping It Up
So, we've gone over what makes polyurethane the go-to for hardwood floors. It's not just about making things shiny; it's about putting a tough shield on your wood. Whether you're going for that natural, matte look or something with a bit more gloss, picking the right product and putting it on right makes all the difference. Remember, good prep work and following the steps will save you headaches later. And hey, if you're ever unsure, don't be afraid to ask someone who knows their stuff. A little extra care now means your floors will look good for a long, long time.
Frequently Asked Questions
What exactly is polyurethane for wood floors?
Polyurethane is like a clear shield for your wood floors. It's a liquid coating you put on top that dries hard, protecting the wood from scratches, spills, and everyday wear and tear. Think of it as a tough, invisible jacket for your floor.
What's the difference between water-based and oil-based polyurethane?
Water-based poly dries really fast, doesn't smell too strong, and stays clear over time, meaning it won't make your floors look yellowish. Oil-based poly takes longer to dry, has a stronger smell, and gives a warmer, more amber color to the wood, which can look nice but might yellow as it ages.
How do I pick the right type of polyurethane?
Consider how much foot traffic your floor gets. If it's a busy area like a hallway or kitchen, you'll need something super tough. Also, think about the look you want – do you prefer a shiny finish (gloss), a little shine (semi-gloss), a soft sheen (satin), or almost no shine at all (matte)?
Does the preparation before applying polyurethane really matter?
Oh yes, it's super important! You have to make sure the floor is perfectly clean, smooth, and free of dust. It's like preparing a canvas before painting; if the surface isn't right, the finish won't look good or last as long.
How many coats of polyurethane should I put on?
For most homes, two or three coats are usually enough. If you have a really busy area, like a commercial space or a home with lots of pets and kids running around, you might want to add an extra coat for more protection.
How long does it take for the floor to be ready to use after applying polyurethane?
It dries pretty quickly, so you can usually walk on it lightly in about 24 hours. But, it takes much longer – sometimes up to a month – to fully harden or 'cure.' It's best to be gentle with the floor during that time, avoiding heavy furniture or rugs.
What's the best way to clean a floor with a polyurethane finish?
Keep it simple! Regular sweeping or vacuuming is great. When you need to mop, use a damp mop with a cleaner specifically made for wood floors. Avoid using too much water or harsh chemicals, as they can damage the protective coat.
Can I get a finish that looks like there's no coating on the floor at all?
Yes, that's called an 'invisible' or 'natural' finish. Some polyurethanes are made to look like the wood is bare while still giving it protection. They usually have a very low sheen, like matte, and don't change the wood's natural color.

0 comments