

So, you're looking to get that floor looking just right. Maybe you're a pro, or maybe you're just trying to make your own place look good. Either way, getting the finishing touches on your flooring project can be a bit tricky. That's where something called a flooring spline comes in. It might sound technical, but it's basically a tool or a material that helps you get a smooth, professional look. We're going to break down what you need to know about using a flooring spline to make your next project turn out great.
Key Takeaways
- A flooring spline is key for a clean, finished look on your floors.
- Choosing the right flooring spline depends on your wood type and how much foot traffic the floor will get.
- Proper prep work, like cleaning and making sure the surface is even, is a must before applying any flooring spline.
- Using the right tools and techniques makes a big difference in how the flooring spline is applied and how it looks.
- Taking care of your finished floor with the right cleaning and protection will help it last longer.
Understanding Flooring Spline Essentials
The Role of Flooring Spline in Finishing
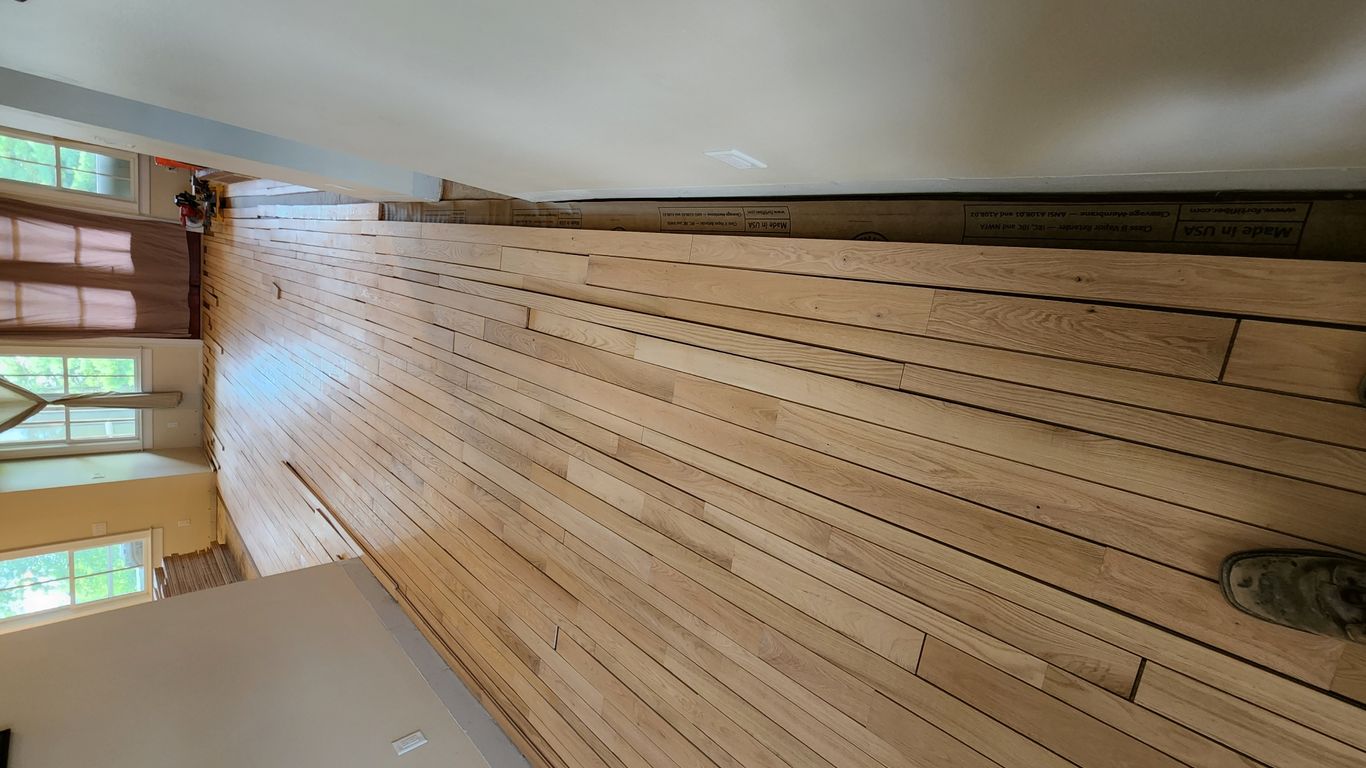
When you're working on a hardwood floor project, the finishing touches are what really make it stand out. That's where flooring spline comes into play. Think of it as the unsung hero of a clean, professional look. It's not just about making things look good, though. The spline is actually a small but important piece that helps connect different parts of the flooring system, especially around transitions or where you have to change direction. It's designed to create a smooth, almost invisible seam that prevents snags and looks like part of the floor itself. Without it, you'd have a rough edge that's not only unsightly but could also be a tripping hazard or collect dirt.
Key Components of a Flooring Spline System
A flooring spline system isn't usually just one single piece. It's more about how the spline is integrated into the overall flooring and finishing process. You've got the main flooring material, of course, and then the spline itself, which is often a thin strip of wood or a similar material. This spline gets fitted into a groove on one piece of flooring and then connects to a corresponding groove or edge on the next. The real magic happens when you apply the finish. The spline is treated the same way as the rest of the floor, so it blends right in. It's all about creating a continuous surface.
Why Flooring Spline Matters for Durability
Durability is a big deal for any floor, and the spline plays a part in that too. By creating a strong, interlocking connection between flooring pieces, the spline helps to distribute stress more evenly across the floor. This means less chance of individual boards loosening or cracking over time, especially in areas that get a lot of foot traffic. It's like giving the floor a bit of extra backbone. A well-integrated spline system contributes to a floor that not only looks good but also lasts longer, resisting the wear and tear of everyday life. It’s a small detail that makes a big difference in the long run.
Selecting the Right Flooring Spline for Your Project

Choosing the correct flooring spline is a big deal for how your project turns out. It's not just about picking something that looks okay; it's about making sure it holds up over time and works with the specific wood you're using. Think of it like picking the right paint for a car – you wouldn't use house paint on a vehicle, right? Same idea here. You need to match the spline to the job.
Matching Spline to Wood Species and Finish
Different wood types have different densities and grain structures. A hardwood floor made of oak is going to behave differently than one made of pine. You need a spline that can handle the expansion and contraction of the wood without cracking or pulling away. The finish on the wood also plays a role. Some finishes are more flexible, while others are quite rigid. You want a spline that won't fight against the finish, causing it to peel or chip down the line. For example, if you're working with a very soft wood, you might need a spline that's a bit more forgiving. On the other hand, a dense, hard wood might require a more robust spline. It's all about compatibility.
Considering Traffic and Wear Requirements
Where is this floor going to be? Is it in a quiet bedroom or a busy entryway that sees tons of foot traffic every single day? The amount of wear and tear a floor will experience is a major factor in choosing the right spline. High-traffic areas need a spline that's built for durability. This often means looking at the material the spline is made from and its overall construction. A spline that works fine in a low-traffic zone might fail prematurely in a commercial setting or a busy family home. You've got to think about how many people will be walking on it, if there will be pets, or even if furniture will be moved around a lot. All these things put stress on the flooring and, by extension, the spline.
Evaluating Spline Material and Construction
So, what are these things actually made of? You'll find splines made from various materials, each with its own pros and cons. Some common options include different types of plastics, metals, or even specialized composites. The construction itself matters too. Is it a solid piece, or does it have a specific profile designed for better grip or flexibility? A well-constructed spline will have a good grip on the flooring and the subfloor, providing a stable connection. It's worth spending a little extra time to inspect the spline's build quality before you buy. Look for smooth edges, consistent dimensions, and a material that feels sturdy but not brittle. Sometimes, a slightly thicker or more dense spline is the better choice for longevity, even if it costs a bit more upfront. You can find some great options that are designed for professional use, like those from Loba, which are known for their durability and ease of application. For instance, the Loba Easy Finish water-based polyurethane is a popular choice among pros because it offers great protection and is user-friendly. Check out Loba finishes for your next project.
Proper Preparation for Flooring Spline Application
Getting the floor ready before you even think about applying any kind of spline is super important. If you skip this part, you're just asking for trouble down the road. It’s like trying to build a house on shaky ground – it’s not going to end well.
Surface Cleaning and Debris Removal
First things first, you gotta get that floor clean. We're talking about getting rid of every last bit of dust, dirt, and anything else that might be sitting there. A good vacuum is your best friend here, but don't stop there. You'll want to follow up with a tack cloth or a slightly damp mop (make sure it's not too wet, though) to pick up any fine dust that the vacuum missed. Think of it like prepping a canvas before you paint; you want a perfectly smooth, clean surface. Any little grit or debris left behind can cause bumps or prevent the spline from adhering properly, which is the last thing you want.
- Vacuum thoroughly to remove loose debris.
- Wipe down with a tack cloth or a damp mop.
- Inspect the surface for any remaining particles.
Ensuring a Smooth and Even Substrate
After cleaning, take a good look at the floor itself. Is it flat? Are there any high spots or low spots? If you're applying spline over an existing finish or a subfloor, it needs to be as level as possible. Unevenness here will translate directly to the finished product, making it look unprofessional and potentially causing wear issues later on. Sometimes, a light sanding might be needed to knock down any high spots, or a leveling compound could be used for low areas. The goal is a consistent surface so the spline lays down perfectly flat.
A smooth, even substrate is non-negotiable for a professional spline application. Any imperfections in the base layer will be visible and can compromise the integrity of the final finish.
Pre-Application Checks for Optimal Adhesion
Before you start slinging spline, do one last check. Make sure the surface is completely dry if you used a damp mop. Also, check the temperature and humidity in the room. Most finishes have specific requirements for these conditions to cure properly. Applying in the wrong environment can lead to problems like slow drying, poor adhesion, or a cloudy finish. It’s worth taking a few extra minutes to confirm everything is just right. This attention to detail is what separates a good job from a great one, and it’s what keeps customers happy. You want that spline to stick like it's supposed to, and these checks help make that happen. For the best results, consider using a primer like LOBA EasyPrime to create an optimal bonding surface.
Mastering Flooring Spline Installation Techniques
Applying Finishes with Precision Tools
Getting a good finish on hardwood floors isn't just about the product; it's also about how you put it on. When you're working with flooring spline, using the right tools makes a big difference. We're talking about applicators that are designed for this kind of work, not just any old roller.
For water-based finishes, especially the newer, faster-drying ones, you need something that lays down a smooth, even coat without leaving streaks. Think about applicators with high-density pads or specific roller covers that are made for water-based products. These help control the flow and prevent the finish from drying too quickly in spots, which is a common problem. Using a quality applicator is key to avoiding lap marks and getting that professional look.
Achieving Uniform Coverage with Flooring Spline
Uniform coverage is the name of the game when you're finishing floors. With flooring spline, you're often dealing with transitions or specific areas that need to look just as good as the main floor. The goal is to get the same thickness of finish everywhere, no matter the shape or size of the area.
This means working in sections and maintaining a wet edge. You don't want to stop and start in the middle of a board or a transition. Instead, plan your passes so that each new stroke overlaps slightly with the previous one. This helps blend the finish together. It might sound simple, but it takes practice to get it right, especially on larger areas or tricky spots.
Managing Dry Times Between Coats
Water-based finishes dry a lot faster than the old oil-based ones. This is great for getting jobs done quicker, but it also means you have to be more mindful of the drying times. You can't just slap on another coat whenever you feel like it.
Each product will have specific instructions on how long to wait before applying the next coat. This isn't just a suggestion; it's important for the finish to bond properly. If you recoat too soon, you can trap moisture or solvents, which can cause problems down the line like cloudiness or poor adhesion. Wait too long, and the new coat might not stick as well to the previous one.
Here’s a general idea of what to expect:
- Light traffic: Usually 24 hours after the final coat.
- Heavy traffic: 48-72 hours.
- Full cure: This can take up to 30 days, during which you should be extra careful with the floor.
Always check the manufacturer's technical data sheet for the exact dry and cure times for the specific product you are using. These times can change based on temperature, humidity, and airflow in the room.
Advanced Application Strategies for Flooring Spline
Working with Two-Component Finishes
When you step up to two-component (2K) finishes, you're entering a different league of durability and performance. These aren't your average one-and-done coatings. They're engineered with a hardener, or catalyst, that you mix in just before application. This chemical reaction creates a much tougher, more resilient finish that stands up to serious wear and tear. Think high-traffic areas, commercial spaces, or homes with pets and kids – places where a standard finish might start showing its age too quickly. The key here is precision. You've got a limited pot life once mixed, so you need to work efficiently and have everything ready to go. Mixing ratios are critical; get them wrong, and you'll compromise the finish's integrity. Always follow the manufacturer's instructions to the letter. For application, you'll want tools that can handle the slightly thicker viscosity and ensure a uniform mix. Some professionals prefer specialized mixing tips that attach directly to the applicator gun, ensuring the two parts are blended thoroughly as they're dispensed. This method is great for larger jobs where you need to maintain consistency over a longer period.
Achieving an Invisible Finish Look
Sometimes, the goal isn't to add a sheen or change the wood's color, but to protect it while keeping its natural, raw look. This is where "invisible" or "natural effect" finishes come in. They're designed to minimize any change to the wood's original tone and texture, often with a matte or ultra-matte sheen. It’s like the wood is finished, but you can’t really tell. This look is super popular right now, especially with lighter woods like white oak or for modern, minimalist interiors. To get this right, surface prep is even more important. Any imperfections or dust will be glaringly obvious. You'll want to use a finish specifically formulated for this effect, as standard finishes can sometimes add a slight ambering or gloss that defeats the purpose. Application needs to be smooth and even, with no lap marks or heavy spots. Using a high-quality applicator with a fine nap or a specialized microfiber roller can help achieve that perfectly uniform, almost undetectable layer of protection. The trick is to apply thin, even coats, allowing each to dry properly before the next.
Application on Stairs and High-Traffic Areas
Stairs and entryways are the workhorses of any home or building. They see constant foot traffic, scuffs, and impacts. Applying a finish here requires a bit more attention to detail and the right product choice. For stairs, you're dealing with vertical surfaces and edges, which can be tricky. A finish with excellent abrasion resistance and good adhesion is non-negotiable. Many professionals opt for a two-component (2K) water-based finish for these demanding areas because of their superior durability. When applying to stairs, work methodically. Start at the top and work your way down, ensuring you don't step on a freshly finished surface. Use a smaller applicator, like a brush or a hand pad, for the risers and edges to get into those tight spots. For the treads, a roller or a larger applicator works well, but be mindful of drips and runs. High-traffic areas like hallways or living rooms also benefit from these tougher finishes. Consistent application is key to preventing wear patterns from showing up too quickly. Applying multiple thin coats, rather than one thick one, builds up a more robust protective layer that will last longer and look better over time. Always allow adequate drying and curing time, especially on stairs where furniture or heavy items won't be placed, but foot traffic is immediate.
Troubleshooting Common Flooring Spline Issues
Even with the best preparation and the right tools, sometimes things don't go exactly as planned when applying finishes. It's part of the process, really. Most issues that pop up with flooring spline application are pretty common and, thankfully, fixable if you know what to look for. Let's break down some of the usual suspects and how to get your project back on track.
Addressing Streaking and Unevenness
Streaks or an uneven finish are probably the most common headaches. This usually happens when the finish isn't applied uniformly, or if the applicator is dragging something across the surface. Sometimes, it's just a matter of the finish not leveling out properly before it starts to dry.
- Check your applicator: Make sure the pad or roller isn't damaged or clogged with dried finish. A worn-out applicator can leave lines.
- Application speed: Applying too quickly or too slowly can both cause issues. Find a steady, consistent pace.
- Finish consistency: If you're using a two-component finish, ensure it's mixed thoroughly and hasn't started to gel prematurely. Sometimes, thinning the product slightly (if the manufacturer allows) can help with flow.
- Environmental factors: High heat or low humidity can cause the finish to dry too fast, leading to lap marks and streaks. Try to control the temperature and humidity in the work area if possible.
If you catch streaks early, you might be able to lightly sand them down with a fine grit (like 220 or higher) and reapply a thin coat. For more stubborn issues, a full light sanding and recoat might be necessary. It's always better to fix it now than to live with it later.
Resolving Adhesion Problems
Poor adhesion is a serious issue because it means the finish isn't bonding correctly to the substrate or the previous coat. This can lead to peeling, bubbling, or delamination down the road. The root cause is almost always related to surface preparation.
- Contamination: Any oil, grease, wax, or even dust left on the surface can prevent the finish from sticking. This is why thorough cleaning and tack-ragging are so important before every coat.
- Incompatible products: Using finishes or sealers that aren't compatible with each other is another common pitfall. Always check manufacturer recommendations for product compatibility. For instance, some primers might not work well with certain water-based topcoats.
- Insufficient drying/curing: Applying a new coat before the previous one has dried sufficiently can trap solvents or moisture, leading to adhesion failure. Always respect the recommended recoat times.
- Substrate moisture: If the wood itself has too much moisture, it can affect adhesion. Always ensure your wood is acclimated and within the acceptable moisture content range.
If you're experiencing adhesion issues, you'll likely need to remove the affected finish entirely, clean the substrate thoroughly, and reapply the system correctly. It’s a pain, but it’s the only way to guarantee a lasting finish.
Dealing with Imperfections During Application
Sometimes, you'll encounter small imperfections like dust nibs, drips, or small bubbles. These are usually minor and can be addressed with proper technique and a bit of patience.
- Dust nibs: These are tiny particles of dust that settle into the wet finish. The best defense is a clean environment and a good tack cloth before each coat. If you get them, you can often lightly sand them out with very fine sandpaper (320 grit or higher) or a fine abrasive screen after the coat has dried, then clean and reapply.
- Drips and runs: These typically happen at edges or where the finish has pooled. Carefully smooth them out with your applicator while the finish is still wet, or lightly sand them down once dry and recoat the area.
- Bubbles: Small bubbles can sometimes form if the finish is agitated too much or if applied too quickly. Try to avoid overworking the finish. If they appear, you can often pop them gently with a clean applicator or lightly sand them out after drying.
Remember, the goal is a smooth, even surface. Don't be afraid to do a light sanding between coats (usually after the first or second coat) to knock down any minor imperfections. Just be sure to clean off all the dust afterward. For professionals looking for the best tools to minimize these issues, consider high-capacity applicator systems like the Applicator 90, which offer precise control for uniform coverage Applicator 90.
Addressing these common problems proactively can save a lot of time and frustration. It often comes down to meticulous surface prep, using the right tools, and following the manufacturer's instructions to the letter. Don't rush the process; take your time and focus on quality at each step.
Maintaining the Integrity of Your Flooring Spline Finish
Routine Cleaning and Maintenance Practices
Keeping your finished floors looking good long-term is all about a regular, gentle cleaning routine. You don't need fancy stuff, just consistency. Start by sweeping or vacuuming your floors daily or every other day. This gets rid of the grit and dust that can scratch up the finish over time. Think of it like brushing your teeth – a little bit every day goes a long way.
Using Approved Cleaning Solutions
When it's time for a more thorough clean, stick to what the finish manufacturer recommends. For most modern water-based finishes, a pH-neutral cleaner is your best bet. We've found that products like LOBA Parkett Soap R2U work great. They clean effectively without stripping away the protective layer of your finish. Always avoid harsh chemicals, ammonia-based cleaners, or abrasive pads, as these can dull the sheen and even damage the finish itself. A simple damp mop with the right cleaner is usually all you need.
Protecting Against Wear and Tear
Beyond cleaning, think about how you can prevent damage before it happens. Putting felt pads on the bottom of all your furniture legs is a no-brainer. It stops chairs and tables from dragging and scratching the floor. For entryways, a good quality doormat can catch a lot of dirt and moisture before it even gets tracked onto your nice floors. Also, try to maintain a steady indoor humidity level; extreme swings can put stress on the wood and the finish over time. It’s these small, consistent efforts that really keep your flooring spline looking its best for years to come.
Professional Grade Tools for Flooring Spline Application
High-Capacity Applicator Systems
When you're dealing with larger flooring projects, having the right tools makes all the difference. We're talking about those high-capacity applicator systems that can hold a good amount of finish. Think of the Applicator 90, for example. This thing is built to handle a full gallon of product, which means fewer refills and less stopping and starting. It uses a sausage-style bag for the finish, which is pretty neat because it keeps the product fresh and stops spills. This kind of system is a real time-saver on big jobs. It's designed for contractors, so it's tough and meant to be used a lot. It also comes with a precision nozzle, so you get a nice, even coat every time. It’s not just about holding more product; it’s about applying it smoothly and consistently, which is what you need for a professional look. If you're doing a whole house or a big commercial space, one of these high-capacity systems is definitely worth looking into. It really cuts down on the hassle and helps you get the job done faster and better. You can find these kinds of applicators designed to work with various finishes, so just check the specs to make sure it's compatible with what you're using. It’s a solid piece of kit for anyone serious about flooring.
Precision Nozzles for Controlled Flow
Getting a smooth, even finish isn't just about the product you use; it's also about how you apply it. That's where precision nozzles come in. These aren't your standard spray tips. They're designed to give you really fine control over the flow of the finish. Whether you're using a large applicator system or a smaller one, the nozzle is key. It helps prevent drips and runs, and it makes sure you get a uniform layer of finish across the floor. For example, the Applicator 35, a lighter 20 oz option, still features a precision dispensing system. This means even though it's smaller and easier to handle for detailed work, you still get that controlled flow. This is super important when you're trying to avoid streaks or uneven patches. A good nozzle ensures the finish lays down just right, making your job look a lot more professional. It’s one of those details that might seem small, but it has a big impact on the final appearance of the floor. You want a finish that looks like it was applied by a machine, even when you're doing it by hand, and the right nozzle helps achieve that.
Ergonomic Designs for Extended Use
Working on floors, especially for long hours, can really take a toll on your body. That’s why ergonomic design in your tools is so important. Think about tools like the Applicator 35. It’s specifically made to be lightweight and balanced. This isn't just about comfort; it's about preventing fatigue and allowing you to maintain control over the application for longer periods. When you're less tired, you make fewer mistakes, and your application is more consistent. The LOBA Hand Pad Set is another example, designed with a comfortable grip to reduce hand fatigue during those detailed jobs. Even the larger systems, like the Applicator 90, are designed with user comfort in mind, aiming to reduce strain during extended use. Good ergonomics means you can focus on the quality of your work, not just on fighting with your tools. It helps you maintain a steady hand and apply the finish evenly, which is critical for a professional outcome. When you're out on a job site all day, having tools that feel good in your hands makes a huge difference in both your performance and your well-being. It’s an investment in your own productivity and the quality of your finished floors. For anyone who spends a lot of time applying finishes, looking for tools with ergonomic features is a smart move. It can help you avoid strain and deliver better results, project after project. You can find a great Multisurface Floor Care Kit that also prioritizes ease of use.
The Benefits of Professional Flooring Spline Systems
Enhanced Durability and Longevity
When you're looking to put a finish on hardwood floors, especially in places that get a lot of foot traffic, you need something that's going to last. Professional-grade finishes, particularly the two-component (2K) water-based types, are built tough. They create a surface that's really resistant to scratches, chemicals, and moisture. This means floors in busy homes with pets or in commercial spots can handle a lot more wear and tear without showing it. Investing in these higher-end systems means fewer callbacks for you and a floor that looks good for a long time.
Consistent, Streak-Free Results
Getting a smooth, even finish on hardwood can be tricky. Professional systems are designed to make this easier. Modern water-based 2K finishes level out nicely on their own, and when you use the right tools and techniques, you can get a uniform look without those annoying streaks or lap marks. This consistency is key for making a floor look truly professional, whether it's a big commercial job or a small residential project. It's about achieving that clean, polished appearance every time.
Reduced Product Waste and Application Time
Using professional-grade application tools, like high-capacity applicator systems, can really cut down on wasted product. These systems often use a sealed application method, which means less finish is exposed to the air, reducing evaporation and spills. Plus, the efficiency of these tools means you can cover more area in less time. This combination of less waste and faster application saves money and makes your projects more profitable.
Choosing Water-Based Finishes with Flooring Spline
Advantages of Modern Water-Based Technology
Water-based finishes have really changed the game for hardwood floors. Gone are the days of waiting forever for finishes to dry and dealing with that super strong smell. These modern formulas are way better for the air quality in your home, which is a big plus. They dry fast, too, meaning you can get back to using the floor much sooner. Plus, they don't turn that ugly yellow color over time like some older finishes did. Cleanup is a breeze – just soap and water. For a tough finish that still looks clear, water-based is the way to go.
Low VOC and Eco-Friendly Options
When you're working inside someone's home, or even your own, you want to think about what you're breathing in. Water-based finishes are a big step up because they have much lower VOCs (Volatile Organic Compounds). This means less fumes and a healthier environment for everyone. It's a responsible choice that doesn't sacrifice performance. You get that professional look without the harsh chemicals. It’s good for the job, good for the client, and good for the planet.
Fast Drying and Quick Re-Coat Times
Time is money in our line of work, right? That's why the fast drying times of water-based finishes are such a big deal. You can often recoat in just 2-3 hours. This speeds up the whole project significantly. Imagine finishing a floor in a couple of days instead of a week. It means less disruption for the homeowner and you can move on to the next job quicker. This efficiency is a major reason why so many pros are switching to water-based systems. It just makes good business sense.
Picking the right water-based finishes for your flooring spline can make a big difference. These finishes are great because they dry fast and don't have a strong smell, making your project easier and more pleasant. We've got a wide selection to help you get that perfect look for your floors. Ready to see what works best for your project? Visit our website today to explore all our options and find the ideal water-based finish for your needs!
Wrapping It Up
So, there you have it. Picking the right flooring spline might seem like a small detail, but it really makes a difference in how your project turns out. It’s not just about making things look good, but also about making sure the job lasts. Whether you’re a seasoned pro or just starting out, taking a little extra time to get the spline right saves headaches down the road. We’ve talked about different types, how to put them in, and why they matter. Don’t skip this step; it’s worth the effort for a floor that looks sharp and holds up well. Now go get that project done.
Frequently Asked Questions
What exactly is a flooring spline and why do I need it?
Think of a flooring spline as a special connector, kind of like a tiny bridge. It helps pieces of flooring fit together really well, making the whole floor strong and look smooth. It's important for making sure your floor lasts a long time and doesn't get damaged easily.
How do I pick the right spline for my floor?
You need to match the spline to the type of wood you're using and how much people will walk on it. For example, a busy kitchen needs a tougher spline than a quiet bedroom. Also, check what the spline is made of to make sure it's strong enough.
What's the best way to get the floor ready before using a spline?
First, make sure the floor is super clean. Get rid of all the dirt, dust, and anything sticky. The surface needs to be perfectly smooth and flat so the spline can stick well and do its job right.
Are there special tools I should use for applying finishes with a spline?
Yes, using the right tools makes a big difference! Professional tools, like those with high-capacity applicators or special nozzles, help you put the finish on evenly and smoothly. This gives you a better, more professional look.
What if I see streaks or uneven spots when I apply the finish?
Streaks usually happen if the finish isn't applied evenly or if the tool is worn out. Try using a different applicator or a new one. Make sure you're applying the finish in a consistent direction. Sometimes, a light sanding after it dries can help smooth things out.
How often should I clean my finished floor?
You should clean your floor regularly by sweeping or vacuuming. For deeper cleaning, use only cleaning products that the finish maker says are okay. Avoid using harsh chemicals, as they can damage the finish over time.
Can I use water-based finishes with a spline system?
Absolutely! Water-based finishes are a great choice. They are usually better for the environment because they have fewer bad fumes, dry quickly, and still give you a strong, good-looking finish.
What are the main advantages of using professional spline systems?
Professional systems are built to last much longer and handle more wear and tear. They help you get a really smooth, even finish without streaks, which looks great. Plus, they can help you use less product, saving you money and time.

0 comments