

So, you've got a floor that needs some love. Maybe it's old and scratched, or maybe you just want a fresh look. Whatever the reason, you're thinking about sanding it yourself. That's where a floor sander comes in. It sounds like a big job, and honestly, it can be. But with the right approach and the right tools, you can get that floor looking great. This guide is here to walk you through the whole process, from picking out your floor sander to cleaning up afterward. We'll cover what you need to know to get the job done right, so you can stop worrying and start sanding.
Key Takeaways
- Choosing the right floor sander is key, whether it's a drum sander for big areas or an orbital sander for finishing.
- Always prep your space before you start; clear everything out and protect what you can't move.
- Work through sandpaper grits from coarse to fine to get a smooth surface without damaging the wood.
- Dust is a big deal, so use good dust collection and wear your protective gear to stay safe and clean.
- Proper maintenance of your floor sander will make sure it works well and lasts a long time.
Understanding Your Floor Sander Options
Choosing the Right Floor Sander for the Job
When you're getting ready to tackle a hardwood floor project, picking the right sander is a big deal. It's not just about getting the job done; it's about getting it done right. You've got a few main types to consider, and each one has its own strengths. Think about the size of the room, the type of wood you're working with, and what kind of finish you're aiming for. A little bit of research upfront can save you a lot of headaches later on.
Drum Sanders vs. Orbital Sanders: A Contractor's Perspective
Drum sanders are the heavy hitters. They use a large rotating drum to remove material quickly. These are great for taking off old finishes, leveling uneven floors, or dealing with really rough wood. They can be aggressive, though, so you need a steady hand and a good feel for them to avoid gouging the floor. On the other hand, orbital sanders use a pad that moves in a circular, oscillating motion. They're much gentler and are fantastic for the final stages of sanding and for achieving a really smooth finish. Many pros use a drum sander for the initial passes and then switch to an orbital for the finer work. It's all about the right tool for the right stage of the job.
| Sander Type | Primary Use | Aggressiveness | Skill Level Required | Best For |
|---|---|---|---|---|
| Drum Sander | Heavy material removal, leveling, old finishes | High | Intermediate to Expert | Rough floors, deep scratches, major repairs |
| Orbital Sander | Fine finishing, smoothing, light prep | Low | Beginner to Intermediate | Final sanding, preparing for finish, light scuffs |
Edging and Detail Sanding Tools
No floor is perfectly flat and uniform, and that's where edging and detail sanders come in. You can't get into the corners or right up against the baseboards with a big drum sander. That's why you need specialized tools. Edging sanders are smaller, disc-shaped sanders designed to get into those tight spots. For even more intricate work, like around vents or in tight closets, you might look at detail sanders or even hand-held orbital sanders. Using the right tool here makes a huge difference in the final look of your floor. It's these smaller tools that really help you achieve that professional, polished look. You can find tools like the LOBA Hand Pad Set for precise application in these tricky areas.
Essential Preparation Before Sanding
Taking time before you start sanding sets you up for a way better outcome. Rushing this stage usually leads to surprises—like discovering tack strips or sunken nails mid-way through with your drum sander running. Here’s what you should do first.
Clearing the Work Area and Protecting Surroundings
Make sure everything—furniture, rugs, electronics, even closet doors—leaves the space before you get started. If it isn’t nailed down, move it out. Sanding throws up a LOT of dust and debris, even if you’re using vacuum ready or dustless systems.
- Remove all furniture and belongings
- Cover built-in cabinets, vents, outlets, and thresholds with plastic
- Tape off entries so the dust stays in one place
Block off air returns and HVAC vents to keep dust from spreading through the house. Use painter’s tape and heavy plastic, not old sheets—they won’t stop fine dust. It’s not overkill. Laying this groundwork makes everything go smoother later.
Floor Inspection and Nail Setting
Bring a bright flashlight and walk every square foot of your floor. You’re looking for:
- Protruding nail and staple heads
- Loose or squeaky boards
- Gaps, cracks, or uneven seams
Set any exposed nails at least 1/8" below the surface using a nail set and hammer. For staples or cleats, use a small punch. If you skip this, those metal bits will catch your sanding belt—and you might end up replacing a torn abrasive in five minutes, or worse, damage the sander. Tighten loose boards with wood screws or nails set below surface. Fill significant gaps now with flexible filler—don’t wait.
Skipping a thorough inspection here is one of the biggest rookie mistakes. Take your time—fix problems now and your sanding will be quicker and far less stressful.
Removing Old Finishes and Adhesives
Get rid of any gunky adhesives, leftover carpet glue, or thick waxy finishes before you fire up the drum sander. Use a floor scraper for thicker spots, applying steady pressure. For stubborn paint or adhesive, a chemical remover might help—always check if it’s safe for your wood species. Some spots, especially around old thresholds, need extra focus.
If the floor was previously finished with wax or oil soap-based products, mop it with a cleaner made for wood floor prep. Stay away from harsh cleaners—they can seep into open grain and cause problems with your finish down the road.
Quick Checklist Before Sanding
| Item Checked | Why It’s Important |
|---|---|
| Room completely empty | Prevents damage, easy movement |
| Floor fully inspected | Avoids sander, abrasive damage |
| Nails set & tight | Prevents sander gouging |
| Old finishes removed | Stops gumming, clogging |
| Surroundings protected | Keeps dust contained |
The more you frontload your prep, the better your results—period. Hardwood floor refinishing services often include these exact steps for a reason: skipping them only means more headaches mid-project.
Mastering the Drum Sander Technique
Using a drum sander might seem straightforward, but getting that perfectly smooth, even surface takes practice and attention to detail. It's not just about pushing the machine around; it's about understanding how it works and how to control it.
Loading and Balancing the Floor Sander
Before you even think about turning the machine on, make sure it's properly set up. This means loading the sandpaper correctly. Most drum sanders have a system where you wrap the sandpaper around the drum and secure it. It's vital that the sandpaper is taut and evenly tensioned. If it's loose in one spot, it can cause uneven sanding or even damage the sandpaper. Also, ensure the drum is in the correct position. When you're not sanding, the drum should be lifted off the floor. You'll lower it gently into contact with the wood only when you're ready to sand.
- Paper Tension: Always check that the sandpaper is pulled tight and flat against the drum.
- Drum Position: Keep the drum raised when moving the sander between passes or when starting/stopping.
- Balance: Make sure the sander itself is balanced on its wheels. A wobbly machine is harder to control.
Proper Grit Progression for Drum Sanding
This is where you really control the outcome. You don't just grab the coarsest grit and go. You start with a coarser grit to remove imperfections and level the floor, then move to finer grits to smooth the surface. Skipping grits is a common mistake that leads to a rough finish.
Here's a typical progression:
- Coarse Grit (e.g., 36-40 grit): Use this for the initial pass, especially if the floor has old finish, deep scratches, or is uneven. This grit does the heavy lifting.
- Medium Grit (e.g., 60-80 grit): After the first pass, switch to a medium grit. This removes the deeper scratches left by the coarse grit and smooths the surface further.
- Fine Grit (e.g., 100-120 grit): This is your finishing pass with the drum sander. It refines the surface, preparing it for the edger and final finish. Never use a grit finer than 120 on a drum sander for the final pass before applying finish.
Always sand with the grain of the wood. Going against the grain will leave noticeable scratches that are very difficult to remove later.
Achieving a Smooth, Even Surface with the Floor Sander
Control is key. You need to keep the sander moving at a steady pace. Don't stop in one spot, or you'll create a divot. Overlap your passes slightly to avoid leaving "ridges" or "lines" where the sandpaper edges meet.
- Direction: Start your passes along the longest wall of the room and work your way across. For subsequent passes, overlap the previous one by about one-third to one-half of the sander's width.
- Speed: Maintain a consistent walking pace. Too fast, and you won't remove enough material; too slow, and you risk damaging the floor.
- Drum Control: Lower the drum gently as you start a pass and raise it just before you finish the pass or reach the end of the floor. This prevents gouges at the start and end of each run.
- Listen: Pay attention to the sound of the sander. A consistent hum usually means you're sanding evenly. Changes in sound can indicate an issue, like a loose sandpaper or an uneven surface.
By following these steps, you'll be well on your way to a beautifully sanded floor, ready for its final finish.
Precision with Edging and Detail Sanders
Navigating Edges and Corners Effectively
When you're sanding a floor, the main area is usually straightforward with a drum sander. But what about the edges, the corners, and those tight spots where the big machine just can't reach? That's where edging and detail sanders come into play. These tools are smaller and designed for more controlled work. Getting these areas right is key to a professional-looking finish. You can't just skip them or do a sloppy job, or the whole floor will look unfinished. Think of it like painting – you need to cut in the edges carefully before you roll the main walls.
Using Edging Sanders for Seamless Transitions
Edging sanders are your go-to for the perimeter of the room. They're usually a bit more powerful than a small detail sander and have a disc that spins. The trick is to keep the sander moving smoothly along the wall. You don't want to stop in one spot for too long, or you'll create a dip. It's all about a consistent, steady motion. Overlap your passes slightly with the main drum sanding area. This helps blend the sanded edge into the rest of the floor so you don't see a distinct line where one tool stopped and the other began. It takes a bit of practice to get that smooth transition, but it's worth the effort.
Specialized Tools for Stair Treads and Tight Spots
For stair treads, corners, and really tight areas, you might need something even smaller. Some folks use a small orbital sander with a detail attachment, or even a simple sanding block for very small touch-ups. There are also specialized tools, like stair tread sanders, that are shaped to fit the risers and treads perfectly. These tools allow you to get into those awkward angles without damaging the surrounding surfaces. It's about having the right tool for the specific job, no matter how small.
| Tool Type | Primary Use |
|---|---|
| Edging Sander | Perimeter of rooms, along walls |
| Detail Sander | Corners, tight spaces, intricate areas |
| Stair Tread Sander | Specifically for steps and risers |
| Sanding Block | Small repairs, touch-ups, very confined spots |
Remember, the goal with these smaller sanders is control. You're not trying to remove a lot of material quickly like with a drum sander. Instead, you're carefully refining the surface to match the main floor area. Patience is definitely a virtue here.
The Role of Orbital and Finish Sanders
Achieving a Flawless Finish with Orbital Sanders
Orbital sanders are your go-to for that final smoothing pass before you apply any finish. They work by spinning sandpaper in small, random orbits, which helps prevent swirl marks and gives you a really smooth surface. This is super important because any little scratch or imperfection you leave behind will show up big time once the finish goes on. Think of it as the final cleanup before the main event. They're not for taking off a lot of wood, but for refining what the bigger sanders have done. You want that surface to feel like silk to the touch.
Vacuum-Ready Sanders for a Dust-Free Environment
Nobody likes breathing in wood dust, and it’s a real pain to clean up. That’s where vacuum-ready sanders come in. These tools have a built-in system or a port to hook up a shop vacuum. As you sand, the vacuum sucks up most of the dust right off the surface. This keeps your work area cleaner, makes it easier to see what you’re doing, and means less dust settling back onto your freshly sanded floor. It’s a game-changer for a cleaner job and a better finish. Tools like the Mirka Deros 650XCV are designed with this in mind, making dust collection a primary feature. Mirka Deros 650XCV is a good example of this technology.
Selecting the Correct Abrasive Discs for Your Floor Sander
Using the right sandpaper, or abrasive discs, is just as important as the sander itself. For orbital and finish sanders, you'll typically use discs. The grit number tells you how coarse the sandpaper is. You start with a coarser grit (like 60 or 80) if there are still some minor imperfections, but usually, for the final passes, you'll move to finer grits like 100, 120, or even 180 or 220. The goal is to gradually remove the scratches left by the previous sanding steps. Mesh abrasives, like those from Mirka Abranet, are a great option because they don't clog as easily and offer excellent dust extraction. Always check what type of abrasive your sander is designed for, whether it's hook-and-loop or adhesive-backed.
Dust Management and Safety Protocols
Effective Dust Collection Systems for Floor Sanders
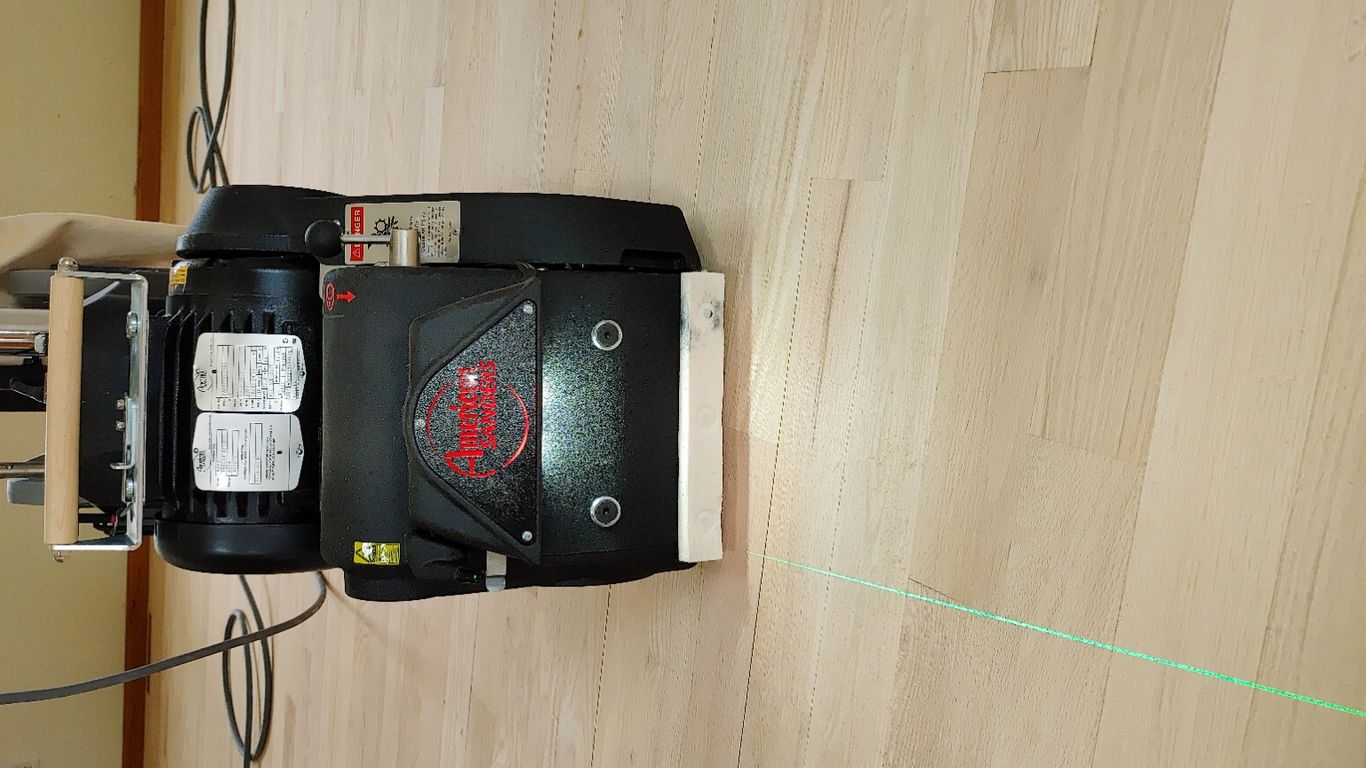
Sanding wood floors creates a lot of fine dust. This dust isn't just messy; it can be bad for your lungs and can mess up your finish if it gets into wet coats. That's why having a good dust collection setup is super important. Most modern floor sanders, especially the big drum sanders and even orbital ones, come with a way to hook up a vacuum or have a built-in dust bag. For drum sanders, you'll often use a large dust bag that attaches to the machine. You'll need to empty these bags regularly, sometimes even during a long sanding job, to keep the sander working efficiently. Orbital sanders and edgers often have smaller bags or can be directly connected to a shop vac. Using a vacuum-ready sander, like some of the Mirka models, is a game-changer. These hook up to a powerful vacuum system that sucks up the dust right as it's created. This keeps the air cleaner and the surface much cleaner between grits, which helps you get a smoother finish.
- Always connect your sander to a dust collection system.
- Regularly empty dust bags to maintain airflow and prevent clogs.
- Consider using a shop vac with a HEPA filter for finer dust capture.
Personal Protective Equipment for Sanding Operations
When you're sanding, especially for extended periods, you need to protect yourself. The dust created isn't just wood particles; it can contain old finishes, sealers, or even mold if the floor had moisture issues. The most important piece of gear is a good respirator mask. Don't just use a flimsy dust mask; get one rated for fine dust particles. Safety glasses are also a must to keep dust out of your eyes. Hearing protection is another big one, as floor sanders are loud. Earplugs or earmuffs will save your hearing over time. Gloves are good for grip and to protect your hands from splinters or rough surfaces. Make sure your clothing is practical – nothing too loose that could get caught in the machine.
| PPE Item | Importance |
|---|---|
| Respirator Mask | Protects lungs from fine dust and particles. |
| Safety Glasses | Shields eyes from airborne debris. |
| Hearing Protection | Prevents hearing damage from loud machinery. |
| Gloves | Improves grip and protects hands. |
Maintaining a Clean Jobsite During Sanding
Keeping the jobsite clean as you go makes a huge difference. It's not just about making cleanup easier later; it helps you do a better job. If you're constantly kicking up dust or working around piles of debris, it's harder to see what you're doing and can lead to mistakes. After each sanding pass, especially when changing grits, it's a good idea to sweep or vacuum the area. This removes loose dust and debris so it doesn't get ground back into the wood or interfere with the next sanding step. For really fine dust, using a tack cloth or a microfiber cloth after vacuuming can pick up those last bits before you apply any finish. A clean workspace also means a safer workspace, reducing trip hazards.
A clean work area is a safe work area and leads to a better final product. Don't let dust and debris pile up; manage it as you go.
- Sweep or vacuum after each grit change.
- Use a tack cloth for final dust removal before finishing.
- Keep tools and materials organized and out of the main sanding path.
Post-Sanding Surface Preparation
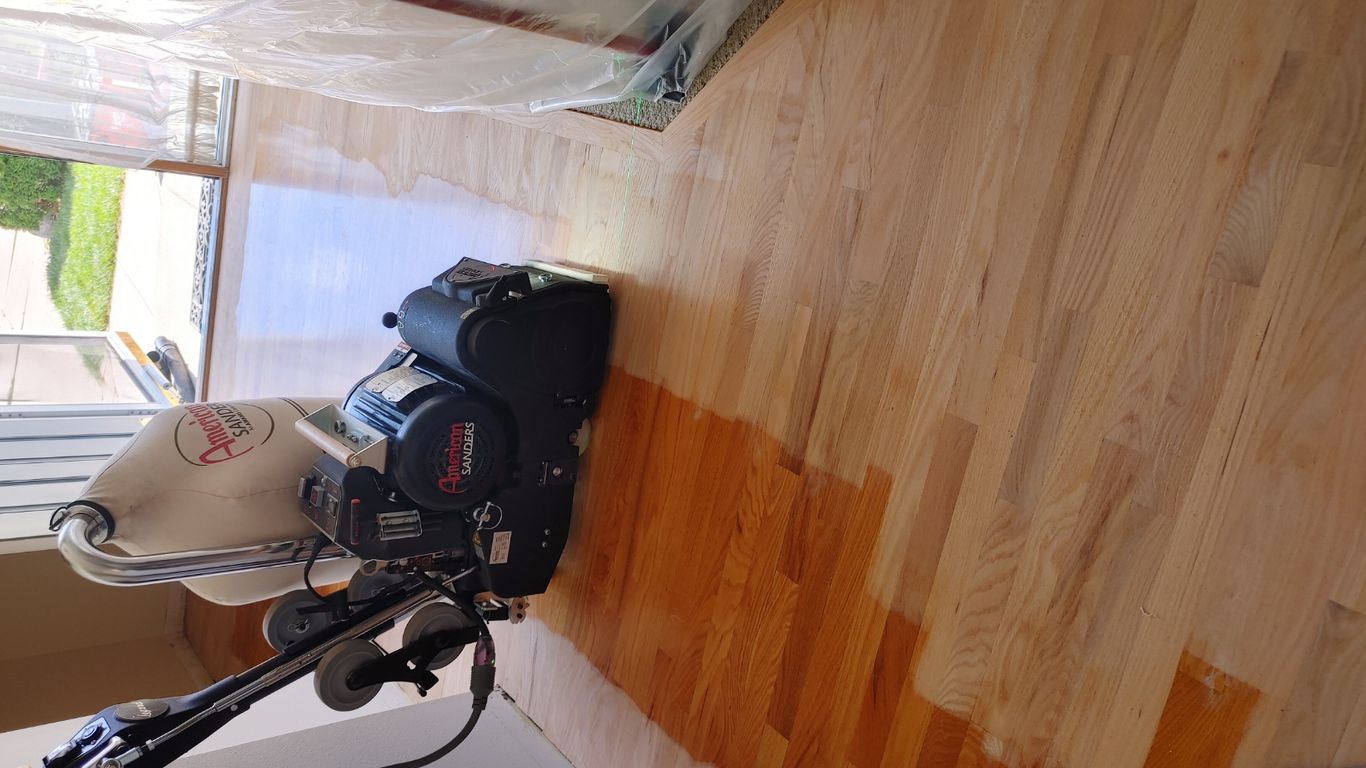
Alright, you've put in the work with the sander, and the floor is looking pretty good. But hold on, we're not quite done yet. Before you even think about slapping on that first coat of finish, there are a few more steps to make sure everything turns out right. This part is super important, and skipping it can lead to a finish that doesn't stick well or looks blotchy.
Thorough Vacuuming and Tack Cloth Application
First things first, you need to get rid of all the dust. And I mean all of it. That fine dust from sanding gets everywhere, and if it gets mixed into your finish, you'll see it. Start with a good vacuum. Use one with a brush attachment to get into the grain of the wood. Go over the entire floor, paying attention to edges and corners. After vacuuming, it's time for the tack cloth. This sticky cloth is designed to pick up the really fine dust that the vacuum might miss. Gently wipe down the entire surface. Don't scrub, just a light wipe. You'll see the dust sticking to the cloth. You might need to use a couple of tack cloths, especially on larger areas, to make sure you've got it all. A clean surface is key to a good finish.
Inspecting for Imperfections After Sanding
Now that the floor is clean, take a good, long look. Get down low, almost at floor level, and look at the surface from different angles. This is your chance to spot any little things you might have missed during sanding. Look for:
- Scratches: Did a piece of grit get caught under the sander? Are there any deep scratches from the drum sander that need a quick touch-up with a finer grit?
- Gouges or Dents: Sometimes, you might find a small dent or gouge that wasn't there before.
- Unevenness: Are there any spots that still feel a bit rough or don't look quite level?
- Residue: Double-check for any leftover adhesive or finish that didn't come off during sanding.
If you find anything, you might need to do some minor spot sanding. Use a sanding block or a detail sander with a fine grit (like 120 or 150) to fix the issue. Just be careful not to create a new problem. After any spot sanding, you'll need to vacuum and tack cloth again to remove that new dust.
Preparing for the First Coat of Finish
Once you're absolutely sure the floor is clean and free of imperfections, you're ready for the finish. Make sure you have your chosen finish (like Bailey Flooring Supplies' water-based options) and all your application tools ready to go. Read the instructions on your finish carefully. Some finishes, especially two-component (2K) ones, need to be mixed with a catalyst. Make sure you mix them in the correct ratio and give them enough time to blend properly.
Having the right tools and a clean workspace makes applying the finish much smoother. It's better to have everything laid out and ready before you start mixing or opening your finish. This way, you can apply it evenly and without interruption, which is what you want for a professional look.
Have your applicator, like a high-quality roller or pad applicator, ready. Ensure your work area is well-lit so you can see where you're applying the finish. The goal here is a smooth, even application without any drips or missed spots. This preparation work might seem like a hassle, but it's what separates a good floor job from a great one.
Understanding Abrasives for Floor Sanders
Grit Selection for Different Wood Species
Choosing the right grit for your floor sander is a bit like picking the right tool for a specific job – you wouldn't use a hammer to screw in a bolt, right? The type of wood you're working with plays a big role here. Softer woods like pine can get gouged easily, so you'll want to start with a coarser grit and work your way up. Harder woods, like oak or maple, can handle a bit more aggressive sanding, but you still need to be careful. It’s all about getting that smooth surface without damaging the wood.
- Softwoods (Pine, Fir): Start with coarser grits (e.g., 36-60) and move up gradually. Be gentle to avoid deep scratches.
- Medium Woods (Cherry, Walnut): A mid-range grit (e.g., 50-80) is usually a good starting point.
- Hardwoods (Oak, Maple, Hickory): Can often start with slightly coarser grits (e.g., 40-60) but require careful progression to finer grits.
Always remember to check the manufacturer's recommendations for your specific sander and abrasives. It's better to be safe than sorry when it comes to your floor.
The Longevity of Mesh Abrasives
When you're sanding, dust is the enemy. It clogs up your sandpaper, making it less effective and costing you more in the long run. That's where mesh abrasives, like Mirka Abranet, really shine. These aren't your typical paper-backed sandpaper. They're made of a woven mesh with thousands of tiny holes. This design lets dust get sucked right through the abrasive and into your vacuum system. This means the abrasive stays sharp and effective for much longer. You get a cleaner surface, less dust in the air, and you're not constantly swapping out dull discs. They can last several times longer than traditional paper discs, which really adds up on big jobs.
Using mesh abrasives with a vacuum-ready sander is a game-changer for dust control. It keeps your work area cleaner and makes the sanding process more efficient.
Choosing the Right Sandpaper for Your Floor Sander
So, you've got your floor sander, and you know you need sandpaper, but which kind? It really depends on what you're trying to achieve. For the main drum sanding, you'll be using belts or large discs. For edges and corners, you'll need smaller discs or pads. The grit number is super important – lower numbers mean coarser grit for taking off material, and higher numbers mean finer grit for smoothing. You'll typically start with a coarser grit to remove old finishes or level the floor and then move to progressively finer grits to get that smooth finish. For example, you might start with a 36-grit belt to get rid of old varnish, then move to 60-grit, then 80-grit, and maybe even 100 or 120-grit for a really smooth surface before applying finish. Don't forget about the material of the abrasive itself; ceramic or zirconia grains are tougher and last longer on hardwoods compared to standard aluminum oxide.
- Drum Sander Belts/Discs: For large, open floor areas. Available in various grits and materials.
- Edger Discs: For sanding along walls and in tight spots. Typically 7-inch diameter.
- Detail Sander Pads: For corners and intricate areas. Smaller sizes.
Always make sure the sandpaper you choose is compatible with your specific floor sander model. Using the wrong type can damage both the sandpaper and your machine. If you're unsure, checking out resources like Bailey Flooring Supplies can help you find the right abrasives for your project.
Maintaining Your Floor Sanding Equipment
Keeping your floor sanders and related tools in good shape is pretty important if you want them to last and do a good job. It’s not just about cleaning them after you’re done, though that’s a big part of it. You’ve got to keep an eye on the parts that wear out and make sure everything is stored right when you’re not using it.
Regular Cleaning and Inspection of Your Floor Sander
After every job, give your sander a good once-over. Dust is the enemy of these machines, so make sure you’re getting it out of all the nooks and crannies. Check the drum or pad for any debris that might have gotten stuck. Also, look over the power cord for any nicks or damage. A quick visual inspection can save you a lot of trouble down the line. It’s like checking your car’s oil – a simple habit that prevents bigger problems.
Replacing Worn Parts and Accessories
Sanding pads, belts, and even the dust bags wear out. You’ll notice it when the sander starts to struggle or doesn’t leave as smooth a finish. Don’t wait too long to swap them out. Using worn-out parts can actually damage your floor or make the sander work harder than it needs to. Keep a stock of common replacement parts like sandpaper discs and dust bags on hand. For example, if you’re using a drum sander, the rubber roller can wear down over time and needs to be replaced to maintain proper contact with the floor.
Proper Storage for Longevity
When you’re done with a project, clean your equipment thoroughly and store it in a dry place. If you have the original case, use it. This protects the machine from dust, moisture, and accidental damage. Avoid just leaving it in a damp garage or a corner where things can fall on it. A little care in storage goes a long way in making sure your tools are ready for the next job and last for years to come.
Taking good care of your floor sanding tools means they'll work better and last longer. Simple steps like cleaning them after each use and checking for wear can make a big difference. Don't forget to store them properly to avoid damage. For all your equipment needs and expert advice, visit our website today!
Conclusion
Wrapping up, using a floor sander for your DIY project isn’t as scary as it looks, but it does take some patience and a bit of sweat. The key is to take your time—don’t rush the sanding, and always double-check your grit progression. If you miss a step, you’ll see it later, trust me. Clean up the dust between passes, keep your sander moving, and don’t be afraid to ask for help if you get stuck. Even the pros had to start somewhere. With the right prep and a steady hand, you’ll end up with a floor you can be proud of. And if you run into trouble, there’s always someone at the supply shop or online who’s been through it before. Good luck, and remember: the finish is only as good as the sanding underneath.
Frequently Asked Questions
What type of floor sander should I use for my project?
The best floor sander for your project depends on your floor's condition and the job you want to do. Drum sanders are powerful and good for removing old finishes or leveling uneven floors. Orbital sanders are easier to use and are great for light sanding or finishing touches.
How do I get my floor ready before sanding?
First, move all furniture out of the room. Cover vents and doorways to keep dust from spreading. Check for nails or staples sticking out and hammer them down. Remove any old carpet glue, paint, or finish before you start sanding.
What grit sandpaper should I start with?
If your floor is rough or has an old finish, start with coarse grit sandpaper like 36 or 40. Then, move to medium grit (60-80) and finish with fine grit (100-120) for a smooth surface.
How do I sand edges and corners?
Use an edging sander or a detail sander to reach the spots the big sander can't get. Move slowly and blend the edges into the rest of the floor so you don’t leave marks.
Do I need to wear safety gear while sanding?
Yes, always wear a dust mask, safety glasses, and hearing protection. Sanding makes a lot of dust and noise, so it’s important to protect yourself.
How do I keep dust under control while sanding?
Most sanders have dust bags or can connect to a shop vacuum. Always empty the dust bag often and vacuum the floor after each sanding step. Close doors and use plastic sheets to keep dust from spreading.
How do I know if the floor is ready for finishing?
After your final sanding, vacuum up all the dust and wipe the floor with a tack cloth. Check for any scratches or rough spots. The floor should feel smooth and look even before you apply any finish.
How do I take care of my floor sander?
After each use, clean off dust and check for any worn parts. Store your sander in a dry place. Replace sandpaper or parts as needed so your sander works well next time.

0 comments