

So, you're thinking about putting down some hardwood floors? It's a big project, for sure. But honestly, with a bit of planning and the right approach, it's totally doable. This guide is here to walk you through the whole process, from getting your subfloor ready to making sure your new floors look great for years to come. We'll cover the basics of hardwood floor installation, what you need to know, and how to get it done right.
Key Takeaways
- Always start with a solid, clean subfloor. Check for moisture and make sure it's level before you even think about laying down wood.
- Let your hardwood flooring materials get used to the room's temperature and humidity before you install them. This helps prevent problems later on.
- There are a few ways to install hardwood floors – nailing, gluing, or floating. Pick the method that works best for your situation and the type of flooring you have.
- Careful planning and attention to detail are super important during the actual hardwood floor installation. Getting that first row right sets the tone for the whole project.
- Finishing your hardwood floors properly makes a big difference in how they look and how long they last. Using the right products and techniques is key.
Preparing Your Subfloor For Hardwood Floor Installation
Subfloor Inspection and Assessment
Before you even think about laying down a single plank of hardwood, you've got to get your subfloor in shape. This isn't just about making things look good; it's about making sure your new floor lasts. Start by giving the whole area a good once-over. Look for any signs of damage, like soft spots, rot, or loose boards. If you've got old flooring down, pull up a section to see what you're working with underneath. A solid, stable subfloor is the foundation of a great hardwood installation. Check for squeaks, too – those are usually a sign of loose fasteners or boards that need attention.
Moisture Testing and Mitigation
Moisture is the enemy of hardwood. Too much, and your floors will swell, warp, and buckle. Too little, and they can become brittle and crack. You absolutely need to test the moisture levels in your subfloor. Use a reliable moisture meter for this. For concrete subfloors, you'll want to check for any signs of efflorescence (that white, powdery stuff) and test the relative humidity. If you find moisture issues, you've got to deal with them before you install anything. This might mean installing a vapor barrier, improving ventilation, or addressing any leaks in the foundation or plumbing.
Subfloor Repair and Leveling
Once you've inspected and tested for moisture, it's time to fix any problems and get the surface perfectly flat. Any low spots need to be filled, and high spots need to be sanded down. If you have uneven boards, you might need to secure them with screws or even replace them if they're damaged. For significant unevenness, a self-leveling compound can be a lifesaver. The goal is a smooth, flat, and stable surface that will support your new hardwood floor for years to come. Don't skip this step; a poorly prepared subfloor will cause problems down the line, no matter how good your flooring is.
Acclimating Your Hardwood Flooring Materials
Understanding Wood's Hygroscopic Nature
Wood is a natural material, and like all natural things, it reacts to its surroundings. Specifically, wood is hygroscopic, which means it absorbs and releases moisture from the air. This is a big deal when you're installing hardwood floors. Think about it: if the wood is too wet when it comes into your house, it's going to shrink as it dries out. This can lead to gaps between your floorboards later on. On the flip side, if the wood is too dry and the air in your house is humid, it can swell up, causing buckling. Getting this right is key to a stable, long-lasting floor.
Proper Storage and Environmental Conditions
So, how do you store your new hardwood floors before installation? The best way is to keep them in the room where they'll be installed, but not directly on the concrete or subfloor. Stack the boxes flat, off the ground, and make sure they're not sealed up tight in plastic wrap. You want air to be able to circulate around them. The ideal conditions are pretty much what you'd want for living in the space: a stable temperature, usually between 60-80°F (15-27°C), and a relative humidity level between 40-60%. This is the sweet spot where the wood can adjust without too much stress. If you're dealing with a new build or a recently renovated space, make sure the HVAC system is running and maintaining these conditions for a while before the flooring arrives.
Duration for Acclimation
How long does this acclimation process actually take? It's not a one-size-fits-all answer, but a good rule of thumb is at least 72 hours, or three full days. For thicker wood or in areas with extreme humidity differences, it might take even longer, sometimes up to a week or more. The best way to know for sure is to check the moisture content of the wood itself and compare it to the subfloor. You can use a moisture meter for this. The goal is to have the moisture content of the wood within 2-4% of the subfloor's moisture content. This might sound like a lot of waiting, but trust me, it's way better than dealing with a floor that's gapping or buckling a few months down the line. Patience here really pays off. You can find some great flooring care kits at Bailey Flooring Supplies that can help maintain your floors after installation. Flooring care kits
Choosing the Right Hardwood Floor Installation Method
When it comes to putting down a new hardwood floor, you've got a few main ways to go about it. Each method has its own set of pros and cons, and what works best really depends on your specific situation, the type of wood you're using, and your own comfort level with DIY projects. It’s not a one-size-fits-all deal, so taking the time to figure this out upfront can save you a lot of headaches down the road.
Nail-Down Installation Techniques
This is probably the most traditional method, especially for solid hardwood floors that are 3/4 inch thick. You're essentially fastening the planks directly to the subfloor using a special flooring nailer, also called a cleat nailer. This tool drives a thin, L-shaped nail through the tongue of the plank at an angle, securing it to the wood joists or subfloor underneath. It’s a solid method that really locks the floor in place, giving it a sturdy feel.
- Best for: Solid hardwood planks (3/4" thick), plywood or OSB subfloors.
- Pros: Very durable, creates a stable floor, can be sanded and refinished multiple times.
- Cons: Requires specialized tools (nailer, compressor), can be labor-intensive, not suitable for all subfloors (like concrete).
- Considerations: Make sure your subfloor is clean, dry, and flat. You'll need to pre-drill holes in hardwood over concrete or in engineered wood planks if the manufacturer recommends it.
Glue-Down Installation Best Practices
With the glue-down method, you're using a specialized flooring adhesive to bond the hardwood planks directly to the subfloor. This is a great option for engineered hardwood, which often has a more stable core and can handle adhesives well. It's also a good choice for concrete subfloors where nailing isn't an option. The key here is using the right adhesive for your wood type and subfloor, and applying it evenly.
- Substrate: Works well on concrete, plywood, and existing well-adhered flooring.
- Adhesive: Use a high-quality, flooring-specific adhesive. Check the manufacturer's recommendations for your wood type. AmberSeal is a good option to consider for its quality and value.
- Application: Spread the adhesive evenly using a notched trowel recommended by the adhesive manufacturer. Work in small sections to prevent the adhesive from drying out.
- Pros: Creates a very solid bond, reduces noise compared to nail-down, suitable for concrete subfloors.
- Cons: Can be messy, requires careful cleanup of excess adhesive, removal can be difficult.
Floating Floor Installation Considerations
A floating floor isn't attached to the subfloor at all. Instead, the planks are connected to each other, usually with a click-lock or tongue-and-groove system. The entire floor then
Executing a Flawless Hardwood Floor Installation
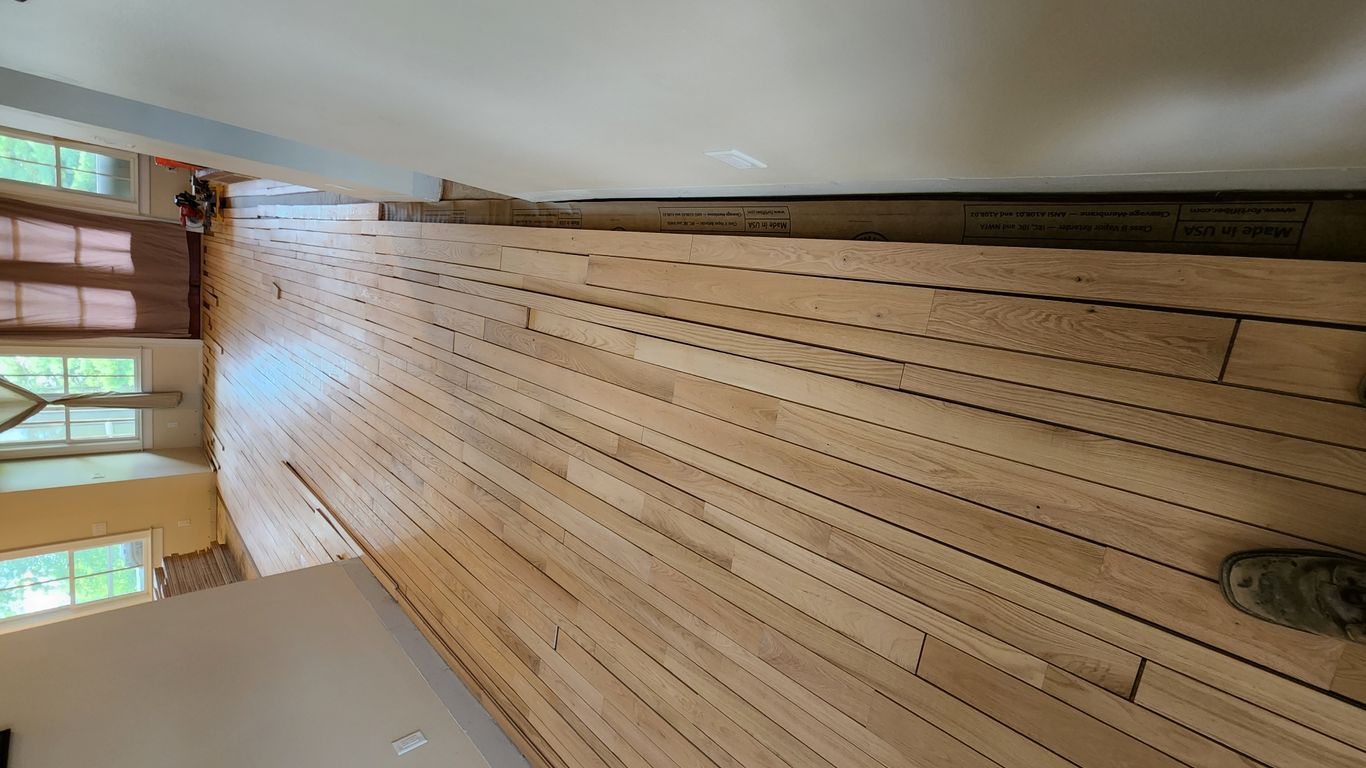
Getting your hardwood floors down perfectly is all about the details. It’s not just about slapping boards down; it’s a careful process that requires patience and precision. If you rush this part, you’ll end up with problems later on, like gaps, unevenness, or even damage to the wood itself. So, let’s talk about how to nail this part.
Laying the First Row Accurately
This is probably the most important step. If your first row is off, everything that follows will be off too. You need to make sure it’s perfectly straight and square to your starting wall. Most people start along the longest, straightest wall in the room. Use a chalk line or a laser level to get a guide. Remember to leave an expansion gap along the wall – usually about 1/2 inch to 3/4 inch, depending on the wood and the manufacturer's recommendation. This gap is super important because wood expands and contracts with changes in humidity and temperature. Without it, your floor could buckle.
- Start with a straight, square first row.
- Always account for expansion gaps.
- Use a chalk line or laser for guidance.
The success of your entire installation hinges on the accuracy of that very first row. Take your time, double-check your measurements, and don't be afraid to reposition boards until they are perfect.
Maintaining Consistent Gaps
As you lay down subsequent rows, you need to keep those expansion gaps consistent. This means using spacers between the last board and the wall. For the gaps between boards themselves, you’re relying on the tongue-and-groove system, but sometimes, especially with wider planks or certain wood types, you might need to use a tapping block and mallet to gently persuade boards together. The goal is a tight fit between boards, but that necessary gap at the perimeter.
- Use spacers for wall gaps.
- Employ a tapping block for tight fits between boards.
- Ensure consistent pressure when joining boards.
Working with Obstacles and Transitions
Rooms aren't always simple rectangles. You’ll run into doorways, vents, fireplaces, and other fixed objects. For doorways and transitions to other flooring types, you’ll typically use a transition strip. These cover the expansion gap and create a smooth change. Around vents or pipes, you’ll need to cut the boards to fit. Measure carefully, cut precisely, and remember to leave a small expansion gap around these obstacles too. It’s better to cut a board slightly too large and trim it down than to cut it too small. For tricky cuts around irregular shapes, a jigsaw is your best friend.
- Plan for transitions to other flooring types.
- Measure twice, cut once for obstacles.
- Always leave expansion gaps, even around fixed objects.
Mastering Hardwood Floor Finishing Techniques
Surface Preparation for Finishing
Getting the surface ready is probably the most important step before you even think about putting down a finish. If you mess this up, the whole job can look bad, no matter how good your finish is. You need to make sure the floor is totally clean. I mean, no dust, no grease, no old wax, nothing. Vacuuming is a must, and then you might need to wipe it down with something specific, depending on what you used before. Sanding is key too. You want to get it smooth, usually ending with a grit around 120 or 150. If you skip steps or use the wrong grit, you'll see it in the final coat. It's all about creating a clean, smooth canvas for the finish to stick to. A good prep job means the finish will last longer and look way better.
Applying Water-Based Finishes
Water-based finishes are pretty popular these days, and for good reason. They dry fast, don't smell too bad, and clean up with water, which is a big plus. When you're putting them down, you want to mix them right, especially if it's a two-part system. Just follow the instructions on the can. Use a good quality roller or applicator that's made for water-based stuff. You want to put it on thin and even. Don't try to lay it on too thick, thinking it'll give you more protection. That usually just leads to problems. You'll want to let each coat dry for the time the manufacturer says before putting on the next one. Usually, it's just a few hours. After each coat, you might want to do a light sanding with a fine grit, like 220, and then clean off all the dust again. This helps make the next coat stick better and gives you a smoother final product. The last coat usually doesn't get sanded.
Achieving an Invisible Finish Look
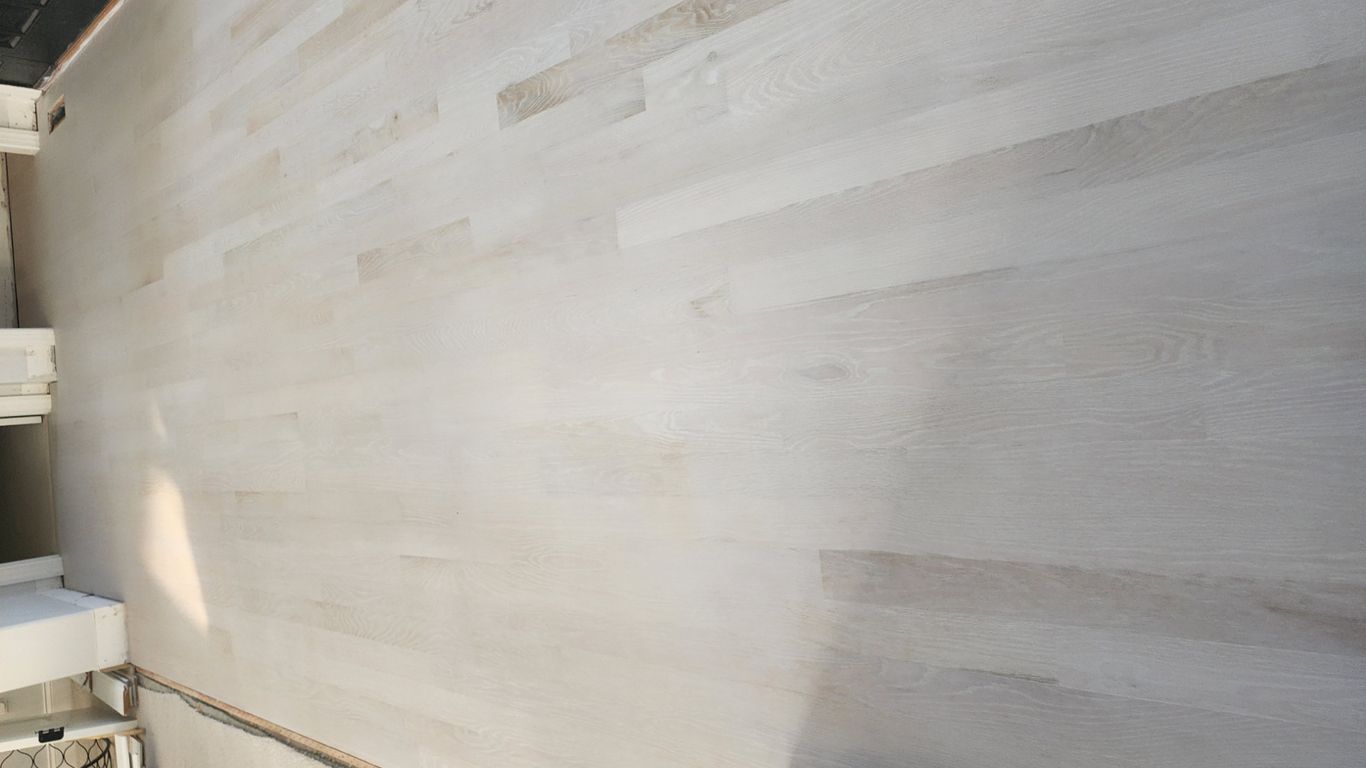
So, you want that natural, raw wood look but still need protection? That's where these "invisible" finishes come in. They're designed to not change the color of the wood much, or add any shine. It’s all about letting the wood's natural grain and color show through. They're great for woods like white oak or if you're going for that modern, minimalist style. The trick is to use a finish that's specifically made for this look, usually a matte or ultra-matte sheen. You still need to do all the prep work like usual, and apply it evenly. The goal is protection without looking like you've put a thick coating on the floor. It’s a bit of an art to get it just right, but when you do, it looks amazing. It really lets the beauty of the wood itself be the star. You can find some great options designed for this specific aesthetic, often from brands trusted by professionals. For example, Bailey Flooring Supplies offers a range of finishes that can help you achieve this look. If you're aiming for a specific style, checking out their professional-grade options might be a good idea. They have products that focus on maintaining the wood's natural tone and grain character, which is exactly what you need for that invisible finish. You can explore their water-based finishes to see what fits your project best. water-based finishes
Selecting Professional-Grade Finishing Products
Understanding Water-Based vs. Oil-Based Finishes
When you're getting ready to put the final touches on a hardwood floor, picking the right finish is a big deal. It's not just about making it look good; it's about how it holds up over time. For a long time, oil-based finishes were the go-to. They're known for giving wood a warm, amber tone and are pretty tough. But, they take a long time to dry, have strong fumes, and can yellow over the years. That's where water-based finishes come in. They've really stepped up their game. They dry much faster, have way less odor, and stay clear, so the natural color of the wood really shines through. Plus, they're better for the air quality in the house. For most jobs these days, especially if you need to get people back on the floor quickly or if you're working in a space where fumes are a concern, water-based is usually the way to go.
Choosing the Right Sheen Level
The sheen level you choose for your finish really changes the look and feel of the wood. It's not just a small detail; it can make or break the whole aesthetic. Here's a quick rundown of what you'll typically find:
- Matte: This is the most natural look. It has almost no shine, so it looks like the wood is unfinished. It's great for a modern or rustic vibe and hides minor imperfections well. It's also less slippery.
- Satin: A bit more sheen than matte, but still pretty subtle. It gives the wood a soft glow without being too reflective. This is a really popular choice because it balances a natural look with a bit of protection and a nice feel.
- Semi-Gloss: You'll see a noticeable shine here. It reflects more light and can make the wood grain pop. It's a bit more formal and can be easier to clean because the surface is smoother.
- Gloss: This is the highest shine. It's very reflective and can make the wood look almost like a mirror. It's often used for a very dramatic or high-end look, but it can show scratches and dust more easily.
Benefits of Two-Component (2K) Systems
For serious durability, especially in places with a lot of foot traffic like busy homes or commercial spots, you really want to look at two-component, or 2K, finishes. These aren't your average one-and-done finishes. They come in two parts – the base finish and a catalyst or hardener – that you mix together right before you use them. This mixing process kicks off a chemical reaction that makes the finish incredibly tough and resistant to just about anything you can throw at it, like scratches, chemicals, and moisture. Using a 2K system means you're building a floor that's built to last, reducing the chances of needing repairs down the road.
Here’s why pros often prefer them:
- Unmatched Durability: They create a surface that's much harder and more resistant to wear and tear than single-component finishes.
- Chemical Resistance: Spills from common household items are less likely to damage the finish.
- Longer Lifespan: Floors finished with 2K systems tend to last longer before needing a recoat or refinish.
- Clarity: Many 2K water-based options offer excellent clarity, meaning they won't yellow over time and will keep the wood's natural color looking true.
When you're choosing a finish, think about the job. A high-traffic area needs a tougher finish than a low-traffic bedroom. For the best results and to avoid callbacks, investing in a professional-grade product, especially a 2K system for demanding jobs, is usually the smartest move. It might cost a bit more upfront, but the long-term performance and customer satisfaction are worth it.
Essential Tools for Hardwood Floor Installation
Getting the right tools for the job makes all the difference when you're installing hardwood floors. It's not just about having them; it's about having the right ones that are built for the task. Using professional-grade equipment means you'll get a better finish, work faster, and probably avoid a lot of headaches. Let's break down what you'll need.
Flooring Nailers and Staplers
When it comes to laying down solid hardwood, you've got a couple of main options for fastening: nailers and staplers. Both do the job, but they have their own quirks.
- Nailers: These are generally preferred for solid hardwood. They drive cleat nails at an angle through the tongue of the flooring board into the subfloor. This creates a really secure bond. You'll find pneumatic models that hook up to an air compressor, which are powerful and efficient for big jobs. Some are designed for specific board thicknesses, so make sure you get one that matches your flooring.
- Staplers: These use staples instead of nails. They can be a bit faster and sometimes more forgiving on certain types of wood or subfloors. However, some pros feel they don't hold quite as securely as cleat nails over the long haul, especially with very hard woods. Again, pneumatic is the way to go for serious work.
It's important to match your tool to the type and thickness of your hardwood. Using the wrong tool can damage the flooring or lead to a weak installation.
Applicators and Rollers for Finishes
Once the floor is down, the finishing work begins, and this is where your application tools really matter. Getting an even, smooth finish is key to a professional look, and the right tools help you achieve that.
- High-Quality Rollers: For applying finishes, especially water-based ones, you'll want rollers designed for that specific product. Look for ones with a dense nap that won't shed fibers onto your wet finish. The size will depend on the area you're covering – smaller ones for tight spots, larger ones for open floors. A good roller helps lay down a consistent film without leaving lap marks.
- Applicator Pads: For edges, corners, and stairs, a hand applicator pad is invaluable. Tools like the LOBA Hand Pad Set give you precise control where rollers can't reach. They help you get a smooth, even coat right up to the baseboards or in tricky nooks.
- Sausage Applicators: For applying adhesives or certain types of sealers that come in large caulk-like tubes or
Achieving Durability with Premium Primers
The Role of Primer in Adhesion
When you're getting ready to put down a finish on hardwood floors, you might wonder if you really need a primer. I used to think it was an extra step that wasn't always necessary, especially if I was in a hurry. But after seeing some finishes fail prematurely, I learned that a good primer is actually pretty important. It acts like a bonding agent, creating a solid connection between the raw wood and the topcoats you're applying. Without it, you can sometimes get issues like peeling or poor adhesion down the road, especially in areas that get a lot of foot traffic or moisture. It really helps everything stick together like it's supposed to.
Selecting the Correct Primer Type
There are a few different kinds of primers out there, and picking the right one makes a difference. For most water-based finishes, you'll want a water-based primer. These are usually low in VOCs, which is good for air quality, and they dry pretty fast. Some primers have a slight amber tint, like LOBA Amber Prime, which can help even out the color of the wood before you apply your finish, especially if you're working with lighter woods or want a warmer look. Others, like LOBA EasyPrime, are clear and designed for maximum adhesion without adding any color. It really depends on the look you're going for and what topcoat you plan to use. Always check the manufacturer's recommendations to make sure your primer and finish are compatible.
Application of Primer Sealers
Applying primer isn't too complicated, but doing it right is key. First off, make sure your floor is prepped perfectly – clean, dry, and sanded smooth. You don't want any dust or debris under that primer. I usually use a good quality microfiber roller or a T-bar applicator for this. The trick is to apply it in thin, even coats. Don't try to slop it on thick; that can lead to problems later. You want consistent coverage across the whole floor. Most water-based primers dry pretty quickly, usually within an hour or two, so you can get your first topcoat on without too much waiting. Just follow the product's instructions for recoat times, and you'll have a solid base for a durable finish. For a project like this, having the right tools, like a good trowel for adhesive if needed, can make all the difference. Check out this trowel if you need one for your prep work.
Key Takeaways:
- Primer creates a strong bond between wood and finish.
- Choose a primer compatible with your topcoat (e.g., water-based primer for water-based finishes).
- Proper surface preparation is vital before primer application.
- Apply primer in thin, even coats for best results.
A well-primed floor is a floor that's set up for success. It's not just about making the finish stick; it's about creating a uniform surface that helps your topcoats perform their best over the long haul. Skipping this step can sometimes lead to callbacks or a finish that doesn't last as long as it should.
Maintaining Your Newly Installed Hardwood Floors
So, you've gone through the whole process – the prep, the acclimation, the installation, and the finishing. Your new hardwood floors look fantastic, right? Now comes the part that a lot of people overlook: keeping them looking that way. It’s not rocket science, but it does take a little bit of know-how and consistency. Think of it like taking care of a good car; regular maintenance keeps it running smoothly and looking sharp for years.
Routine Cleaning Procedures
First off, let's talk about the day-to-day stuff. The most important thing you can do is keep your floors clean. This means regular sweeping or vacuuming. You want to get rid of any grit, dust, or debris that can act like sandpaper underfoot, scratching up that beautiful finish over time. A good quality broom with soft bristles or a vacuum cleaner with a hard floor attachment is your best friend here. Just make sure the vacuum doesn't have a beater bar that spins aggressively, as that can also cause damage.
When it comes to actual cleaning, less is often more. You don't need to be mopping your floors every other day. In fact, over-wetting can be a real problem for hardwood. Stick to a damp mop – and I mean damp, not soaking wet. Wring out your mop really well before you use it. You're just trying to pick up surface dirt, not flood the floor.
Using Manufacturer-Approved Cleaners
This is a big one. When you do need to use a cleaner, always, always, always use a product that's specifically made for hardwood floors and, ideally, one that's approved by the manufacturer of your flooring or finish. Generic cleaners, especially those with harsh chemicals, ammonia, or abrasive ingredients, can strip the finish, dull the sheen, or even damage the wood itself. It’s like using dish soap on your car’s paint job – it might get it clean, but it’s not good for the long run.
For routine cleaning, a pH-neutral cleaner is usually the way to go. Products like LOBA Parkett Soap R2U are designed for this exact purpose. They clean effectively without leaving behind any residue that can attract more dirt or make your floors look hazy. Always follow the dilution instructions on the cleaner's bottle. Too much cleaner can be just as bad as using the wrong kind.
Protecting Floors from Damage
Beyond just cleaning, there are other ways to protect your investment. Think about furniture. Every time you move a chair or a table, you risk scratching the floor. The easiest fix? Put felt pads on the bottom of all your furniture legs. Check them regularly and replace them when they get worn down or collect grit. It’s a small step that makes a huge difference.
Also, consider high-traffic areas. Entryways are notorious for tracking in dirt, sand, and moisture. Using doormats both inside and outside your main entrances can trap a lot of that abrasive stuff before it even gets onto your hardwood. For areas that get a lot of direct sunlight, like near patio doors or large windows, be aware that prolonged UV exposure can cause fading over time. Window treatments like blinds or curtains can help mitigate this.
Finally, for those inevitable spills or tracked-in water, clean them up immediately. Don't let liquids sit on the surface. A quick wipe-up with a soft cloth will prevent water spots or potential damage to the finish. By following these simple maintenance steps, you'll keep your beautiful hardwood floors looking like new for years to come.
Keeping your new hardwood floors looking great is easier than you think! Simple steps like regular sweeping and using the right cleaners can make a big difference. Want to learn more about the best ways to care for your beautiful floors? Visit our website for expert tips and top-quality cleaning supplies.
Wrapping Up Your Hardwood Project
So, you've made it through the whole process. Installing hardwood floors isn't a walk in the park, but with the right tools and a bit of patience, you can get a great-looking floor that lasts. Remember to prep right, take your time with each step, and don't be afraid to ask for help if you get stuck. Using good quality materials, like the professional-grade finishes we talked about, really makes a difference in the end. Keep up with the cleaning and maintenance, and your floors will look good for years to come. Now go enjoy that beautiful new floor you put in.
Frequently Asked Questions
How long should I let my new wood floors sit in the room before installing them?
It's super important to let your new wood floors get used to the temperature and humidity in your house before you put them down. This is called 'acclimating.' You should usually leave them in the room for at least 3 to 7 days. This helps the wood adjust so it won't swell or shrink too much after it's installed, which can cause problems like gaps or buckling.
What's the best way to prepare my floor before putting down new wood?
Before you start, you've got to make sure the floor underneath, called the subfloor, is in good shape. It needs to be clean, dry, and flat. Check for any loose boards, nails sticking up, or uneven spots. Fix any problems you find. A smooth and sturdy subfloor is key for a great-looking and long-lasting wood floor.
Can I install hardwood floors myself, or should I hire someone?
You can definitely install hardwood floors yourself if you're handy and patient! There are a few ways to do it: nailing them down, gluing them, or using a floating method. Each has its own steps. If you're unsure or want a super professional finish, hiring an expert is always a good idea.
What's the difference between water-based and oil-based finishes for wood floors?
Water-based finishes dry much faster and have less smell and fewer harmful fumes (VOCs). They also stay clear and don't turn yellow over time. Oil-based finishes take longer to dry, have a stronger smell, but some people like the amber tone they give wood. For most people today, water-based finishes are the way to go because they're better for your health and quicker to work with.
How do I clean my new hardwood floors to keep them looking good?
Cleaning is pretty simple! Just sweep or vacuum your floors regularly to get rid of dirt and grit that can scratch the wood. For a deeper clean, use a cleaner made specifically for hardwood floors. Always use a damp (not soaking wet!) mop and follow the cleaner's instructions. Avoid using too much water or harsh chemicals.
What does 'sheen level' mean for wood floor finishes?
The sheen level is how shiny or dull the finish looks. You'll see terms like Matte (least shiny, looks natural), Satin (a soft shine), Semi-Gloss (a noticeable shine), and Gloss (very shiny). The choice depends on the look you want and how much light you want to reflect in the room. Matte finishes are really popular right now because they make the wood look more natural.
Why is it important to leave gaps around the edges of the room when installing wood floors?
Wood naturally expands and shrinks with changes in humidity. Leaving a small gap, usually about 1/4 to 1/2 inch, around the edges of the room gives the wood space to move. This prevents the floor from buckling or pushing up against the walls when it expands.
What are 'two-component' or '2K' finishes?
These are super-tough finishes made of two parts that you mix together right before using. This mixing makes the finish much stronger and more resistant to scratches and chemicals. They're great for high-traffic areas like kitchens, entryways, or busy living rooms because they last a really long time.

0 comments