
So, you're thinking about putting in hardwood floors? It sounds like a big job, and honestly, it can be. But it doesn't have to be some big mystery. We're going to break down the whole hardwood floor installation process, step by step. Think of this as your friendly guide that cuts through all the confusing stuff. We'll cover everything from getting the room ready to making sure your new floor looks amazing and lasts for years. It’s all about taking it one stage at a time.
Key Takeaways
- Proper subfloor prep is a must before you start laying any wood.
- Letting your wood acclimate to the room's temperature and humidity is important.
- Know your tools and have them ready before you begin the hardwood floor installation process.
- Take your time with the actual laying of the planks; straight lines and good connections make a difference.
- Finishing touches, like sanding and sealing, are what really make the floor look professional and protect it.
Understanding The Hardwood Floor Installation Process
Assessing Subfloor Readiness
Before you even think about laying down those beautiful hardwood planks, the most important first step is to check out the surface underneath. This is your subfloor, and it's the foundation for everything. If it's not ready, your new floor will have problems down the line. We're talking about making sure it's solid, level, and dry. A bouncy or uneven subfloor can lead to squeaks, gaps, and even planks coming loose. Moisture is another big one; wood and water don't mix well, and a damp subfloor can cause warping and mold. So, take your time here. A little effort now saves a lot of headaches later.
Acclimating Your Hardwood Materials
Hardwood is a natural material, and it expands and contracts with changes in temperature and humidity. That's why it's super important to let your new wood planks get used to the environment where they'll be installed. This process is called acclimation. You'll want to bring the unopened boxes of flooring into the room where they'll be laid for at least 48 to 72 hours, sometimes longer depending on the wood and your climate. Stack them flat, off the ground, and make sure air can circulate around them. This helps the wood adjust to the room's normal moisture and temperature levels, reducing the risk of warping or gapping after installation.
Gathering Essential Tools and Equipment
Getting ready for a hardwood floor installation means having the right gear. You don't want to be halfway through the job and realize you're missing something. For most nail-down installations, you'll need a flooring nailer (or stapler), a miter saw for cutting planks, a measuring tape, a chalk line, safety glasses, and a good utility knife. If you're gluing, you'll need a specific trowel and adhesive. Don't forget a pry bar for adjustments and maybe a tapping block to help seat the planks. Having everything on hand makes the whole process go much smoother and faster. You can find many of these items, like floor care systems and cleaning kits, at places like Bailey Flooring Supplies.
Preparing The Subfloor For Installation
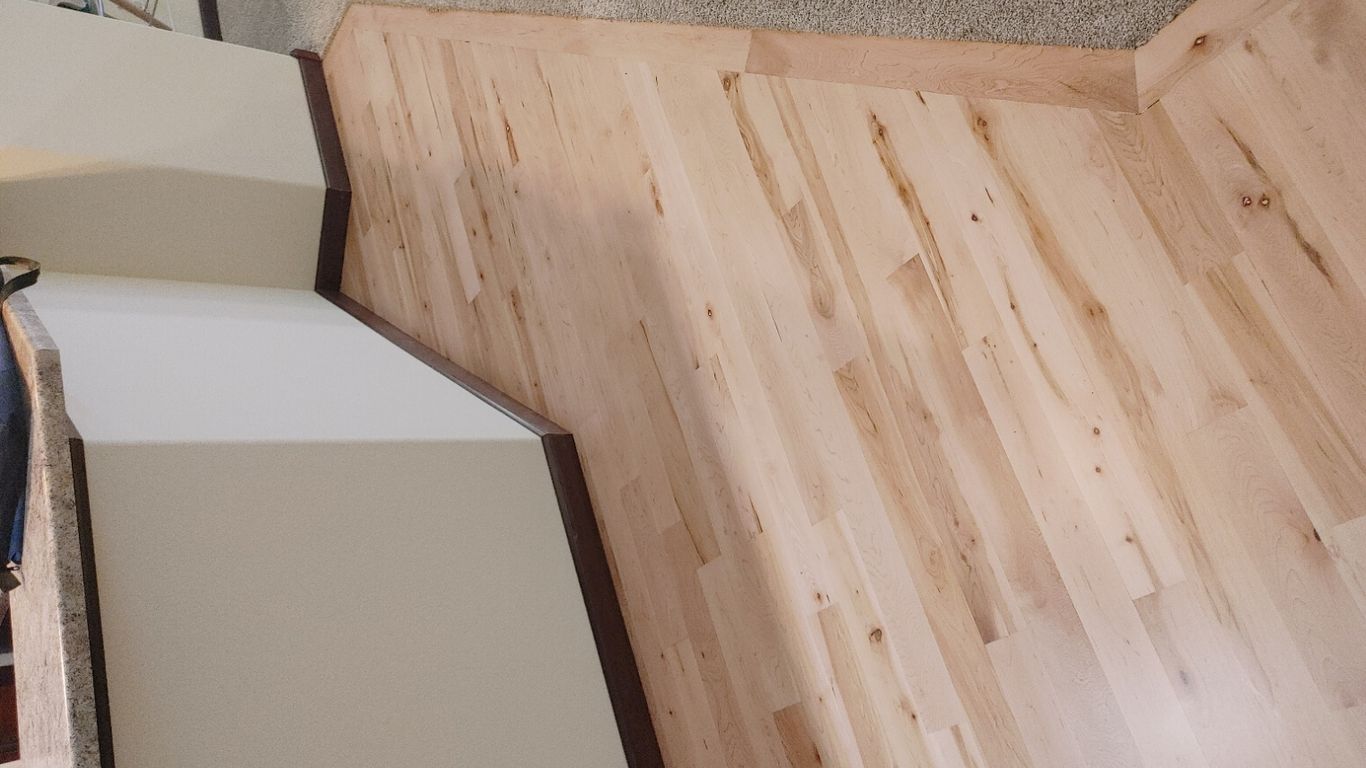
Before you even think about laying down those beautiful hardwood planks, you've got to get the subfloor ready. This step is super important, and honestly, a lot of people rush it. But trust me, a solid, well-prepared subfloor is the foundation for a floor that looks good and lasts for years. Skipping this part is like building a house on sand – it's just not going to end well.
Ensuring A Clean And Level Surface
First things first, the subfloor needs to be clean. We're talking no dust, no debris, no old adhesive, nothing that could get in the way or cause squeaks later on. Sweep it, vacuum it, and then give it a good once-over. You want a surface that's smooth and free of anything that could cause a bump or a snag.
Beyond just being clean, it has to be level. Most hardwood flooring manufacturers have specific tolerances for subfloor flatness, usually around 3/16" over a 10-foot span. You can check this with a long, straight edge or a level. If you find high spots, you'll need to sand them down. Low spots are a bit trickier; you might need to fill them with a leveling compound. A perfectly flat subfloor is key to preventing gaps between planks and avoiding a hollow sound when you walk on it.
Addressing Moisture Concerns
Moisture is the enemy of hardwood. If your subfloor is too damp, it can cause the wood to swell, warp, or even develop mold and mildew. Before you do anything else, you need to check the moisture content of both the subfloor and the hardwood itself. You can use a moisture meter for this.
If you're installing over a concrete slab, a vapor barrier is usually a must. For wood subfloors, especially in basements or crawl spaces, you might need a vapor retarder. The type of barrier depends on your specific situation, but the goal is always to keep moisture from migrating into your new floor.
Repairing Or Replacing Damaged Subflooring
Take a good look at the subfloor. Are there any loose boards? Any soft spots that feel spongy? Any areas that are water-damaged or rotten? These all need to be fixed. Loose boards can lead to squeaky floors, and damaged sections can compromise the structural integrity of your entire floor.
If you find a few loose boards, you can often secure them by screwing them down to the joists. For more significant damage, like rot or widespread weakness, you'll likely need to cut out the damaged section and replace it with new plywood or OSB. Make sure any new subflooring material matches the thickness of the existing subfloor. It's better to spend a little extra time and money fixing these issues now than to deal with a failing floor later.
Laying The Foundation For Your Floor
Before you even think about laying down those beautiful hardwood planks, getting the groundwork right is super important. It’s like building a house – you wouldn’t skip the foundation, right? This part of the process is all about making sure your subfloor is ready for its new hardwood coat and setting up for a smooth installation.
Installing Underlayment For Sound And Moisture Control
Underlayment is that layer that goes between your subfloor and the hardwood. It’s not just some extra bit of material; it actually does a couple of important jobs. For starters, it helps cut down on noise. Think about it – footsteps on hardwood can echo, especially on upper floors. Underlayment acts like a cushion, absorbing some of that sound. It also helps with moisture. Depending on the type, it can act as a barrier, stopping moisture from the subfloor from getting into your hardwood and causing problems like warping or cupping. For floating floors, it's pretty much a must-have. For nail-down or glue-down, it can still be a good idea, especially if you're concerned about sound or have a concrete subfloor.
- Reduces footfall noise: Makes your home quieter.
- Moisture barrier: Protects wood from subfloor dampness.
- Smooths minor subfloor imperfections: Provides a better surface for the hardwood.
- Adds comfort: A little extra cushion underfoot.
Planning Your Layout And Starting Point
This is where you get to be a bit of an artist. How you lay out your floor can really change how a room looks and feels. You need to figure out which direction the planks will run. Usually, you want them to run parallel to the longest wall in the room, or towards the main light source, like a window. This makes the room look bigger and more open. You also need to decide where you're going to start. Most of the time, you start along the longest, straightest wall. This gives you a good, solid line to work from. It’s also a good idea to dry-lay a few rows to see how it looks and to figure out how you’ll handle any awkward cuts or transitions at the end of the room. Getting this plan right from the start saves a lot of headaches later on.
Establishing Straight Starting Lines
Okay, so you've picked your starting wall. Now you need to make sure your first row of hardwood is perfectly straight. If it’s not, that crookedness will carry all the way through your floor, and you’ll notice it every time you walk in the room. The best way to do this is to use a chalk line or a long, straight edge and a pencil. Measure out from your starting wall to create a parallel line that’s exactly the width of one plank away from the wall. This line is your guide for the first row. You might need to do a little shaving on the edge of the first row of planks, called the tongue, so they fit snugly against the wall. Remember to leave a small expansion gap around the perimeter of the room – usually about 1/2 inch – which will be covered by your baseboards or quarter-round later.
A perfectly straight starting line is the backbone of a professional-looking hardwood floor installation. Don't rush this step; take your time to measure and mark accurately. It makes all the difference in the final outcome.
Executing The Hardwood Floor Installation Process
Nailing or Stapling Techniques
When it comes to laying down solid hardwood planks, mechanical fastening is a common method. This involves using a specialized flooring nailer or stapler. These tools drive fasteners through the tongue of the plank at an angle, securing it to the subfloor. The key here is consistent pressure and angle to avoid damaging the wood or creating weak points. For most 3/4-inch solid hardwood, a 16-gauge cleat nailer is the go-to. You'll want to place fasteners about every 6 to 8 inches along the length of the board, and a couple of fasteners near the ends of each plank. It’s important to use the right type of fastener for your specific flooring thickness and type. Always check the manufacturer’s recommendations for your flooring.
Gluing Down Hardwood Planks
Another popular method, especially for engineered hardwood or in situations where mechanical fastening isn't ideal, is using adhesive. A high-quality wood flooring adhesive is spread onto the subfloor using a notched trowel. The trowel size is important; it needs to create ridges that allow the adhesive to spread evenly and create a strong bond without oozing up too much. You'll typically work in small sections, laying the planks into the wet adhesive and pressing them down firmly. Some adhesives require a specific open time before laying the boards, so read the product instructions carefully. This method can help reduce noise transmission and is often preferred for its solid feel underfoot.
Working With Engineered Hardwood
Engineered hardwood offers more flexibility in installation. Because of its layered construction, it's less susceptible to changes in humidity and temperature compared to solid hardwood. This means it can often be installed in more areas of the home, including basements and even over concrete slabs. Engineered planks can be installed using a variety of methods: they can be glued down, stapled down (if the core is thick enough), or even floated. A floating floor is one where the planks are joined together but not attached to the subfloor. This method often uses a click-lock system or a tongue-and-groove system with glue or a locking mechanism. Always check the manufacturer's specific installation guidelines for your engineered flooring product, as methods can vary significantly between brands and constructions.
Navigating Tricky Areas And Transitions
Cutting Around Obstacles and Doorways
Working with hardwood floors means you'll eventually run into things like door jambs, heating vents, and cabinets. You can't just lay planks over them. For door jambs, the trick is to slide the plank under the trim. You'll need to undercut the jamb with a handsaw or a jamb saw so the plank sits flush underneath. This makes for a really clean look. For vents or other fixed obstacles, you'll need to measure carefully and cut the planks to fit around them. Sometimes this means cutting out a section of the plank, or cutting multiple pieces to fit snugly. It takes patience, but it's worth it to avoid gaps.
Installing Transition Strips
Transitions are where your new hardwood floor meets another type of flooring, like tile or carpet, or where it meets a doorway. These areas need a transition strip, also called a reducer or threshold. These strips cover the gap between the two flooring types and create a smooth, safe surface. You'll typically nail or glue these down. Make sure the transition strip is the right height for the two floors it's connecting. If one floor is significantly higher than the other, you might need a special type of transition piece.
Dealing With Irregular Room Shapes
Not all rooms are perfect rectangles. If you have an L-shaped room or a bay window area, you'll need to plan your cuts carefully. Start by measuring and marking your planks. You might need to cut angles, or 'scribe' the wood to fit against curved walls. Scribing involves tracing the wall's shape onto the plank and then cutting along that line. This takes a bit of practice, but it's the best way to get a tight fit against non-straight walls. Sometimes, you might need to cut a plank into smaller pieces to fit a complex shape. It's all about careful measurement and precise cuts to make it look like it was meant to be there.
Finishing Touches For A Professional Look
Sanding For A Smooth Surface
After all the planks are down, it's time to get the surface ready for finishing. This usually means a good sanding. For a new installation, you're likely starting with a pretty smooth surface, but you still want to go over it. We typically use a drum sander for the main areas and then an edge sander for the borders. The grit progression is important here. We usually start with something like 80-grit and work our way up to 120 or even 150-grit. The goal is to get rid of any minor imperfections, like slight height differences between boards or any glue squeeze-out that might have happened. A perfectly smooth subfloor is key to a flawless finish.
Applying Stains And Sealers
If you're staining your floor, this is where the color really comes to life. We like to use professional-grade stains that offer good penetration and color consistency. For oil-based stains, you'll get a richer, deeper look, but they take longer to dry. Water-based stains are quicker to dry, which can be a real time-saver on big jobs. After staining, we let it dry completely according to the manufacturer's instructions. Then comes the sealer. A good sealer helps the topcoats adhere better and can add another layer of protection. Some finishes don't require a separate sealer, but it's always good to check the product specs. For those looking to achieve a lighter, more natural look on woods like red oak, products like Bona Red Out can be a game-changer before staining, helping to neutralize unwanted tones. check out Bona Red Out.
Top Coating For Durability
This is the final protective layer. We mostly use water-based finishes these days. They dry fast, have low odor, and are much better for indoor air quality. You'll usually apply two to three coats, sometimes more for high-traffic areas. Each coat needs to dry properly, and sometimes a light sanding or screening between coats is recommended to knock down any dust nibs and ensure good adhesion for the next layer. The right topcoat will protect your floor from wear, spills, and scratches for years to come.
| Finish Type | Dry Time (Recoat) | Odor Level | VOCs | Cleanup |
|---|---|---|---|---|
| Water-Based | 2-3 hours | Low | Low | Water |
| Oil-Based | 8-24 hours | High | High | Mineral Spirits |
Choosing The Right Finishing System
When it comes to finishing your hardwood floors, picking the right system is a big deal. It's not just about how the floor looks right after you're done; it's about how it holds up over time, especially with daily wear and tear. You've got a couple of main types to think about: water-based and oil-based finishes. Each has its own set of pros and cons, and what works best really depends on your specific project and what you expect from the floor.
Water-Based Versus Oil-Based Finishes
Water-based finishes have really become the go-to for a lot of pros lately, and for good reason. They dry super fast, which means you can get back to using the room much quicker. Plus, they have way less odor and fewer volatile organic compounds (VOCs), making them a healthier choice for your home or job site. They also tend to stay clear and don't yellow over time like some older finishes. Cleanup is usually a breeze, just soap and water. On the flip side, they can sometimes be a bit trickier to apply perfectly without streaks if you're not careful, and they might not offer quite the same depth of color as oil-based options.
Oil-based finishes, on the other hand, have been around forever. They penetrate the wood nicely, giving it a warm, amber tone that many people love. They're generally pretty forgiving to apply and can create a really tough, durable surface. The downside? They take a lot longer to dry – sometimes a full day between coats – and the smell can be pretty strong, with higher VOCs. Cleanup also requires mineral spirits. For a classic look and a robust finish, oil-based is still a solid choice, but the longer drying times and fumes are definitely things to consider.
Understanding Sheen Levels
The sheen level you choose for your finish plays a big role in both the look and the maintenance of your floor. It's basically how much light the finish reflects.
- Matte: This is the lowest sheen. It gives a very natural, almost raw wood look. It hides minor imperfections and dust really well, making it great for high-traffic areas or if you want a modern, understated look. It's less reflective, so it doesn't show scratches as easily.
- Satin: A step up from matte, satin has a soft luster. It offers a bit more visual interest than matte without being too shiny. It's a popular choice because it balances a natural look with a subtle glow and still does a decent job of hiding wear.
- Semi-Gloss: This level has a noticeable shine. It reflects more light, making the wood appear brighter and highlighting its grain. Semi-gloss is more durable and easier to clean than lower sheens, but it will show scratches and dust more readily.
- Gloss: The highest sheen, gloss finishes are very reflective and create a mirror-like surface. They make the wood look very vibrant and can make a room feel larger. However, they are the most prone to showing every little scratch, scuff, and dust bunny. They're often used for a more dramatic or traditional look.
Selecting Professional-Grade Products
When you're putting in the work to install and finish hardwood floors, you want to use products that are built to last and perform. That's where professional-grade finishes come in. These aren't the same as what you might find in a big box store for DIY projects. Professional products, like those from Bailey Flooring Supplies, are formulated with higher quality resins and solids, which means they offer superior durability, better chemical resistance, and a more consistent finish. For instance, a two-component (2K) water-based finish is engineered for heavy-duty use, providing exceptional abrasion resistance that holds up in busy homes with pets or commercial spaces. Using these higher-performance products means fewer callbacks and a floor that looks great for years. It's an investment in quality that pays off in the long run. If you're looking for top-notch hardwood flooring services in Pea Ridge, Arkansas, consider professionals who use these kinds of materials.
Choosing professional-grade finishes means you're opting for products designed for longevity and performance under real-world conditions. This translates to a more durable floor and greater customer satisfaction.
Bailey Flooring Supplies offers a range of professional-grade water-based finishes. Their products are trusted by contractors for their reliability and the quality of the finish they produce. For example, LOBA EasyFinish is a popular choice known for its durability and ease of application. They also carry primers like LOBA EasyPrime, which helps ensure your topcoat adheres properly and provides a consistent base. Using the right primer is key to a flawless finish, especially when working with different wood species or aiming for specific color results. Remember, the right tools also make a difference; consider professional applicators like the Applicator 90 for large areas or LOBA Hand Pads for detailed work. This attention to detail in product selection and application tools is what separates a professional job from a DIY attempt. You can find these high-quality products at Bailey Flooring Supplies, where they focus on providing contractors with the best materials available. They also offer expert advice to help you select the perfect finish for your project. Get Expert Advice on choosing the right products for your needs.
Applying Water-Based Finishes Effectively
Surface Preparation Before Coating
Getting the floor ready before you even think about pouring finish is probably the most important step. If you skip this, you're just asking for trouble later on. We're talking about making sure the floor is totally clean. No dust, no grit, no old wax, nothing. Vacuuming is a must, but sometimes you need to do more. A good wipe-down with a tack cloth or a recommended cleaner can make a big difference. You want a surface that's smooth and ready to accept the finish without any surprises.
Mixing and Applying Two-Component Systems
When you're dealing with a two-component (2K) water-based finish, you've got to mix it right. These aren't just pour-and-go products. You'll have a base and a catalyst, and the manufacturer's instructions are your bible here. Get the ratio wrong, and you'll have problems with drying, curing, or durability. Once it's mixed, apply it evenly. Using a good quality roller or applicator designed for water-based finishes is key. Thin, consistent coats are better than one thick, sloppy one. Work with the grain of the wood, and don't overwork the product. You want it to lay down smoothly.
Achieving A Streak-Free Application
Nobody wants to see lines or streaks on their finished floor. To avoid this, pay attention to your application technique. Make sure you're using the right amount of finish – not too much, not too little. Keep a wet edge as you work across the floor. This means overlapping your previous pass slightly while the finish is still wet. This helps blend the coats together without leaving marks. Also, pay attention to the environmental conditions. Too hot, too cold, or too humid can all affect how the finish lays down and dries. A little patience and a steady hand go a long way here.
Post-Installation Care And Maintenance
Allowing For Proper Curing Times
So, you've just finished installing that beautiful new hardwood floor. It looks amazing, right? But hold on a second before you start rearranging all your furniture or letting the dog run wild. The finish, especially if it's a water-based product, needs time to fully harden. This process is called curing, and it's different from just drying. Drying means the surface is no longer wet, but curing is when the finish reaches its maximum hardness and durability. Rushing this can lead to scratches, dents, or a dull appearance that you'll regret later. Most manufacturers recommend waiting at least 24-72 hours for light foot traffic and up to two weeks for heavy furniture placement or rugs. Always check the specific product's instructions, as cure times can vary. It’s a small waiting game that pays off big time for the longevity of your floor.
Routine Cleaning Practices
Keeping your hardwood floors looking good long-term is all about regular, gentle cleaning. Forget about those harsh chemical cleaners or soaking wet mops – they can really do a number on the finish and the wood itself. The best approach is usually a simple one. Start by sweeping or vacuuming regularly to pick up dirt and grit that can act like sandpaper underfoot. For actual cleaning, use a pH-neutral cleaner specifically made for hardwood floors. Products like LOBA Parkett Soap R2U are great because they're designed to clean without leaving residue or damaging the finish. A slightly damp mop is usually all you need. Just make sure the mop isn't dripping wet. Also, consider putting felt pads on the legs of all your furniture. It’s a simple step that makes a huge difference in preventing scratches when things get moved around.
Protecting Your Investment
Your new hardwood floor is a significant investment, and taking a few extra steps can help protect it for years to come. Think about high-traffic areas; these spots will show wear faster. Using doormats at all entrances, both inside and out, can trap a lot of the dirt and moisture that gets tracked in. For furniture, those felt pads we mentioned are a lifesaver. They prevent scratches and dents when chairs are pushed in or out. If you have pets, keeping their nails trimmed can help minimize minor scratches. Also, try to maintain a consistent indoor humidity level. Extreme fluctuations can cause wood to expand and contract, potentially leading to gaps or cupping over time. For those with oiled finishes, using a specific maintenance oil like LOBA Nature Oil Care periodically can help refresh the protective layer and keep the wood looking its best. It’s all about consistent, gentle care to keep that beautiful finish looking like new.
Keeping your floors looking great after installation is simple! Regular cleaning and the right products will make sure your floors stay beautiful for years. For the best ways to care for your new floors, check out our selection of top-notch cleaning and maintenance supplies on our website.
Wrapping It Up
So there you have it. Installing hardwood floors might seem like a big job, and honestly, it can be. But by breaking it down step-by-step, like we've gone over, it's totally manageable. Remember to prep your subfloor right, take your time with the layout, and don't rush the finishing. Using the right tools and materials makes a world of difference, trust me. If you've followed along, you should be looking at a beautiful, solid floor that'll last for ages. And hey, if you get stuck, there's always help out there. Good luck with your project!
Frequently Asked Questions
How long does hardwood flooring need to sit in the room before installation?
It's important to let your new hardwood floors get used to the temperature and humidity of your home for at least 48 hours, and sometimes even longer, before you start putting them down. This helps prevent them from shrinking or expanding too much after they're installed.
What's the most important thing to check about the subfloor?
The subfloor needs to be super clean, flat, and dry. Any bumps, dips, or moisture can cause big problems later on, like squeaky floors or boards that don't fit together right.
Can I install hardwood floors over existing flooring?
Usually, no. Hardwood floors need a solid, flat subfloor directly underneath them. You'll likely need to remove any old flooring, like carpet or vinyl, first.
What's the difference between water-based and oil-based finishes?
Water-based finishes dry much faster, have less smell, and don't turn yellow over time. Oil-based finishes are tougher and can give a warmer look, but they take longer to dry and have a stronger smell.
How many coats of finish should I apply?
For most homes, two or three coats of finish are usually enough. If you have a really busy house with lots of foot traffic, you might want to add an extra coat for more protection.
What does 'sheen' mean when talking about floor finishes?
Sheen refers to how shiny the finish is. You can choose from matte (not shiny at all), satin (a soft shine), semi-gloss (a noticeable shine), or gloss (very shiny).
How do I clean my new hardwood floors?
Regular sweeping or vacuuming is key. For cleaning, use a special hardwood floor cleaner that's approved by the manufacturer. Avoid using too much water or harsh chemicals, as these can damage the wood.
What are transition strips for?
Transition strips are used where your hardwood floor meets another type of flooring, like tile or carpet, or at doorways. They create a smooth, safe edge and make the change between different floor types look neat.
0 comments