

So, you're looking to refinish your wooden floors? That's a big job, and picking the right tools makes all the difference. When it comes to sanding, there are a bunch of different wooden floor sanders out there. It can be a bit overwhelming trying to figure out which one is best for what you need to do. This guide is here to break it all down, from the types of sanders and what to look for, to how to use them and keep them running smoothly. We'll help you get that floor looking great without too much fuss.
Key Takeaways
- Different wooden floor sanders are built for different jobs, like heavy-duty refinishing (drum sanders), surface prep (orbital sanders), and detailed work (edge sanders).
- When choosing a sander, think about its motor power, how well it collects dust, and if it's comfortable to hold and use.
- The grit of sandpaper you use matters a lot. Coarse grits are for taking off old material, medium grits for smoothing, and fine grits for that final polish.
- Don't forget accessories like sanding discs, dust bags, and replacement parts. They are important for getting the job done right and keeping your sander in good shape.
- Safety first! Always wear protective gear, follow electrical safety rules, and make sure you have good ventilation when using wooden floor sanders.
Understanding Different Types of Wooden Floor Sanders
Drum Sanders For Heavy-Duty Refinishing
When you've got a floor that's seen better days, maybe with old finishes, deep scratches, or significant wear, a drum sander is your go-to tool. These machines are beasts, designed for serious material removal. They work by spinning a large drum covered in sandpaper, which grinds down the wood surface. Because they're so powerful, they can really level out uneven floors and strip away old coatings quickly. However, they're not for the faint of heart. Drum sanders are heavy, can be tricky to control, and if you're not careful, you can easily gouge the wood. It's crucial to keep the sander moving at all times to avoid creating divots. They're best suited for large, open areas and are typically used for the initial, heavy-duty stages of a refinishing project.
Orbital Sanders For Surface Preparation
Orbital sanders, also known as random orbital sanders, are a bit more forgiving than drum sanders. Instead of just spinning, the sandpaper pad moves in small, random circles. This action is much less likely to leave swirl marks or gouges in the wood, making them ideal for surface preparation and smoothing. They're great for removing lighter finishes, scuffing up old finishes for recoating, or for the final sanding stages before applying a new finish. Orbital sanders are generally lighter and easier to maneuver, making them a good choice for DIYers or for use in smaller spaces or areas where precision is needed. They don't remove material as aggressively as drum sanders, so they might take longer for heavy-duty jobs, but they offer a much smoother finish with less risk of damage.
Edge Sanders For Detailed Work
No floor is perfectly square, and you'll always have edges, corners, and areas around cabinets or doorways that a large drum or orbital sander just can't reach. That's where the edge sander comes in. These are smaller, more compact machines designed specifically for detailed work. They typically use a disc or belt that spins at the edge of the machine, allowing you to get right up against walls and into tight spots. While they're not meant for sanding the entire floor, they are indispensable for blending the sanded areas from the main sander into the perimeter of the room. Proper use of an edge sander ensures a consistent finish across the entire floor surface. They require a steady hand and careful operation to avoid damaging baseboards or creating an uneven transition between the main floor and the edges.
| Sander Type | Primary Use | Power Level | Risk of Gouging | Best For |
|---|---|---|---|---|
| Drum Sander | Heavy-duty refinishing, leveling | High | High | Initial stripping, large open areas |
| Orbital Sander | Surface prep, smoothing | Medium | Low | Final sanding, light refinishing, DIY projects |
| Edge Sander | Detailed work, perimeters | Medium | Medium | Edges, corners, tight spaces |
Key Features To Consider In Wooden Floor Sanders
Motor Power and Durability
When you're looking at floor sanders, the motor is the heart of the machine. You want something with enough power to get the job done without bogging down, especially if you're dealing with tougher wood or old finishes. A motor that's rated higher, often in amps or watts, generally means more power. But it's not just about raw power; it's also about how long that power can last. Look for sanders that are built with durable components. This means checking if the motor housing is robust and if the manufacturer talks about the quality of the internal parts. A well-built motor will handle the heat and strain of sanding for extended periods, which is pretty common on a big floor project. Think about it like this: a cheap motor might work fine for a small closet, but for a whole house, you need something that's built to last. Some brands even offer longer warranties on their motors, which can be a good sign of their confidence in the product's durability.
Dust Collection Systems
Sanding creates a lot of dust, and a good dust collection system is a game-changer. It's not just about keeping your workspace cleaner; it's also about your health. Fine wood dust can be really bad to breathe in. The best sanders have efficient dust collection that captures most of the dust right at the source. This usually involves a built-in vacuum system or a port where you can attach your own shop vac. Some systems are better than others at trapping the fine particles. You'll want to look at how well the dust bag or container seals and how easy it is to empty. If the dust collection isn't great, you'll be spending a lot of time cleaning up, and you'll be breathing in more dust than you should be. A sander with a really good dust collection system can make a huge difference in how pleasant and safe the job is.
Ergonomics and Weight
Using a floor sander for any length of time can be tough on your body. That's where ergonomics and weight come into play. A sander that's well-balanced and not too heavy will be much easier to maneuver and control. This is especially important when you're trying to get an even finish across a large area. Look for features like comfortable grip handles and controls that are easy to reach and operate. Some sanders are designed to be more compact or have a lower profile, which can help with getting into tighter spaces or just making them feel less cumbersome. The weight distribution matters too; a sander that feels balanced in your hands will reduce fatigue and strain on your arms and back. If you're going to be using the sander for a full day or multiple days, investing in one that's comfortable to operate is a really smart move for your own well-being.
Choosing The Right Grit For Your Sanding Project
Picking the right grit sandpaper is a big deal when you're sanding wood floors. It's not just about making the wood smooth; it's about how you prepare it for whatever comes next, like a new finish. Using the wrong grit can either leave your floor looking rough or take way too long to get it right.
Think of it like this: you start with the roughest grit to get the big stuff off, then move to finer grits to make it smooth. It's a step-by-step process, and you don't want to skip steps or use the wrong ones.
Coarse Grits For Initial Material Removal
When you're starting out, especially if the floor has old finishes, deep scratches, or is just really uneven, you'll want to grab some coarse grit sandpaper. We're talking about grits like 20, 24, or 36. These are like the heavy hitters. They're designed to take off a good amount of material quickly. You use these to get rid of old wax, paint, or deep gouges. If you're refinishing a floor that's never been touched before or has some serious damage, this is where you begin. It might seem aggressive, but it's necessary to get a clean slate. Just remember, after using coarse grits, you'll definitely need to move to finer ones to smooth things out. You can't just slap a finish on after using a 20-grit paper; it'll look terrible.
Medium Grits For Smoothing Surfaces
After you've tackled the heavy lifting with coarse grits, it's time to move on to the medium grits. These usually fall in the range of 50 to 80. Grits like 60 or 80 are perfect for smoothing out the marks left by the coarser sandpaper. They start to refine the surface, making it feel much better under your hand. This is where you really start to see the floor taking shape and getting ready for the final stages. If you're just doing a light screen and recoat on an existing finish, you might even start with a medium grit like 80 or 100, skipping the really coarse stuff altogether. It all depends on the condition of the floor you're working with.
Fine Grits For Final Preparation
Now we're getting to the good stuff – the fine grits. We're talking about grits from 100 up to 220. These are your finishing touches. Grits like 100, 120, and 150 are used to get the floor really smooth after the medium grits. They remove any faint scratches and create a surface that's ready for stain or finish. For a really high-end look, some pros even go up to 180 or 220 grit. The finer the grit, the smoother the wood will feel and the better your finish will look. It's all about creating that perfect canvas. Using a fine grit ensures that your stain will absorb evenly and your finish will lay down without any imperfections showing through. It's the last chance to make sure everything is perfect before you apply that protective coating. You can find a good selection of these finer grits, like 80g and 120g, to help you achieve that polished look.
Essential Accessories For Wooden Floor Sanders
Sanding Discs and Belts
When you're working with floor sanders, the right abrasives are just as important as the machine itself. For drum sanders, you'll be using sanding belts, typically 8 inches wide. The grit you choose depends on the condition of the floor and how much material you need to remove. For edgers and smaller orbital sanders, you'll use sanding discs, often 7 inches in diameter. It's important to match the disc type to your sander – some are hook-and-loop, while others are designed for specific bolt-on systems. Always have a good stock of various grits on hand, from coarse for initial passes to fine for final smoothing. For example, Bona Blue 8" Belts are a solid choice for drum sanders, and 7" x 5/16" Edger Discs are common for detail work.
Dust Bags and Filters
Keeping dust under control is a big deal, not just for your health but for the quality of your finish. Most sanders come with a dust collection system, but you'll need bags or containers to catch the dust. These can range from simple cloth bags to more advanced vacuum systems. Regularly checking and replacing these bags, along with any filters, is key to maintaining good airflow and efficient dust collection. A clogged bag means more dust in the air, which can ruin a finish and create a mess. Consider a large sander bag for bigger jobs to minimize interruptions.
Replacement Parts And Maintenance Kits
Like any tool, floor sanders need upkeep. Having a few common replacement parts on hand can save you from project delays. This might include things like drive belts, motor brushes, or even replacement pads for orbital sanders. Many manufacturers offer maintenance kits that bundle common wear items. Keeping your sander in good working order with regular cleaning and timely part replacement will help it perform better and last longer. It's always a good idea to check your owner's manual for recommended maintenance schedules and parts.
Professional Techniques For Using Wooden Floor Sanders
Proper Sanding Direction
When you're using a floor sander, the direction you move it matters a lot. For the initial passes, especially with a drum sander, you'll want to go with the grain of the wood. This means moving the sander parallel to the longest edge of the boards. Going against the grain can leave noticeable scratches that are tough to fix later. As you move to finer grits, you might switch to a diagonal pattern or even across the grain for a short period, but always finish with the grain. This helps to create a smooth surface that's ready for finishing. Think of it like brushing paint; you want smooth, even strokes in the same direction.
Achieving A Seamless Finish
Getting a finish that looks like it's part of the wood, not just sitting on top, takes practice. It starts with proper sanding, making sure you've removed all the old finish and scratches. After sanding, you need to clean the floor really well. Dust is the enemy of a good finish. Use a good vacuum and then a tack cloth. When you apply your finish, whether it's water-based or oil-based, do it in thin, even coats. Don't try to rush it by putting on a thick layer. Using the right applicator, like a good quality roller or a T-bar applicator, makes a big difference. For water-based finishes, you'll typically need two to three coats, and for commercial jobs, maybe even four. Always let each coat dry properly before applying the next one. A light sanding with a very fine grit (like 220 or higher) between coats can help smooth out any imperfections, but make sure to clean up all the dust afterward.
Avoiding Common Sanding Mistakes
There are a few common slip-ups people make when sanding floors. One is not sanding enough, leaving old finish or deep scratches behind. Another is skipping grits – going from a coarse grit to a very fine one without using the grits in between. This means you won't get a smooth enough surface. Stopping the sander in one spot for too long is a big one; it can create dips or uneven spots in the floor. Also, not cleaning up dust properly between sanding stages and before applying finish is a recipe for disaster. You'll end up with a gritty, uneven finish. Finally, trying to sand too close to walls or corners with a large sander can cause damage. That's where edge sanders and hand scrapers come in handy.
Here’s a quick rundown of what to watch out for:
- Stopping the sander in one place: Always keep the sander moving.
- Skipping sandpaper grits: Use a progression of grits (e.g., 60, 80, 100, 120).
- Incomplete dust removal: Vacuum and tack thoroughly after each sanding stage.
- Applying finish over dust: This leads to a rough, speckled finish.
- Using the wrong direction: Always sand with the wood grain for the final passes.
Proper preparation is key. If you don't get the sanding right, no amount of finishing will make the floor look good. Take your time and pay attention to the details.
Maintenance And Care For Your Wooden Floor Sanders
Keeping your floor sanders in good shape is pretty important if you want them to last and do a good job. It’s not super complicated, but you do need to pay attention to a few things after you use them. Think of it like taking care of any tool you rely on – a little effort goes a long way.
Regular Cleaning Procedures
After you finish sanding, the first thing you should do is clean out the dust. Seriously, get as much of it out as you can. This means emptying the dust bag or canister and wiping down the exterior. If you can, take off any covers or plates that give you access to the sanding drum or pad and clean those areas too. A stiff brush works well for getting dust out of nooks and crannies. Don't forget to wipe down the power cord and the housing. A clean machine runs better and lasts longer.
Inspecting Wear And Tear
While you're cleaning, take a moment to look over the machine. Check the sanding belt or drum for any signs of excessive wear. Are the brushes on the motor looking worn down? How about the power cord – any nicks or cuts? If you see anything that looks like it's about to give out, it’s better to replace it before it causes a bigger problem or, worse, a safety hazard. It’s also a good time to check if any screws or bolts have come loose.
Proper Storage For Longevity
Once your sander is clean and you've checked it over, store it somewhere dry and protected. A garage or workshop is usually fine, but try to keep it away from moisture and extreme temperatures. If you have the original case or a sturdy cover, use it. This protects it from dust and accidental bumps. Storing your sander properly prevents rust and damage, keeping it ready for your next project.
| Component | Cleaning Method |
|---|---|
| Dust Bag/Canister | Empty and brush out residue |
| Exterior Housing | Wipe with a damp cloth |
| Sanding Drum/Pad | Brush and compressed air (if available) |
| Power Cord | Inspect for damage, wipe clean |
| Motor Brushes | Inspect for wear, clean gently if needed |
Taking care of your equipment isn't just about keeping it looking good; it's about making sure it performs reliably when you need it most. Regular maintenance can prevent costly repairs and downtime, saving you time and money in the long run. It's a small investment of time that pays off significantly.
Safety Precautions When Operating Wooden Floor Sanders
Personal Protective Equipment (PPE)
Working with floor sanders means dealing with dust, noise, and potential debris. It's not just about comfort; it's about protecting yourself. Always wear a good quality dust mask or respirator to keep fine wood particles out of your lungs. Safety glasses are a must to shield your eyes from flying particles. Hearing protection, like earplugs or earmuffs, is also important, especially when using drum sanders, as they can get quite loud. Sturdy work boots and gloves will protect your feet and hands.
Electrical Safety Guidelines
Most floor sanders run on electricity, so keeping those cords in good shape is key. Always inspect the power cord for any nicks, cuts, or fraying before you plug it in. If you see any damage, don't use the machine until it's repaired or replaced. Make sure your sander is plugged into a properly grounded outlet. If you're working in a damp area, use a GFCI (Ground Fault Circuit Interrupter) outlet or plug for added protection against electrical shock. Keep cords away from water and high-traffic areas where they could be tripped over or damaged.
Dust Control and Ventilation
Sanding creates a lot of dust, and breathing that in isn't good for you. Most modern sanders have dust collection systems, but they aren't perfect. Make sure the dust bag or collection container is emptied regularly. For really dusty jobs, consider using a sander with a more advanced dust extraction system, like those that connect to a shop vacuum. Good ventilation in the work area is also important. Open windows and doors if possible, or use fans to help move the dust away from your breathing zone. This not only helps keep the air cleaner but also improves visibility while you're working.
Evaluating Brands And Models Of Wooden Floor Sanders
When you're looking to buy a floor sander, it can feel like there are a million options out there. It’s not just about picking one that looks good; you really need to think about what brands have a solid reputation and which specific models are built to last and do the job right. We've seen a lot of different sanders come and go over the years, and some brands just consistently deliver.
Reputable Manufacturers In The Industry
Some names just pop up again and again when you talk to experienced flooring pros. Companies like Bona and Lagler are well-known for making tough, reliable equipment that holds up on job sites. They've been around for a while, and that usually means they know what they're doing. You'll also see brands like Festool, which are known for their dust collection systems and precision, though they often come with a higher price tag. It's worth looking into manufacturers that specialize in flooring tools, as they tend to understand the specific needs of the trade better than a general tool company.
Comparing Features Across Models
Once you've got a few brands in mind, you need to compare the actual sanders. Don't just look at the price. Think about the motor power – a stronger motor means it can handle tougher jobs and won't bog down as easily. How good is the dust collection? This is a big one for your health and the cleanliness of the job site. Some sanders have better systems than others. Also, consider the weight and how it feels to use. A sander that's too heavy or awkward will make the job much harder and can lead to mistakes. Look at the details: is the handle adjustable? Does it have variable speed settings? These little things can make a big difference in how well you can work.
Reading Professional Reviews And Testimonials
Don't just take our word for it, or the manufacturer's marketing claims. See what other pros are saying. Online reviews, forums, and even talking to other contractors can give you real-world insights. Look for reviews that talk about durability, ease of use, and how well the sander performs on different types of wood or finishes. Sometimes, a testimonial from someone who does this for a living, day in and day out, is more helpful than any spec sheet. You can often find these on supplier websites or dedicated flooring forums. For example, when looking at finishes, you might find that a product like Loba Easy Finish is frequently recommended by pros for its balance of performance and ease of application, which is a good sign for any tool or material you're considering.
| Feature | Brand A Model X | Brand B Model Y | Brand C Model Z |
|---|---|---|---|
| Motor Power (Watts) | 1200 | 1000 | 1350 |
| Dust Collection % | 95% | 90% | 97% |
| Weight (lbs) | 45 | 40 | 50 |
| Price ($) | 800 | 700 | 950 |
Rental Versus Purchase Of Wooden Floor Sanders
Assessing Project Scope and Frequency
Deciding whether to rent or buy a floor sander really comes down to how much work you've got lined up. If you're just doing a single room, maybe a small hallway, renting makes a lot of sense. You get access to professional-grade equipment without the big upfront cost. Plus, you don't have to worry about storing a bulky machine afterward.
But, if you're a contractor who sands floors regularly, or if you have a large house with multiple rooms needing attention, buying might be the way to go. Owning your equipment means it's always available when you need it, and you can get familiar with its quirks. Think about the total square footage you'll be covering over the next year or two. A big project or frequent smaller jobs can quickly make the cost of rentals add up.
Cost-Benefit Analysis Of Renting
Renting a floor sander can seem cheaper initially. You pay a daily or weekly rate, and that's it. However, you also need to factor in the cost of sandpaper, which you'll buy regardless. Sometimes, rental places charge extra for things like delivery or specific types of sandpaper. If you end up needing the sander for longer than you planned, those daily rates can become quite expensive. It's worth doing the math to see how many rental periods would equal the cost of buying a decent used or entry-level new sander.
Investment In Quality Equipment
Buying a floor sander is an investment, no doubt about it. You're paying for the convenience, the reliability, and the ability to use it whenever a project comes up. High-quality sanders, especially those with good dust collection systems, can make a huge difference in the final finish and your overall work experience. If you plan on doing this kind of work more than a couple of times, owning a good piece of equipment can pay for itself over time. Plus, you can often sell it later if you decide to upgrade or stop doing the work. For professionals, having reliable tools is part of the business. It's about having the right tool for the job, every time. Consider looking into brands known for durability, like those often found at specialized suppliers. Bailey Flooring Supplies has a range of professional-grade equipment and materials that contractors trust.
Understanding Dust Containment With Wooden Floor Sanders
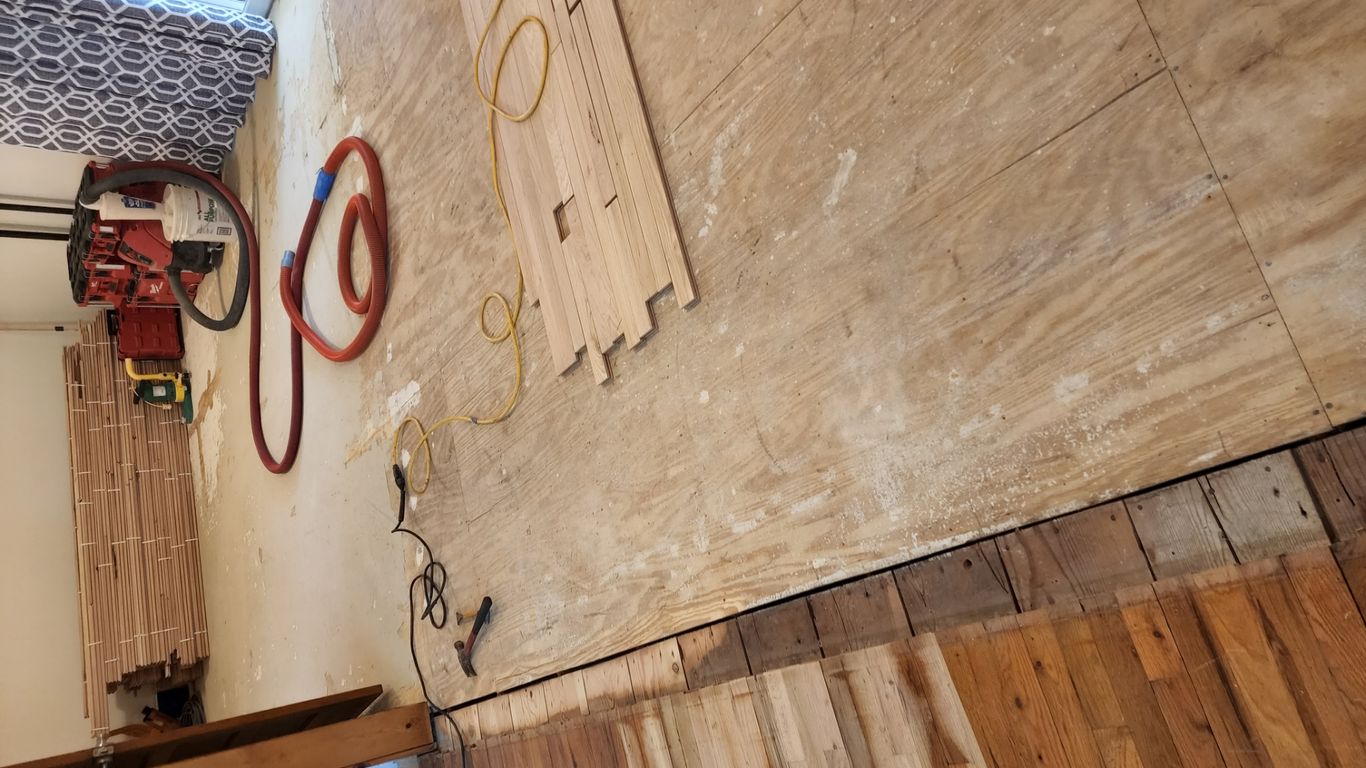
When you're sanding wood floors, dust is a big issue. It gets everywhere, and breathing it in isn't good for you. That's why dust containment systems on sanders are so important. They help keep your work area cleaner and make the air safer to breathe.
The Importance of Efficient Dust Collection
Good dust collection isn't just about keeping things tidy; it's about efficiency and health. When a sander effectively captures dust as it works, you get a cleaner surface to see your progress. This means you're less likely to miss spots or over-sand areas. Plus, less dust floating around means a healthier environment for you and anyone else in the building. Think about it: a sander that kicks up a ton of dust makes the whole job harder and messier. A good system pulls that dust right into a bag or a vacuum.
Types of Dust Extraction Systems
There are a few ways sanders handle dust. Some have built-in dust bags that collect the fine particles. These are usually okay for smaller jobs, but you have to stop and empty them pretty often. For bigger projects, you'll want a sander that can connect to a separate vacuum system, often called a dust collection system (DCS). These are way more powerful and can handle a lot more dust. Brands like Bona make dedicated vacuums designed to work with their sanders, pulling dust away as you sand. Some sanders, like certain Mirka models, are designed with vacuum-ready ports to hook up to your own shop vac or a specialized dust extractor. The key is how well the system pulls the dust away from the sanding surface and into the collection unit.
Maintaining Optimal Vacuum Performance
Even the best dust collection system won't work well if it's not maintained. You need to keep the dust bags or filters clean. If a bag is full or a filter is clogged, the vacuum can't pull air through effectively, and dust will start escaping. Regularly check and empty dust bags. For vacuums with filters, clean or replace them according to the manufacturer's instructions. Also, make sure the hose connections are tight and there are no leaks. A good vacuum system is a big help, but it needs a little attention to keep doing its job right. Keeping your vacuum system running smoothly means less dust in the air and a better finish on the floor.
Keeping your workspace clean while sanding wooden floors is super important. Our article, "Understanding Dust Containment With Wooden Floor Sanders," breaks down how to keep that pesky dust from spreading everywhere. Learn simple tricks to make your sanding job much tidier and healthier. Want to see the best tools for the job? Visit our website today!
Wrapping Up Your Sanding Project
So, picking the right sander is a big deal for getting your wood floors looking good. It’s not just about grabbing the first thing you see. Think about the size of your job, what kind of wood you’re working with, and how much time you’ve got. Whether you go for a big drum sander for a whole house or a smaller edge sander for touch-ups, making the right choice now saves you headaches later. Don't be afraid to ask for advice if you're unsure. Getting the right gear means a smoother job and floors you'll be proud of for years to come. Happy sanding!
Frequently Asked Questions
What's the main difference between a drum sander and an orbital sander?
Think of a drum sander like a powerful vacuum cleaner for your floor, but it uses a big spinning drum to take off a lot of wood fast. It's great for really old or damaged floors that need a lot of work. An orbital sander, on the other hand, moves back and forth in a circular motion, kind of like how you might scrub a spot. It's gentler and better for smoothing out the surface or for floors that don't need major repairs.
Do I really need an edge sander?
You might! An edge sander is a smaller, more focused tool that gets into those tight spots, like along walls or around cabinets, where the big drum sander can't reach. If you want your whole floor to look perfectly smooth and finished, an edge sander is usually necessary for those tricky areas.
How do I know what grit sandpaper to use?
Grit is like the coarseness of the sandpaper. You start with a coarse grit (like 36 or 60) to quickly remove old finish or deep scratches. Then, you move to a medium grit (like 80 or 100) to smooth things out. Finally, you use a fine grit (like 120 or 150) for that super smooth finish before you put on the new coating. It's like going from rough to smooth in steps.
Why is dust collection so important with floor sanders?
Sanding wood creates a LOT of fine dust. If your sander doesn't have a good dust collection system, that dust will fly everywhere – into your air, your furniture, and even your lungs! Good dust collection keeps your workspace cleaner, makes it safer to breathe, and helps you see what you're doing better.
Can I just rent a sander, or should I buy one?
It really depends on your project. If you're only sanding one or two rooms and don't plan on doing it again soon, renting is probably more cost-effective. But if you have a big house, multiple projects planned, or you're a professional, buying a good quality sander is a better investment in the long run.
What safety gear do I need when using a floor sander?
Safety first! You'll definitely need safety glasses to protect your eyes from flying debris. A dust mask or respirator is super important to avoid breathing in all that fine wood dust. Good ear protection is also a smart idea because these machines can be loud. And sturdy work clothes and closed-toe shoes are a must.
How do I make sure my floor looks smooth and not streaky?
The key is to sand in a consistent direction, usually with the grain of the wood. Overlap each pass slightly so you don't miss any spots or create new lines. Also, make sure you're using the right grit progression, moving from coarser to finer grits, and always vacuuming up the dust between each grit change. Taking your time and being methodical is crucial.
What's the best way to clean up after sanding?
After you've finished sanding with the finest grit, vacuum the floor thoroughly. Then, use a tack cloth or a slightly damp (not wet!) microfiber cloth to pick up any remaining fine dust. This step is super important because any dust left behind can get trapped in your new finish, making it look bumpy or cloudy.

0 comments