

So, you're looking to put a finish on your wood floors and are wondering about oil-based polyurethane. It's been around for ages, and for good reason. It gives a really nice, classic look that people love. But is it the right choice for your project? We're going to break down what you need to know about oil based polyurethane for floors, from how it performs to how to put it on. Let's get started.
Key Takeaways
- Oil-based polyurethane offers a warm, traditional look and is known for its toughness, making it a solid choice for hardwood floors.
- It provides good protection against wear and tear, especially in areas that get a lot of foot traffic.
- Proper preparation of the floor surface is super important for a good finish. This means cleaning and sanding it just right.
- When applying, use thin, even coats. Watch out for the recoat times; they're different from water-based options.
- Understand the different sheen levels available, from glossy to matte, to get the exact look you want for your floors.
Understanding Oil Based Polyurethane For Floors
The Enduring Appeal Of Oil-Based Finishes
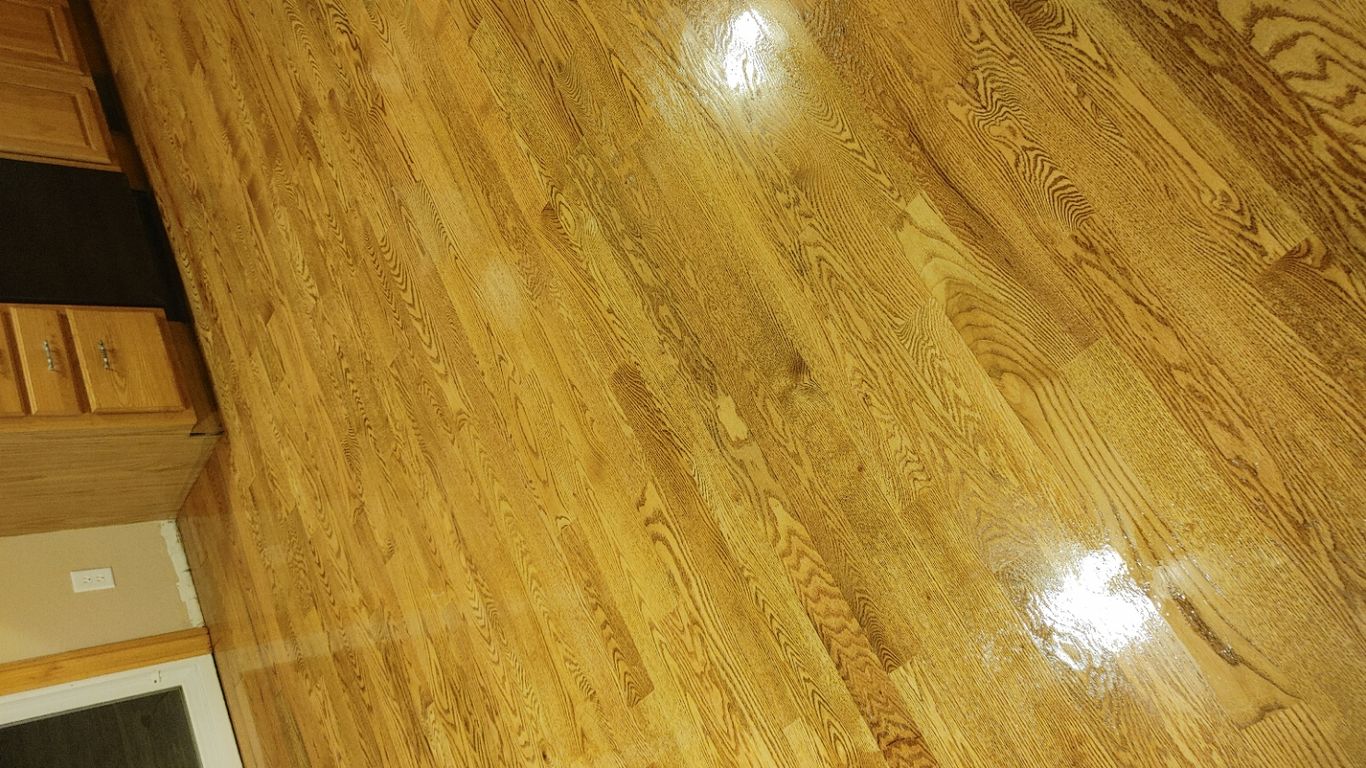
For a long time, oil-based polyurethane was the go-to for finishing hardwood floors. It’s known for creating a hard, durable surface that can really stand up to daily wear and tear. Many folks still prefer it because it gives wood a warm, amber tone that deepens over time, giving floors a classic, rich look. This traditional finish has a certain charm that many homeowners and contractors appreciate, especially for older homes or styles that call for that vintage feel. It's a finish that has proven itself over decades, and its reliability is a big part of its lasting popularity.
Key Characteristics Of Oil-Based Polyurethane
Oil-based polyurethane is a solvent-based finish. This means it uses mineral spirits or similar solvents to dissolve the resins and polymers. When you apply it, these solvents evaporate, leaving behind a protective film. This process is what gives it that distinct, strong odor and requires good ventilation during application and drying. The resulting finish is typically quite hard and resistant to abrasion and chemicals. It also tends to impart a slight amber color to the wood, which can enhance the natural tones of many wood species. The slow drying time is a defining characteristic, often requiring 8-24 hours between coats, which is significantly longer than its water-based counterparts. Cleanup also requires mineral spirits.
When To Choose Oil-Based Over Water-Based
So, when does oil-based polyurethane make more sense than the newer water-based options? If you're aiming for that deep, warm amber glow that only oil-based finishes can provide, this is your choice. It’s also a solid pick for high-traffic areas where maximum hardness and abrasion resistance are top priorities, though modern water-based finishes are catching up fast. If you're working on a project where the smell and longer drying times aren't a major concern, and you appreciate the traditional look it imparts, oil-based is still a strong contender. It's a tried-and-true product that, when applied correctly, offers excellent protection and a beautiful, classic finish. For those who prefer the ease of water cleanup, however, water-based options are usually the better route.
Evaluating Durability And Performance
Abrasion Resistance For High-Traffic Areas
When you're putting a finish on a floor, especially one that's going to see a lot of action, you need it to hold up. We're talking about floors in busy homes, maybe with kids or pets, or even commercial spots. Oil-based polyurethane is known for its toughness. It creates a really hard surface that can take a beating. Think about it – it's got to resist scratches from shoes, furniture being moved, and just the general wear and tear of daily life. This kind of protection is what keeps your floors looking good for years, not just months.
Chemical And Moisture Protection
Floors aren't just about foot traffic, right? Spills happen. Water gets tracked in. Oil-based polyurethanes do a pretty good job of creating a barrier against liquids and common household chemicals. This means that if you spill your coffee or your dog has an accident, the finish is going to help prevent it from soaking into the wood. It’s not completely waterproof, of course, but it offers a solid defense. This is especially important in areas like kitchens or entryways where spills are more likely.
Long-Term Clarity And Color Stability
One thing to consider with oil-based finishes is how they age. They tend to have a warmer, amber tone when first applied, and this can deepen over time. While some people really like that classic, aged look, it's something to be aware of if you're going for a very light or natural wood color. Unlike some finishes that might fade or change unpredictably, oil-based polyurethanes tend to maintain their color stability, albeit with that characteristic ambering. It's a predictable change, which is good for planning the look of your floor over the long haul.
Application Techniques For A Professional Finish
Getting a professional look on your hardwood floors with oil-based polyurethane isn't just about the product itself; it's really about how you put it on. Surface preparation is paramount, and I can't stress that enough. If you skip this, you're just asking for trouble down the road, like peeling or a finish that just doesn't stick right.
Surface Preparation Is Paramount
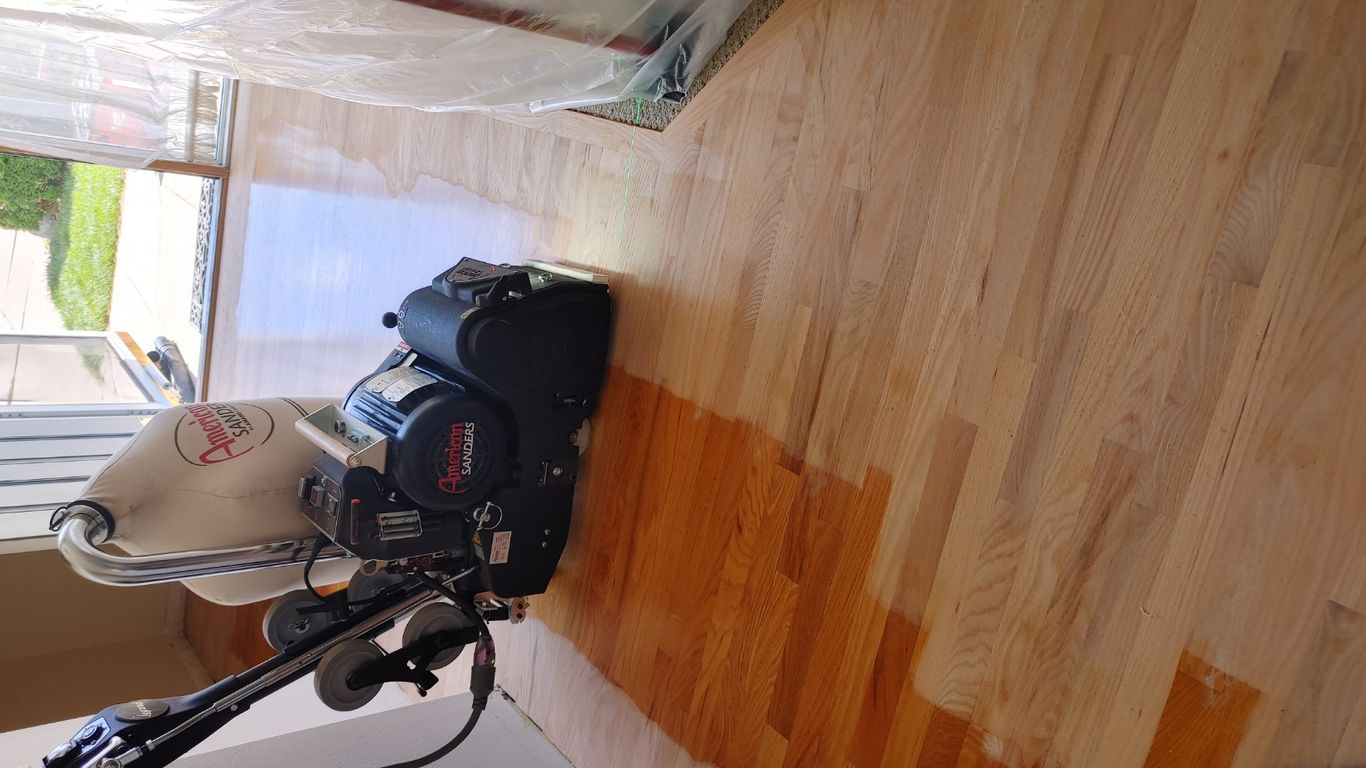
Before you even think about opening a can of poly, the floor needs to be spotless. We're talking dust-free, clean, and smooth. This means thorough vacuuming, maybe even a tack cloth wipe-down. Any grit or debris left behind will get sealed into the finish, and you'll see it every time you look at the floor. Sanding is key here, too. You want to make sure the surface is even and free of old finishes or imperfections. For a really good prep, you might want to look into quality sanding equipment to get that perfect surface.
Proper Mixing and Application Methods
Once you're prepped, it's time to mix. Oil-based poly needs a good stir, but don't whip it around like you're making meringue – that just introduces air bubbles. Gently mix it to get everything incorporated. When you apply it, use a good quality brush or applicator designed for oil-based finishes. Work in thin, even coats. Trying to lay it on too thick is a common mistake that leads to drips and uneven drying. Always work with the grain of the wood, and try to maintain a wet edge so you don't get lap marks. This means moving steadily and not stopping in the middle of a section.
Achieving a Smooth, Streak-Free Surface
To get that smooth, streak-free look, consistency is everything. Apply your coats evenly, and pay attention to the recoat times specified by the manufacturer. If you sand between coats (which is often recommended for a super smooth finish), make sure you clean up all the dust thoroughly. A light sanding with a fine-grit paper or screen can knock down any imperfections. The goal is to build up thin layers of protection that blend together perfectly. It takes patience, but the result is a floor that looks like it was done by a pro.
Remember, oil-based polyurethane has a distinct odor and higher VOCs compared to water-based options. Make sure you're working in a well-ventilated area, and consider using a respirator to protect yourself. Proper ventilation is not just about comfort; it's about safety and allowing the finish to cure correctly.
Drying Times And Curing Processes
Understanding Recoat Windows
When you're working with oil-based polyurethane, patience is key. You can't just slap on coat after coat without letting the previous one do its thing. Each product has a specific window for recoating, and messing this up can lead to problems down the road, like peeling or a finish that just doesn't bond right. For most oil-based polys, you're looking at a recoat window that can stretch from 8 to 24 hours. It really depends on the temperature and how humid it is in the room. If you miss that window, you might have to lightly scuff sand the surface before applying the next coat to make sure it sticks properly. It’s not the end of the world, but it’s an extra step that adds time to your project. Always check the can for the exact times recommended by the manufacturer.
Full Cure Versus Light Traffic
This is where a lot of folks get confused. Just because a floor feels dry to the touch and you can walk on it lightly doesn't mean it's ready for the real world. That 'dry to the touch' feeling usually means it's ready for another coat, or maybe some very light foot traffic with clean socks. But the full cure? That's a whole different story. This is when the polyurethane has hardened completely and reached its maximum durability. For oil-based finishes, this can take anywhere from 7 to 30 days, sometimes even longer. During this time, you need to be super careful. Avoid dragging furniture, dropping things, or letting pets run wild on the floor. Even small scratches can compromise the finish before it's fully hardened.
Factors Affecting Drying Speed
So, what makes one floor dry faster than another? A few things, really. Temperature and humidity are the big players. If it's cold and damp, your polyurethane is going to take ages to dry. Ideally, you want a consistent temperature between 65-75°F (18-24°C) and relative humidity around 50%. Good ventilation also helps a lot; opening windows or using fans can speed things up by circulating air and helping the solvents evaporate. The thickness of the coats you apply makes a difference too. Thin, even coats dry much faster than thick, gloppy ones. And don't forget the type of wood itself – some woods are more porous and might hold onto moisture longer.
| Factor | Impact on Drying Time |
|---|---|
| Temperature | Lower temps slow drying; higher temps speed it up. |
| Humidity | High humidity slows drying; low humidity speeds it up. |
| Ventilation | Good airflow speeds drying; stagnant air slows it down. |
| Coat Thickness | Thin coats dry faster than thick coats. |
| Wood Type | Porous woods may dry slower. |
Choosing The Right Sheen Level
Gloss: Maximum Shine and Reflectivity
For a floor that really pops, gloss is the way to go. It reflects a lot of light, making your floors look super shiny and almost like a mirror. This look can make a room feel bigger and brighter, especially if you've got good lighting. It's a bold choice, and it really shows off the wood's grain. Just remember, that high shine can also show every little scuff mark or speck of dust, so it needs regular cleaning to stay looking its best. It’s a classic look that’s hard to beat if you want that high-impact finish.
Semi-Gloss: A Balanced Luster
Semi-gloss hits a sweet spot between a full-on shine and a more subdued look. It’s got a nice sheen that catches the light without being overwhelming. This makes it a really popular choice for most homes because it’s durable and looks good without demanding constant attention. It’s easier to keep clean than a full gloss finish, and it still adds a bit of brightness to the room. If you want a finish that’s got some shine but is also practical for everyday life, semi-gloss is a solid option.
Satin: Soft, Subtle Sheen
Satin finish is probably the most common choice for hardwood floors, and for good reason. It gives the wood a soft, low-sheen look that feels natural and elegant. It doesn't reflect a ton of light, which means it hides minor imperfections and everyday wear pretty well. This makes it super practical for busy households. The look is understated and sophisticated, letting the natural beauty of the wood take center stage. It’s a safe bet that looks great in almost any setting.
Matte: Natural, Low-Sheen Appearance
If you’re going for a really natural, almost unfinished look, matte is your best bet. This finish has almost no shine at all, letting the wood’s true color and texture come through without any glare. It’s perfect for modern or minimalist designs, or when you want the wood to look as raw as possible while still being protected. Because it’s so low-sheen, it’s really good at hiding dust and minor scratches. It’s the ultimate choice for a subtle, sophisticated finish that lets the wood speak for itself.
| Sheen Level | Light Reflection | Durability (Perceived) | Maintenance Ease |
|---|---|---|---|
| Gloss | Very High | Moderate | Low |
| Semi-Gloss | High | Good | Medium |
| Satin | Medium | Good | High |
| Matte | Low | Good | Very High |
Maintenance And Care For Oil-Based Floors
Regular Cleaning Best Practices
Keeping your oil-based polyurethane floors looking their best is all about consistent, gentle care. The key is to avoid anything that could strip away the finish or leave a dulling residue. Regular sweeping or vacuuming is your first line of defense against grit and dirt that can scratch the surface over time. Make it a habit to sweep up dry debris daily, especially in high-traffic areas. When it comes to damp cleaning, less is more. Always use a well-wrung-out mop – you don't want standing water on your wood floors, ever. Think of it as a quick wipe-down rather than a deep scrub. This simple routine will go a long way in preserving the beauty and longevity of your finish.
Recommended Cleaning Products
When you need to do more than just sweep, choosing the right cleaner is super important. For oil-based polyurethane, you want something that cleans effectively without being harsh. Forget those all-purpose cleaners or anything with ammonia or bleach; they can really damage the finish. Instead, look for pH-neutral cleaners specifically designed for hardwood floors. Products like LOBA Parkett Soap R2U are a solid choice because they're formulated to clean wood without stripping the protective oils or leaving behind any sticky residue. Always check the product label to ensure it's safe for oil-finished floors. Using the wrong cleaner is a fast track to a dull, damaged floor, so take a moment to pick the right one.
Protecting Your Finish From Wear
Beyond regular cleaning, there are a few other things you can do to protect your oil-based floors. Furniture pads are a must. Stick felt pads on the bottom of all your furniture legs – chairs, tables, sofas, you name it. This prevents those nasty scratches that can happen when furniture is moved. For rugs, use ones with a non-slip backing that won't trap moisture. Also, consider using mats at entryways to catch dirt and moisture before it even gets onto your floors. If you have pets, keeping their nails trimmed can make a big difference too. These small steps add up to significant protection for your investment.
| Area of Concern | Recommended Action |
|---|---|
| Furniture Legs | Apply felt pads |
| Entryways | Use durable mats |
| High-Traffic Zones | Sweep/vacuum daily, use area rugs |
| Pet Nails | Keep trimmed |
| Spills | Wipe up immediately with a dry or damp cloth |
Addressing Common Concerns With Oil-Based Polyurethane
Odor and VOC Considerations
Oil-based polyurethane is known for its strong smell and higher levels of Volatile Organic Compounds (VOCs). This can be a real issue, especially if you're working in a home with people or pets, or if you're sensitive to fumes. The odor can linger for days, sometimes even weeks, after application. Proper ventilation is absolutely key here – think open windows, fans, and maybe even respirators if you're particularly concerned. It's not just about comfort; high VOCs can be a health concern. Many pros and DIYers are looking for alternatives because of this. If you're doing a floor in a living space, you really need to plan around this. It means keeping the area clear and well-ventilated for an extended period. Some people find that the smell eventually dissipates, but it's a process. You've got to be patient and prioritize safety.
Yellowing Over Time
One of the most noticeable changes with oil-based poly over the years is its tendency to yellow. This isn't necessarily a bad thing for all wood floors; sometimes, that warm, amber tone can look quite nice, especially on certain wood species like oak. It can give the floor a richer, more aged appearance. However, if you're aiming for a very light or natural look, this yellowing can be a problem. It can alter the original color of the wood, making it appear warmer or even slightly orange over time. This is due to the natural oils in the finish oxidizing. If you want to keep the wood looking as close to its natural color as possible, you might want to consider a water-based finish instead, as they are designed to stay clear. It's a trade-off between that classic oil-based look and long-term color stability.
Cleanup Procedures
Cleaning up after using oil-based polyurethane is a bit more involved than with water-based products. You can't just use soap and water here. You'll need mineral spirits or a similar solvent to clean your brushes, rollers, and any spills. This means having the right supplies on hand before you start. Mineral spirits can be harsh, so you'll want to work in a well-ventilated area during cleanup too. Dispose of rags soaked in mineral spirits properly, as they can be a fire hazard. It's a good idea to have a designated container for these rags. While it's a bit more work, proper cleanup is important for maintaining your tools and preventing messes from becoming permanent.
Professional Grade Oil Based Polyurethane For Floors
Why Professionals Trust Certain Brands
When you're looking for the best protection for hardwood floors, especially in high-traffic areas, professional-grade products are the way to go. These aren't your average off-the-shelf finishes. They're formulated with higher solids content and tougher resins, meaning they lay down a thicker, more durable film with fewer coats. Contractors swear by them because they stand up to daily wear and tear, resist scratches, and hold their color over time. Plus, they often have better leveling properties, which helps avoid those dreaded streaks and lap marks that can ruin a good-looking floor. It’s about getting a finish that lasts and keeps clients happy, reducing the need for callbacks.
Benefits Of Contractor-Grade Products
Contractor-grade finishes offer a noticeable step up in performance. They're designed for durability, meaning they can handle the abuse of busy households with kids and pets, or even commercial spaces. You'll find they offer superior resistance to chemicals and moisture, which is a big plus in kitchens and entryways. Another key benefit is their long-term clarity. Unlike some finishes that can yellow or amber over time, professional products are formulated to maintain their original appearance, keeping your wood looking its best for years. This consistency is what pros rely on.
Where To Source Professional Finishes
Finding these pro-level products used to mean going to specialized flooring supply stores. Now, thankfully, many of these high-performance finishes are more accessible. Bailey Flooring Supplies, for instance, carries a range of contractor-grade options that are trusted by professionals. They understand that flooring pros need reliable products that perform consistently, project after project. When you're investing in your floors, choosing a finish that's built for the job makes all the difference. You can often find these at dedicated hardwood flooring suppliers or through online retailers that cater to the trade. It’s worth looking into places that offer expert advice, too, so you can be sure you’re getting the right product for your specific needs. For example, if you're looking for a specific type of cleaner to go with your finish, you might find something like Bona Deep Clean at these specialized stores.
Comparing Oil-Based To Modern Alternatives
Water-Based Polyurethane Advantages
When you're looking at finishes for your hardwood floors, oil-based polyurethane has been the go-to for a long time. It's known for its durability and the warm, amber tone it gives to wood. However, the flooring world has seen some big changes, and water-based finishes are now a major player, often preferred by pros for good reasons. One of the biggest wins for water-based is how fast it dries. You can usually recoat in just a few hours, which really speeds up a project. This is a huge deal when you're trying to get a floor done quickly, especially if you're working around a client's schedule. Plus, the cleanup is way easier – just soap and water, no need for mineral spirits. This makes the whole process less of a hassle.
Another point in favor of water-based is the smell, or rather, the lack of it. Traditional oil-based finishes have a strong, lingering odor that can make a space unlivable for days. Water-based options are much lower in VOCs (Volatile Organic Compounds) and have a much milder smell. This means you can often get back into the room sooner, and it's just a more pleasant working environment for everyone involved. For homeowners, this is a big plus, especially if they have kids or pets and need to minimize exposure.
Clarity is also a key difference. Oil-based poly tends to yellow over time, giving wood a warmer, aged look. Some people like this, but if you're going for a natural, light look, especially with woods like maple or white oak, water-based is the way to go. It stays crystal clear and doesn't add that amber tone, preserving the wood's true color. This is why you see more modern, minimalist designs using water-based finishes.
Hybrid Finishes Explained
Hybrid finishes try to give you the best of both worlds, blending aspects of oil-based and water-based technologies. Think of them as trying to get that classic oil-based look and feel but with some of the practical benefits of water-based. They often use different resin technologies to achieve this. For example, some hybrids might offer better scratch resistance than a standard water-based finish while still drying faster and having lower VOCs than a traditional oil-based product.
These finishes can be a good option if you're torn between the two. They might offer a slightly warmer tone than a pure water-based finish but without the heavy yellowing of oil-based. The application can sometimes be a bit more forgiving, and they often provide good durability. However, it's important to remember that 'hybrid' can mean different things to different manufacturers, so you'll want to check the specific product details to see what benefits it truly offers.
When Oil-Based Remains The Superior Choice
Despite the advancements in water-based and hybrid finishes, there are still situations where oil-based polyurethane is the top pick. Its deep, rich amber tone is something many people specifically want for their floors. Over time, this tone deepens, giving older homes a classic, warm feel that can be hard to replicate. If you're restoring a historic home or just love that traditional look, oil-based might be your only real option to get that authentic patina.
Durability is another area where oil-based has a long-standing reputation. While modern water-based finishes have caught up significantly, many pros still trust oil-based for its proven toughness and resistance to wear and tear, especially in very high-traffic commercial settings. It creates a very hard, protective surface that can stand up to a lot of abuse. The application process, while slower and smellier, is also very well understood by experienced floor finishers, and they know how to get a beautiful, consistent result with it. If you're looking for that classic, time-tested performance and don't mind the longer drying times and stronger odor, oil-based polyurethane is still a solid choice. You can find quality tools like the Bona 1500G Trowel that are designed to work well with various finishes, including oil-based.
Troubleshooting Common Application Issues
Addressing Streaking And Lap Marks
Streaking and lap marks are common headaches when applying any finish, and oil-based polyurethane is no exception. These usually pop up when the product isn't applied evenly or when you're working too slowly, letting the finish start to dry before you overlap your strokes. The key is to maintain a wet edge. This means always working into the area you just finished applying the poly to, blending the new application into the still-wet previous section. Use a good quality applicator, like a natural bristle brush or a lambswool applicator, and keep it well-loaded but not dripping. Work in sections, and don't try to cover too much area at once. If you notice a lap mark forming, try to gently feather it out while the finish is still wet. It's better to do a second coat to fix a minor issue than to live with a noticeable streak.
Dealing With Bubbling Or Fisheyes
Bubbles or fisheyes in your finish can be super frustrating. Bubbles often happen when you overwork the finish, whipping air into it, or if the applicator is too dry. Fisheyes, those little crater-like spots, are usually caused by contaminants on the surface – think silicone, wax, or even oils from your hands. Make sure your floor is absolutely spotless before you start applying any coats. Vacuum thoroughly, then tack it off with a good quality tack cloth. If you're using a water-based cleaner or prep product, ensure it's completely dry and doesn't leave any residue. Sometimes, using a different applicator can help; a high-quality microfiber roller designed for finishes can often reduce bubbling compared to a brush.
Ensuring Proper Adhesion
This is probably the most critical part. If your finish doesn't stick, nothing else matters. Poor adhesion usually comes down to one of two things: inadequate surface preparation or applying a new coat over a finish that hasn't dried enough. For oil-based poly, you need to make sure the wood is clean, dry, and properly sanded. If you're recoating, you need to follow the recoat window. Applying a new coat too soon can cause the underlying layer to soften and lift, while waiting too long might require a light sanding to create a surface the new coat can grip onto. Always check the manufacturer's recommendations for recoat times, as they can vary based on temperature and humidity. A light scuff sand with 220-grit sandpaper between coats can often help create a better bond, but always clean off the dust afterward.
Having trouble with your application? Don't let common issues slow you down. We've got simple fixes to get things running smoothly again. For more detailed help and expert advice, visit our website today!
Wrapping It Up
So, we've gone over a lot of ground here, talking about polyurethane for your floors. It's not just about slapping something on and hoping for the best. You've got options, and picking the right one really makes a difference in how your floors look and how long they last. Whether you're going for that super natural, matte look or something with a bit more sheen, there's a product out there. Remember to prep your floors right – that's half the battle. And don't forget about maintenance; a little care goes a long way. If you're still scratching your head, don't be afraid to ask for help. Getting it right the first time saves a lot of headaches down the road.
Frequently Asked Questions
What makes oil-based polyurethane different from water-based?
Oil-based poly is like a tough shield that takes a while to dry and has a strong smell. It often gives wood a warmer, yellowish tone over time. Water-based poly dries much faster, has less smell, and stays clear, not turning yellow. It's a more modern choice.
How long does it take for oil-based polyurethane to dry?
Oil-based poly needs patience! You usually have to wait at least 8 to 24 hours before you can put on another coat. To be fully hardened and ready for heavy use, it can take up to 30 days. That's a long time to be careful with your floors!
Is oil-based polyurethane good for busy homes?
Yes, it's really tough! Oil-based poly is known for being super strong and resisting scratches and wear. This makes it a great choice for floors that get a lot of foot traffic, like in entryways or living rooms, because it holds up really well.
Does oil-based polyurethane change the color of the wood?
It sure does! Oil-based poly tends to give wood a deeper, warmer look. It adds a bit of an amber or yellowish tint, which many people like because it makes the wood look richer. Over time, this color can become more noticeable.
What's the best way to clean oil-based polyurethane floors?
For cleaning, it's best to use a soft broom or a vacuum with a hard floor attachment. When you need to mop, use a damp mop with a cleaner made specifically for wood floors. Avoid using too much water or harsh cleaners, as they can damage the finish.
Can I apply oil-based polyurethane myself?
You can, but it takes care! You'll need to prepare the floor really well by sanding and cleaning it. Applying it evenly without streaks is tricky, and the strong smell means you need good ventilation. It's definitely a project that requires patience and attention to detail.
What does 'sheen' mean when talking about polyurethane?
Sheen is just how shiny the finish looks. Gloss is super shiny, like a mirror. Semi-gloss is still shiny but less intense. Satin has a soft, low shine, and Matte looks very natural with almost no shine at all. It's about the look you want for your floor.
Why do professionals sometimes still use oil-based poly?
Even though water-based is popular, some pros stick with oil-based because they trust its proven durability and the rich look it gives wood. For certain projects or when clients specifically want that classic, warm look, oil-based poly is still a reliable option.

0 comments