
Getting a perfect clear finish on your hardwood floors or furniture doesn’t have to feel impossible. With the right prep, products, and a little patience, you can get that smooth, professional look at home. Whether you’re a DIY beginner or you’ve tackled a few projects before, this guide will walk you through each step. We’ll cover everything from picking the right finish to cleaning up once you’re done. Let’s take the guesswork out of getting that flawless, clear finish you want.
Key Takeaways
- Prep is everything—proper sanding and dust removal make a huge difference in your final clear finish.
- Water-based clear finishes give you a non-yellowing, durable coat that keeps wood looking natural.
- Choosing the right sheen (matte, satin, semi-gloss, or gloss) depends on your style and how much traffic the area gets.
- Follow dry and cure times closely to avoid sticky floors and marks from furniture or shoes.
- Stick with professional-grade, certified products for the most reliable, long-lasting results.
Benefits of a Professional-Grade Clear Finish
Preserving Natural Wood Character
When you're working with beautiful hardwood, the last thing you want is a finish that completely hides its natural beauty. Professional-grade clear finishes are designed to do just the opposite. They create a protective layer without altering the wood's inherent color or grain pattern. This means you get to see and feel the real wood, just with added protection. It’s like giving your floor a clear shield that lets its natural character shine through. This is especially important for woods like white oak or maple, where the grain is a key part of the aesthetic. The goal is protection, not alteration.
Maximizing Abrasion and Chemical Resistance
Let's face it, floors take a beating. Between foot traffic, furniture, pets, and the occasional spill, they need serious protection. Professional-grade clear finishes, especially the two-component (2K) water-based systems, are built tough. They form a hard, durable surface that resists scratches, scuffs, and even common household chemicals. This means fewer worries about wear and tear, and a floor that looks good for much longer. Think of it as giving your floor a suit of armor that can handle daily life without showing it.
Maintaining Crystal Clarity Without Yellowing
One of the biggest headaches with older finishes is that they tend to yellow over time, especially when exposed to UV light. This can completely change the look of your wood, often for the worse. Modern professional-grade water-based clear finishes are formulated to stay crystal clear. They won't impart an amber tone to your wood, and they resist yellowing, even after years of use. This ensures that the beautiful color and clarity of your wood are preserved, looking just as good as the day it was finished.
Surface Preparation Essentials for a Flawless Finish
Getting ready for a clear coat isn't just about slapping it on. It's the most important part, honestly. If you mess this up, the whole job can go sideways, no matter how good your finish is. Think of it like building a house – you need a solid foundation. For wood floors, that means making sure the surface is absolutely perfect before you even think about opening a can of finish.
Proper Sanding and Grit Progression
This is where you really set the stage. You've got to get the wood smooth, but not too smooth. Starting too fine can actually make it harder for the finish to stick. Most pros aim for a final grit of around 120-150 for water-based finishes. You'll work your way up, usually starting with a coarser grit like 60 or 80, then moving to 100, and finally finishing with 120 or 150. Make sure you're sanding with the grain, and that each pass removes the scratches from the previous grit. If you skip a grit or don't sand evenly, you'll see it later, trust me.
Thorough Dust and Debris Removal
After sanding, the floor looks clean, but it's covered in fine dust. This stuff is the enemy of a good finish. You need to get rid of every last speck. Start with a good vacuum, getting into all the edges and corners. Then, use a tack cloth or a microfiber cloth that's slightly damp with a recommended cleaner. Some guys swear by a shop vac with a brush attachment, followed by a damp cloth. The key is to remove anything that could get trapped in the finish and make it look bumpy or dirty. Don't rush this step; it's worth the extra time.
Environmental Conditions for Best Application
Where you're applying the finish matters a lot. You want the temperature to be right, usually between 65-75°F (18-24°C). Too cold, and the finish won't flow right and might not cure properly. Too hot, and it can dry too fast, leading to lap marks and an uneven finish. Humidity is also a big deal. Aim for around 40-60% relative humidity. High humidity can slow down drying and curing, while very low humidity can sometimes cause issues too. Make sure the room is well-ventilated but also protected from drafts that could blow dust onto the wet finish. It’s best to have the space sealed off if possible.
Selecting the Right Water-Based Clear Finish System
Evaluating 1K Versus 2K Finish Options
When you're looking at water-based clear finishes, you'll run into two main types: 1K and 2K. Think of 1K as a ready-to-go option, like a single-component system. You just open the can and start applying. These are usually simpler to use, which can be nice if you're new to this or just want to get the job done without a lot of fuss. They're good for lower-traffic areas or projects where extreme durability isn't the absolute top priority.
Now, 2K finishes are a bit different. The '2K' means it's a two-component system. You've got your main finish, and then a separate catalyst or hardener that you mix in right before you use it. This mixing step is important – you have to get the ratio right, or it won't perform as it should. But here's the payoff: 2K finishes are generally tougher. They offer better resistance to scratches, chemicals, and wear and tear. This makes them a solid choice for busy homes with kids and pets, or any area that sees a lot of foot traffic. Bailey Flooring Supplies carries professional-grade 2K options that contractors trust for their durability and long-lasting results.
Matching Sheen Levels to Project Needs
The sheen of your clear finish is more than just how shiny it looks; it really changes the whole feel of the wood. You've got a few main choices, and picking the right one depends on what you're going for and how the floor will be used.
- Matte: This is the lowest sheen. It looks very natural, almost like the wood is unfinished. It hides imperfections well and doesn't show scuffs or fingerprints easily. It's great for a modern, understated look, especially with lighter woods like white oak.
- Satin: A bit more shine than matte, but still pretty subtle. It gives the wood a soft luster without being reflective. This is a really popular choice because it balances a natural look with a bit of protection and a nice feel.
- Semi-Gloss: You'll see more reflection here. It makes the wood color pop a bit more and can make a room feel brighter. It's more durable than matte or satin, but it will show more dust and scratches.
- Gloss: This is the shiniest option. It gives a very reflective, almost mirror-like finish. It really makes the wood grain stand out and can make a space feel more formal. However, it's the most prone to showing every little mark, scuff, or fingerprint.
When you're deciding, think about the style of the room and how much wear the floor will get. For high-traffic areas, a satin or semi-gloss might be a good balance. If you want that raw wood look, matte is the way to go. Bailey Flooring Supplies has a range of options to fit whatever look and performance you need.
Importance of Manufacturer Recommendations
When you're working with any kind of finishing product, especially water-based ones, paying attention to what the manufacturer says is a big deal. It’s not just about following rules; it’s about getting the best possible outcome for your project. These companies spend a lot of time and money testing their products to figure out exactly how they work best.
They’ll tell you things like the right temperature and humidity for application, which is super important for water-based finishes because they can dry too fast or too slow depending on the conditions. They also specify how to mix two-component (2K) systems – getting that ratio wrong can really mess up the finish's durability. Plus, they’ll give you guidelines on how many coats to apply for different levels of traffic, and how long to wait between coats (recoat times) and before you can actually walk on the floor (cure times).
Following these recommendations helps avoid common problems like bubbles, streaks, poor adhesion, or a finish that doesn't last as long as it should. Bailey Flooring Supplies carries professional brands, and they make sure to provide access to all the technical data sheets and recommendations from those manufacturers. It’s all part of making sure you have the right information to get a professional-quality finish every time.
Applying a Clear Finish: Tools and Techniques
A flawless clear finish starts with the right approach—and that means using proper tools and knowing a few reliable techniques. If you're working with water-based finishes from Bailey Flooring Supplies, this step is where good prep pays off. Here’s what you need to know to get smooth, professional results every time.
Choosing the Right Applicator
You’ve got a few options when it comes to applying your clear finish. The tool you pick can make a big difference in your outcome:
- Microfiber rollers: Excellent for even coverage and less splattering.
- T-bar applicators: Perfect for large, open areas—helps maintain a consistent film thickness.
- Angled brushes: Handy for edges, stairs, trim, and tough corners.
- Applicator pads: Work great for closets or tight spaces where rollers can’t reach.
For Bailey’s water-based systems, a high-quality microfiber roller or a professional T-bar will give you the coverage and control you’re looking for. Their finishes go on smoothly, so you don’t have to fight streaks or bubbles when you use the proper tool.
Consistent, Even Coating Methods
Let’s talk technique—a big part of a good finish has to do with how the product gets on the floor.
- Pour your finish into a paint tray or directly along the board row—never on dirty surfaces.
- Work in manageable sections, keeping a wet edge at all times.
- Apply in thin, uniform coats. Too thick leads to drips, too thin won’t protect.
- Overlap each pass by a couple of inches to avoid lap marks.
- Let each coat dry thoroughly before recoating (most Bailey water-based finishes are ready in 2-3 hours).
| Product | Recoat Time | Dry to Touch | Full Cure | Recommended Coats |
|---|---|---|---|---|
| Loba Easy Finish | 2-3 hours | 1 hour | 7 days | 2-3 (residential) |
| Loba 2K Duo | 2-3 hours | 1 hour | 7 days | 2-3 (residential) |
| Loba Supra A.T | 2-3 hours | 1 hour | 7 days | 2-3 (residential) |
A quick tip: Stay alert for the room’s airflow and temperature—if it’s too cold or too humid, things can slow down or leave streaks.
Avoiding Common Application Issues
Nothing’s more frustrating than bubbles, streaks, or haze showing up after you finish. Thankfully, Bailey’s pro-grade systems help minimize these problems when used right. Here’s how to stay in the clear:
- Gently stir, not shake. Shaking can trap air and create bubbles.
- Vacuum and tack between coats—dust is your enemy.
- Don’t go back over areas that have started to tack up; you’ll get drag marks.
- Make sure your applicators are clean and lint-free before every coat.
- Always follow Bailey’s manufacturer instructions—each product might have its own tips for best results.
A smooth finish doesn’t happen by accident. It takes patience, attention to detail, and using tools and products designed for serious results.
Bailey Flooring Supplies water-based finishes are a smart pick for tradesmen who want clear, durable, absolutely professional floors on every job. With the right tools and strategies, you’ll leave behind a finish that speaks for itself—and keeps customers happy for years.
Understanding Sheen Options With Clear Finish
Differences Between Matte, Satin, Semi-Gloss, and Gloss
When you're picking out a clear finish for your hardwood floors, one of the big decisions you'll make is about the sheen. It's not just about how shiny it looks; the sheen level actually changes how the floor feels and how it holds up over time. Think of it like choosing the right outfit – sometimes you want something subtle, other times you want it to stand out.
- Gloss: This is the most reflective option. It really makes the wood pop and can make a room feel brighter because it bounces light around. It's also usually the toughest and easiest to clean because the surface is so smooth. However, gloss can show every little scratch and imperfection, and it might look a bit dated in some modern homes.
- Semi-Gloss: A step down from full gloss, semi-gloss still has a nice shine but it's not as intense. It offers a good balance between reflectivity and a more subdued look. It’s durable and easy to maintain, making it a popular choice for many projects.
- Satin: This is probably the most common choice for hardwood floors. Satin has a soft luster that looks natural and elegant. It hides minor wear and tear better than glossier finishes and provides a comfortable feel underfoot. It’s a safe bet if you’re not sure what to go with.
- Matte (or Flat/Ultra-Matte): Matte finishes have very little to no shine. They give the wood a very natural, almost raw look, which is super popular right now, especially with lighter woods like white oak. These finishes are great for hiding imperfections and wear, but they can sometimes be a bit trickier to clean than their glossier counterparts. Some ultra-matte finishes can also look a bit
Ensuring Proper Dry and Cure Times
Getting the dry and cure times right for your water-based clear finish is super important. It's not just about waiting around; it's about making sure each coat bonds properly and the whole floor hardens up like it's supposed to. Rush this part, and you'll be looking at problems down the road, like finishes that scratch too easily or don't look right.
Typical Recoat and Cure Timelines
Most professional water-based finishes, like the ones from Bailey Flooring Supplies, are designed to be pretty quick. You're usually looking at a recoat window of about 2 to 3 hours. This means after you put down a coat, you can put the next one on after just a couple of hours, assuming the conditions are good. This is way faster than the old oil-based stuff that could take 8 to 24 hours between coats. The full cure, though, that's when the finish really hardens up and gets its maximum durability. That typically takes about 7 days. You can usually walk on the floor lightly after 24 hours, but you'll want to hold off on heavy furniture or rugs until that full week is up.
How Temperature and Humidity Impact Drying
These times aren't set in stone, though. The temperature and humidity in the room play a big role. If it's cooler than recommended (usually around 65-75°F) or the humidity is too high (over 60%), things will take longer to dry. Think of it like trying to dry laundry on a damp day – it just takes more time. On the flip side, if it's too hot and dry, the finish might dry too fast on the surface, which can cause issues like bubbles or poor adhesion. It's best to try and keep your job site within the manufacturer's recommended range for the best results.
Preventing Premature Traffic on Fresh Coats
This is where patience really pays off. Even though the floor might feel dry to the touch after 24 hours, it's still not fully cured. That means it's still a bit soft and can be damaged easily. If you let people walk on it too soon, especially with shoes that have grit on the soles, you'll end up with scratches and scuffs that are hard to fix. Moving furniture back too early can also dent or scratch the finish. It's always better to err on the side of caution and give the finish the full cure time it needs. Your customers will thank you for a floor that looks great for years to come.
Intercoat Abrasion for a Smooth Result
Getting that perfect, glassy finish on your hardwood floor isn’t just about your last coat—it’s all about what you do between coats. That’s where intercoat abrasion comes in. Many folks skip this step, but truly flawless floors rely on careful attention to detail at these in-between stages. Here’s how to do it the right way with Bailey Flooring Supplies’ water-based clear finishes.
Buffing Between Coats for Uniformity
Buffing, sometimes called screening, is what gets rid of little rough spots, dust nibs, or raised wood grain after each coat. With Bailey’s professional-grade water-based systems, use a fine-grit buffer (generally 220-320) after each dry coat except the final layer. This step ensures the next coat bonds properly and creates an even, smooth finish with no surprises later.
- Inspect the surface after drying; look for raised grain, dust, or surface irregularities
- Use a buffer with a fine-grit screen—avoid aggressive sanding, as the waterborne finish films are thin
- Work methodically, overlapping passes, and don’t press too hard
Effective Dust Removal Before Each Layer
Once you’ve buffed, there’s a fine layer of powder—this is where many jobs go sideways. Don’t just sweep! Instead, vacuum the entire area thoroughly to get rid of every bit of residue. The pros at Bailey Flooring Supplies always recommend:
- Using a commercial vacuum with a brush attachment for corners and along walls
- Tack ragging with a damp, lint-free pad to grab any fine particles
- Never using an oily tack cloth—use only water-dampened microfiber, as residue can affect adhesion
A clean surface means your next coat won’t trap debris, so the sheen stays perfectly clear and even.
Tips for Tack Cleaning and Vacuuming
Small habits here make a big difference in the final quality. Here’s what experienced tradesmen suggest:
- Change vacuum bags or clean filters regularly—it really matters
- Always use clean pads or cloths for each pass
- Double-check baseboards and corners; dust collects here fast
- Avoid shortcuts like dry sweeping, which only stirs up dust
| Step | Details |
|---|---|
| Buffing | Use 220-320 grit screen, light pressure |
| Vacuum | Brush attachment, corners, edges |
| Tack Clean | Water-damp microfiber, no residue |
Taking time with intercoat abrasion means your water-based finish will lay down as smooth as glass, with no hidden grit or bits stuck in the final coat.
Bailey Flooring Supplies Water-Based Finishes: Review
If you’re after a product that helps you nail every step—especially those critical in-between coats—Bailey Flooring Supplies’ line of water-based finishes outperforms big box options. The drying time (usually 2-3 hours per coat at 70°F/50% humidity) fits the real-world job site schedule, and you get a finish that responds well to light screening without gumming up or powdering excessively. Their products deliver:
- Consistent film build with each layer
- Excellent adhesion for successive coats
- Crystal-clear appearance, free of yellowing over time
For fast turnaround and lasting results, Bailey’s professional line is the go-to for tradesmen who refuse to compromise.
Keep your process tight: buff between coats, vacuum and tack like you mean it, and use trusted finish. You’ll see the results—not just on the day you finish, but for years down the line.
Protecting the Investment With Ongoing Maintenance
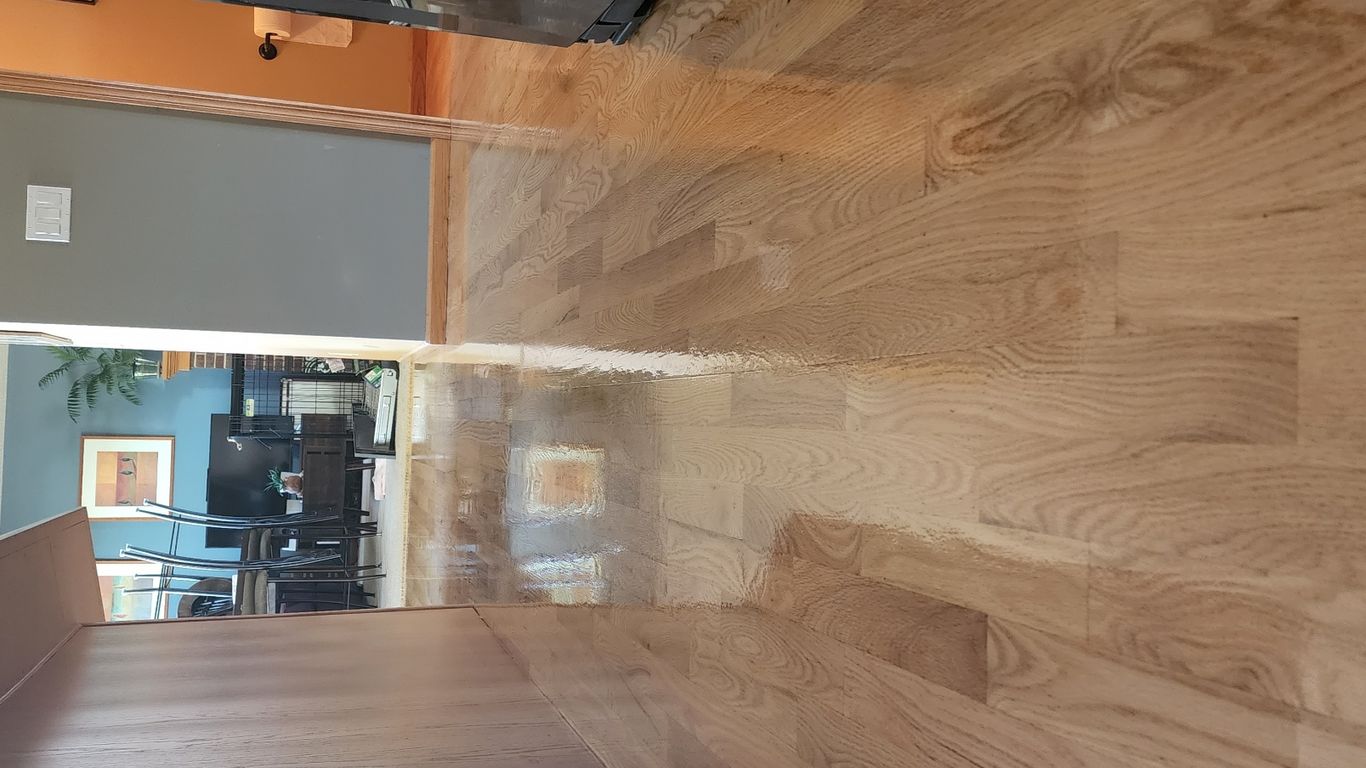
Maintaining your hardwood floors after applying a quality water-based finish is what keeps them looking sharp day in, day out. Let's get into how you can extend the life of your finish and protect your flooring investment.
Routine Cleaning For Clear Finish Longevity
Regular maintenance is the best way to keep your floor’s finish intact and looking great. A simple routine can save you trouble later:
- Sweep or vacuum several times a week using a soft-bristle broom or a vacuum with a hardwood floor setting.
- Mop with a damp (not wet) microfiber pad—avoid letting standing water touch the floor.
- Use a pH-neutral cleaner that’s formulated for water-based finishes. Never use wax-based or harsh chemical cleaners.
Manufacturer-Approved Maintenance Products
Not all cleaning products work well with water-based finishes. Stick to supplies and finishes tested and approved by the manufacturer. For floors coated with Loba or similar, products like Bona or Loba cleaners are your safest bets. They’re designed to preserve non-yellowing clarity and high abrasion resistance without leaving residues or dulling the sheen. For bigger maintenance tasks like re-coating high-traffic spots, professional-grade polyurethane (available at Bailey Flooring Supplies) saves you headaches and reduces the need for future repairs.
Recommended Maintenance Table
| Task | Frequency |
|---|---|
| Dry mop/sweep | 2–3x per week |
| Damp mop (pH neutral) | Weekly/as needed |
| Spot clean spills | Immediately |
| Recoating (as needed) | Every 2–4 years* |
*Higher traffic spaces may need attention more often.
Humidity and Furniture Protection Strategies
- Keep indoor humidity stable (ideally between 40-60%) to prevent wood from expanding or shrinking.
- Use felt pads under all furniture legs to stop scratches and dents. Replace pads every few months if they wear thin.
- Place mats at entrances to trap grit and moisture before it reaches the floor.
- If moving heavy furniture, lift—don’t drag. Consider using furniture sliders to protect against gouging.
A clear finish only does its job if you do yours. Happier floors mean less money spent in the long run, and that’s something every tradesman or homeowner can get behind.
Bailey Flooring Supplies Water-Based Finish Product Review
If you’re looking for finishes that hold up to daily punishment and still show off the floor’s natural wood grain, Bailey Flooring Supplies offers a lineup of water-based polyurethane finishes that stand out from big-box competitors.
What Makes Bailey’s Water-Based Finishes Different?
- Non-yellowing clarity keeps floors natural-looking, year after year.
- Quick dry and fast recoat—get back on your floors sooner without sacrificing durability.
- Professional-grade abrasion resistance holds up to commercial and residential traffic.
- Low-VOC, low odor—much safer for indoor work.
- Available in all sheen levels (matte, satin, semi-gloss, gloss) for any project style.
Bailey stocks everything from entry-level 1K single-component finishes to tough 2K systems for heavy-traffic jobs. Their tech support backs you up, and free shipping on big orders cuts cost for businesses. With durability, easy maintenance, and reliable supply, Bailey’s poly finishes are the go-to for tradesmen who don’t want callbacks or finish failures. If you need a water-based clear coat that works as hard as you do, this is a supplier that won’t disappoint.
Professional Stains and Color Options Under Clear Finish
Using Oil-Based Versus Water-Based Stains
Picking the right stain is step one for any serious hardwood floor project. Oil-based stains are known for deep, rich color and longer open times, which means more workability for blending and wiping. However, they usually have more odor and longer dry times. Water-based stains have come a long way—they dry quick, are low in odor, and put out less VOCs, making them a responsible choice for homes and commercial sites. Water-based finishes also tend to play nice with water-based clear coats, preventing common adhesion issues that sometimes arise with oil-based systems.
Key differences between oil-based and water-based stains:
| Feature | Oil-Based Stain | Water-Based Stain |
|---|---|---|
| Dry Time | 8–24 hours | 1–3 hours |
| Odor/VOCs | Higher | Low |
| Color Depth | Deep, bold tones | Lighter, subtle tones |
| Compatibility | Oil-based topcoats | Water-based finishes |
Popular Color Trends and Applications
Floor color trends are all over the place right now, but a few clear winners stand out. Grays, near-invisible finishes, and natural white oak looks are going strong. Deep browns, like provincial and walnut, also keep a classic vibe alive for folks who want warmth underfoot. Contractors and homeowners have access to a wide color range from Bailey Flooring Supplies, including:
- Modern greys (Pebble Grey, Aged Pewter)
- Light, Scandinavian-style naturals
- Timeless classics (Ebony, Jacobean)
- Rich browns (Cola, Provincial)
- Specialty tints for unique, designer looks
Blockquote:
Easy-to-apply stains and finishes from Bailey mean you’ll spend less time fixing mistakes and more time getting paid for your work.
Integrating Stain Selection With Clear Topcoats
When staining and finishing, compatibility matters. Water-based topcoats like Bailey’s Loba Easy Finish or 2K Invisible Protect are made to layer right over most water-based and fast-dry stains without pulling color or causing cloudy issues. Oil-based stains need to be fully cured and sometimes even buffed before applying a water-based poly, or you’ll see color bleed or even adhesion failure. Always stick to the stain/finish combinations your supplier stands behind if you want warranties to actually mean something.
Here's a checklist to ensure success:
- Test stain samples directly on your floor (not just fan decks!)
- Allow stain to fully dry/cure per manufacturer
- Buff as recommended before first coat of clear finish
- Consult Bailey Flooring Supplies’ support for tricky wood species or non-standard combos
- Always stick with compatible stain and topcoat products where possible
Contractors who use Bailey’s water-based systems get not just a solid look, but predictable performance, less downtime between coats, and top-notch durability. Honestly, this is what you want when your business is your reputation.
Troubleshooting Common Clear Finish Challenges
Professional floor finishers know that even with the best water-based products, there’s always a chance something unexpected will pop up during or after application. Here’s a hands-on guide to tackling the most frequent headaches when using Bailey Flooring Supplies’ clear finishes.
Handling Bubbles, Streaks, and Unevenness
It’s frustrating when a perfect setup leads to a finish filled with bubbles or uneven streaks. Usually, these issues are tied to application technique or environment.
How to prevent and fix these problems:
- Always use the right applicator (quality microfiber roller or T-bar). Avoid foam pads, as they can trap air.
- Don’t shake your finish before use—gently stir instead.
- Make sure your workspace is free of drafts, as fast-drying can cause streaking.
- Apply moderate, even pressure when rolling. Working too quickly tends to cause bubbles; rushing always backfires.
- If streaks or bubbles appear in a wet coat, lightly back-roll immediately to smooth the film.
- For dried bubbles or rough patches, allow the coat to dry fully, then de-nib with a fine abrasive (220+ grit) and tack clean before recoating.
Take your time on each coat. Let the floor tell you if you’re working too fast or slow.
Dealing With Contaminants and Adhesion Issues
Contaminants can sneak in from dirty rags, improper cleaning, or even airborne particles. If you spot flaking, peeling, or poor bonding:
- Re-examine your surface preparation steps—stray oils, dust, or solvent traces prevent good adhesion.
- Vacuum and tack between every step—especially before the final coat.
- Only use manufacturer-recommended cleaners and avoid multi-purpose products; residue from unknown chemicals is a common culprit.
- Maintain room temperature and humidity in the ideal range (usually 65–75°F, 40–60% RH).
If you have to correct a problem area:
- Spot sand the affected section, wipe clean, and reapply thin, even finish, feathering the edges.
- Full resanding is usually only needed for severe bonding failures.
Correcting Sheen Inconsistencies
Nothing makes a new floor look worse than patches where parts are shiny and others are flat. Sheen issues often happen when coats are applied too heavy, product isn’t mixed well, or dust settles on the wet film.
Best prevention methods:
- Always stir clear finishes thoroughly before and during application, as flattening agents can settle.
- Stick with a consistent sheen product for all coats—don’t swap semi-gloss for satin between coats.
- Keep all application tools uncontaminated and clean. Even a little leftover cleaner on a roller can impact sheen.
- Work in sections and maintain a wet edge to minimize overlap marks.
If you spot inconsistencies after drying:
- Lightly buff the affected area.
- Wipe completely dust-free.
- Apply an even coat over the entire surface for consistent appearance.
| Issue | Common Cause | Quick Solution |
|---|---|---|
| Bubbles | Shaking product, fast rolling, air flow | Stir gently, slower application |
| Poor adhesion | Dirty prep, old wax, contaminants | Re-clean, sand, use approved cleaner |
| Sheen differences | Poor mixing, uneven coats, overlapping | Restir, uniform coat, proper overlap |
With Bailey Flooring Supplies’ water-based finishes, most issues are easy to prevent if you keep your process consistent and stay patient. That’s what makes the difference between a good job and a flawless one.
Choosing Certified Products for Reliable Results
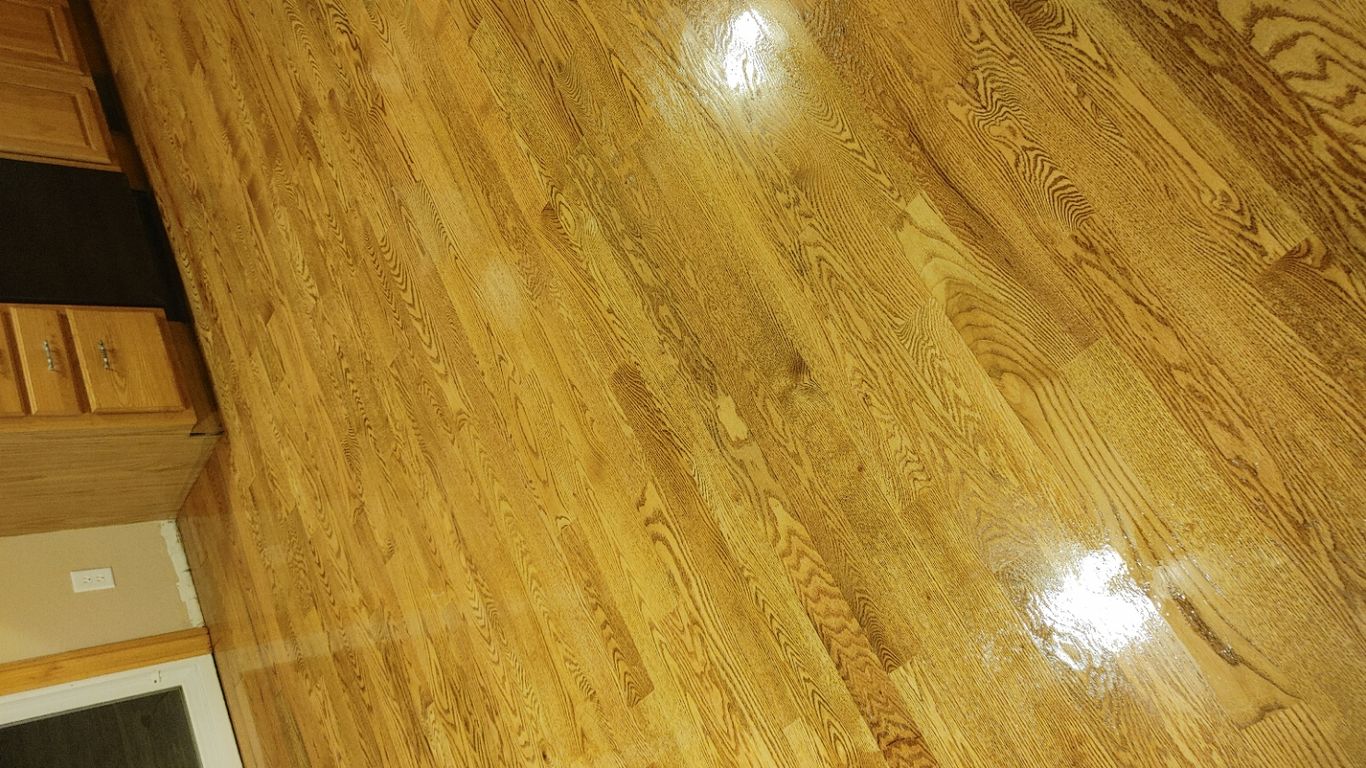
Why Professional Brands Outperform Hardware Store Options
When you're aiming for that flawless, professional look on a hardwood floor, skimping on the finish isn't the way to go. I've seen too many jobs go sideways because someone grabbed the cheapest can off the shelf at the big box store. Those products are often formulated for a broader audience, meaning they might not have the specific performance characteristics that pros need. We're talking about finishes that are designed for durability, ease of application, and consistent results, project after project. Professional brands, like those you'll find at Bailey Flooring Supplies, are built to withstand the rigors of daily life, whether it's a busy family home or a commercial space. They offer better abrasion resistance, chemical resistance, and a clarity that doesn't yellow over time. Using contractor-trusted brands means fewer callbacks and a finish that truly lasts.
Importance of VOC Compliance and Indoor Air Quality
These days, nobody wants to be breathing in harsh fumes, and for good reason. Professional-grade water-based finishes have come a long way, and many are now formulated with low VOCs (Volatile Organic Compounds). This is a big deal, not just for the environment, but for the air quality in the homes and buildings where we work. Low VOC products mean less odor during application and faster re-occupancy times for the space. It's a win-win: you get a high-performance finish, and the occupants get a healthier environment. When you're looking at products, always check for compliance with indoor air quality standards. It shows the manufacturer cares about more than just the finish itself.
Reliability of Supply and Technical Support
Another thing that separates professional brands is the reliability. You need to know that when you need a specific product, it's going to be available. Bailey Flooring Supplies focuses on stocking products that contractors rely on, meaning they have a consistent supply chain. Beyond just having the product on the shelf, there's also the technical support. If you run into a question about application, compatibility, or troubleshooting, having access to manufacturer recommendations and knowledgeable support is invaluable. It’s not just about buying a can of finish; it’s about having a partner who stands behind their products and can help you get the job done right. For example, if you're considering a finish like the Bona Pro Series, knowing you can get support if needed is a big plus.
When you need your projects to turn out great, picking products that are certified is a smart move. These items have been checked and proven to work well, giving you confidence in the final look. Don't guess about quality; choose certified for results you can count on. Visit our website today to explore our selection of top-notch, certified flooring supplies and get started on your next project with peace of mind!
Wrapping Up: Your Path to a Clear, Professional Finish
Getting that flawless, clear finish on your hardwood floors isn’t magic—it’s just about sticking to the basics and not cutting corners. Prep work matters most: sand right, clean up every bit of dust, and follow the instructions on your finish to the letter. Don’t rush the coats or skip the dry times, even if you’re itching to get the furniture back in place. Use the right tools, keep your workspace clean, and always check your work between coats. If you’re using a pro-grade finish from Bailey Flooring Supplies, you’re already a step ahead—these products are built for real-world jobs and hold up to daily wear. Keep up with regular cleaning and use the right maintenance products, and your floors will keep that fresh, natural look for years. If you hit a snag or just want a second opinion, don’t be shy about reaching out to the team at Bailey. We’re here to help you get it right, whether you’re a seasoned contractor or just tackling your first floor. Good luck, and enjoy those floors—they’re built to last.
Frequently Asked Questions
How many coats of clear finish should I apply?
Most floors need 2 to 3 coats for homes, and 3 to 4 coats for busy places like stores or schools. Always check the product instructions for the best results.
What’s the difference between water-based and oil-based finishes?
Water-based finishes dry faster, have less smell, and stay clear without turning yellow. Oil-based finishes take longer to dry, have a strong smell, and can turn wood a yellowish color over time.
How long do I need to wait before walking on the floor after applying a clear finish?
You can usually walk gently on the floor after 24 hours, but you should wait about a week before moving heavy furniture or letting pets run around. Drying times can change based on the brand and room conditions.
Why is it important to sand and clean the floor before applying a finish?
Sanding makes the floor smooth and helps the finish stick better. Cleaning removes dust and dirt so you get an even, flawless finish without bumps or rough spots.
What tools should I use to apply a clear finish?
A high-quality roller, T-bar, or microfiber applicator works best for spreading the finish evenly. Some people use brushes for small or tricky spots.
How do I pick the right sheen for my floor?
Matte gives a natural look, satin adds a soft glow, semi-gloss is a bit shiny, and gloss is very shiny. Think about how much shine you want and how much cleaning you want to do—glossier floors show more dust and marks.
What should I do if I see bubbles or streaks in the finish?
Bubbles or streaks can happen if you shake the product or apply it too thick. Lightly sand the area once it’s dry, clean away dust, and add another thin coat.
How can I make my clear finish last longer?
Sweep or vacuum often, use cleaners made for your finish, avoid harsh chemicals, put felt pads under furniture, and keep the room’s humidity steady. These steps help protect your floor and keep it looking great.
0 comments