
Thinking about how many coats of polyurethane your hardwood floors really need? It's a common question, and honestly, there's no single answer that fits every situation. You've got to think about how much foot traffic your floors get, what kind of wood you're working with, and even what look you're going for. Getting this right means your floors will look good and last a long time, which is pretty much the goal, right? Let's break down what goes into deciding how many polyurethane coats on hardwood floors is the sweet spot.
Key Takeaways
- For typical homes, 2 to 3 coats of polyurethane on hardwood floors are usually enough for good durability. If you have pets or kids running around a lot, leaning towards 3 coats is a smart move.
- High-traffic areas like commercial spaces or busy entryways might need 3 to 4 coats, or even more, to stand up to constant wear and tear.
- Always check the manufacturer's instructions for the specific polyurethane product you're using, as recommendations can vary.
- Proper preparation, like sanding and cleaning between coats, is just as important as the number of coats for a lasting finish.
- The type of polyurethane (water-based vs. oil-based) and its quality can influence how many coats are needed for optimal protection.
Determining the Right Number of Polyurethane Coats
Figuring out how many coats of polyurethane your hardwood floors actually need can feel like a guessing game, but it's really about matching the finish to how the floor will be used. It’s not just about slapping on as much as you can; it’s about getting the right protection without making the floor look overdone or feel unnatural.
Residential Traffic Considerations
For most homes, where foot traffic is pretty standard – think kids running around, pets, and everyday comings and goings – you're usually looking at a sweet spot of two to three coats of a good quality polyurethane. This range provides a solid defense against scuffs, spills, and general wear and tear that happens in a busy household. If you've got a particularly active family or pets that are hard on floors, leaning towards three coats is a smart move. It builds up that protective layer just enough to handle the daily grind.
Commercial and High-Traffic Areas
Now, if we're talking about areas that see a lot more action – like a busy entryway, a commercial space, or even a home with a lot of pets and constant activity – you'll want to bump that number up. For these kinds of spots, three to four coats is more like it. This extra layer is what gives you that superior durability needed to stand up to heavy foot traffic, furniture being moved, and the general abuse that commercial or very active residential areas dish out. It’s about building a robust shield that can take a beating and keep looking good.
Understanding Manufacturer Recommendations
Always, always check what the polyurethane manufacturer says. They put a lot of work into testing their products, and their recommendations are usually spot-on for their specific formulas. You'll find this info on the product label or the technical data sheet. Some high-performance finishes might even suggest a different number of coats. Following their guidelines is key to getting the best performance and making sure the finish lasts as long as it's supposed to. It’s like following a recipe; you usually get the best results when you stick to the instructions. For example, Bailey Flooring Supplies often provides detailed specs for their Loba Easy Finish, recommending 2-3 coats for residential use and 3-4 for commercial settings. This kind of guidance is invaluable for getting the job done right and ensuring your floors are protected.
The Role of Polyurethane in Floor Durability
Polyurethane finishes play a major part in keeping hardwood floors looking good and lasting under daily wear. Getting the right finish isn’t just about looks—it’s a shield that stands up to heavy furniture, pets, dropping things, and moisture from boots or spills. Let’s break down what makes polyurethane such a trusted pick for professional tradesmen and why investing in the right coating is worth every cent.
Abrasion Resistance and Wear Protection
Abrasion resistance is where polyurethane shines for flooring use. Modern water-based and two-component (2K) finishes create a tough top layer that shrugs off scratches and dents. Whether your area sees just family foot traffic or you’re handling a non-stop flow of customers, a properly applied polyurethane means your floors will stay smoother for longer.
- Professional finishes use advanced resins for true "tough coat" ability
- Scratching from pet nails or tracked-in grit is less likely to reach bare wood
- You’ll spend less time buffing out scuffs or worrying about repairs at entryways
Chemical and Moisture Barrier Properties
A big reason polyurethane is trusted by installers is its ability to seal wood pores without making the floor feel plastic. Water-based formulas especially are designed so spills bead up rather than soak in and cause warped planks or mold. Plus, these topcoats are less affected by household cleaning products and tracked-in road salts, extending the lifespan of both the finish and the wood beneath.
Here’s how water-based options stack up:
| Feature | Water-Based Polyurethane | Oil-Based Polyurethane |
|---|---|---|
| Yellowing | No | Yes, over time |
| Odor | Low | Strong |
| Cure Time | 1-2 days | 4-7 days |
| VOCs | Low | High |
| Chemical Barrier | Excellent | Strong |
Maintaining Clarity and Natural Appearance
For many homeowners, keeping the wood’s color and grain visible is a top priority. Polyurethane, especially the latest invisible or ultra-matte formulas, makes it possible to guard floors without changing their natural hue. Water-based finishes from top suppliers hold back yellowing and let the wood's real beauty come through—ideal for designers and picky clients.
- Retain the authentic texture and feel of the grain
- No unwanted "amber" color, even on lighter woods
- Modern invisible finishes are perfect for contemporary and Scandinavian-inspired looks
Most professionals agree: a high-quality polyurethane finish isn’t just about initial presentation—it’s a long-term investment in the floor’s integrity and your reputation. For those needing professional-grade patching before finishing, consider using a dependable wood patch like Patch-Quick for knot holes and larger voids to ensure an even, durable finish layer.
In summary, choosing the right polyurethane—especially one that stays clear, repels daily threats, and resists scratches—means fewer callbacks and far less hassle over time. Whether you’re doing a classic home renovation or a high-traffic restaurant, the right finish system is the backbone of lasting floor durability.
Professional Grade Finishes for Superior Performance
Advantages of Two-Component (2K) Systems
When you're looking for a finish that can really take a beating, especially in places with a lot of foot traffic or where pets and kids are around, a two-component (2K) system is the way to go. These aren't your average finishes; they're engineered to be tough. You mix two parts together right before you use them, and that chemical reaction creates a super strong, durable surface. It's way more resistant to scratches, chemicals, and even moisture than a standard one-component finish. For pros, this means fewer call-backs and happier clients because the floor just holds up better over time. It’s a bit more work upfront, but the payoff in durability is huge.
Water-Based vs. Oil-Based Polyurethane
Choosing between water-based and oil-based polyurethane is a big decision for any flooring project. Oil-based finishes have been around forever, and they give wood a nice, warm amber tone. They're also pretty forgiving to apply. However, they take a long time to dry, have a strong smell, and contain more volatile organic compounds (VOCs), which isn't great for indoor air quality. Water-based finishes, on the other hand, have come a long way. They dry much faster, have very little odor, and are much lower in VOCs, making them a healthier choice. Plus, they dry crystal clear, so they don't change the natural color of the wood like oil-based ones can. While oil-based might still be preferred by some for that classic look, water-based is often the smarter choice for modern projects due to its performance and environmental benefits.
| Feature | Water-Based Polyurethane | Oil-Based Polyurethane |
|---|---|---|
| Dry Time (Recoat) | 2-3 Hours | 8-24 Hours |
| Odor | Low | Strong |
| VOCs | Low | High |
| Color | Clear, Non-Yellowing | Amber Tone, Yellows |
| Cleanup | Water | Mineral Spirits |
Benefits of Low-VOC Formulations
Low-VOC (Volatile Organic Compound) finishes are becoming the standard, and for good reason. Traditional finishes often release a lot of fumes that can be harsh and unhealthy, especially when you're working indoors. Low-VOC options significantly reduce these emissions. This means a much more pleasant working environment for you and a healthier space for the homeowners or occupants once the job is done. You can often reoccupy the space much sooner without worrying about lingering fumes. Plus, using low-VOC products is just better for the environment overall. It’s a win-win: better for people, better for the planet, and often just as durable as their higher-VOC counterparts.
Application Techniques for Optimal Coat Adhesion
Getting the polyurethane to stick right is super important. If it doesn't bond well between coats, you're going to have problems down the road, like peeling or flaking. It’s not just about slapping it on; there’s a bit of a process to it.
Proper Surface Preparation is Key
Before you even think about opening a can of finish, the floor needs to be prepped. This means getting it perfectly clean and smooth. Any dust, oil, or old finish left behind will mess with how the new coats stick. We're talking about sanding it down right, usually to about 120-150 grit for the final pass, and then vacuuming everything up. Seriously, vacuum until you think you've vacuumed enough, and then vacuum some more. A tack cloth or a slightly damp mop can pick up the really fine dust that the vacuum misses. A clean surface is the foundation for a durable finish.
Applying Thin, Even Coats
Don't try to put on a super thick coat of polyurethane thinking it'll save you time or add more protection. It’s actually the opposite. Thick coats dry unevenly, can cause bubbles, and are more prone to cracking. You want to apply thin, even coats. A good quality microfiber roller or a T-bar applicator works best for water-based finishes. Work with the grain of the wood, and keep a wet edge so you don't get lap marks. It might feel like you're not putting much on, but trust me, multiple thin coats build up much better than a few thick ones. For a gallon of finish, you're typically looking at covering around 400-500 square feet per coat, depending on the wood. This is where using the right tools, like a good applicator, really makes a difference.
Understanding Recoat Windows and Dry Times
This is where patience really pays off. You can't just slap another coat on as soon as the first one looks dry. Each product has specific recoat windows – the time you need to wait before applying the next layer. For most water-based polyurethanes, this is usually around 2-3 hours, assuming the temperature is between 65-75°F and humidity is around 40-60%. If you recoat too soon, you risk trapping solvents or moisture, which can weaken the bond. If you wait too long, the surface can become too slick, and the next coat might not adhere properly. Always check the product data sheet for the exact times. It’s better to wait a little longer than to rush it and have to fix it later. You can find great application tools and dust bags, like the ones for American Sanders edgers, at Bailey Flooring Supplies to help keep your job site clean and efficient. Dust removal bags
Proper application isn't just about the finish itself, but also about the environment you're working in. Temperature and humidity play a big role in how the polyurethane dries and cures. Make sure you're working within the manufacturer's recommended conditions for the best results.
| Factor | Recommendation |
|---|---|
| Temperature | 65-75°F (18-24°C) |
| Relative Humidity | 40-60% |
| Recoat Window (Water-Based) | 2-3 hours (typical) |
| Light Traffic | After 24 hours |
| Full Cure | 7 days (typical) |
Intercoat Abrasion and Surface Preparation Between Coats
Alright, so you've laid down that first coat of polyurethane, and it's looking pretty good. But hold on, we're not done yet. Before you slap on the next layer, there's a bit of prep work that makes a world of difference. Skipping this step is like trying to build a house on shaky ground – it just won't hold up.
Light Buffing for Smoothness
After the first coat has dried according to the manufacturer's instructions, you'll want to do a light "abrading" or "scuffing" of the surface. This isn't about sanding down to the wood; it's more like a gentle buffing. We're talking about using a fine-grit abrasive screen, something like a 220-grit or even finer. The goal here is to knock down any tiny imperfections – maybe a stray bristle from your applicator, a bit of dust that settled, or a slight unevenness in the sheen. This light abrasion creates a better surface for the next coat to grip onto, leading to superior adhesion. Think of it like lightly sanding a piece of furniture before you paint it; it just makes everything stick better and look smoother.
Thorough Dust Removal Between Coats
This is probably the most critical part of the intercoat prep. Dust is the enemy of a flawless finish. After you've done your light buffing, you've created more fine dust. You need to get rid of every last speck. Start with a good vacuum cleaner, making sure to get into the corners and along the baseboards. Then, follow up with a tack cloth or a slightly damp (not wet!) microfiber cloth. You want to wipe the entire floor surface. If you miss even a little bit of dust, it'll get trapped in the next coat, and you'll see little bumps or specks under the finish. It’s a pain, I know, but trust me, it’s worth the effort for that professional, smooth look.
Ensuring Proper Adhesion for Subsequent Layers
So, why go through all this trouble? It all comes down to adhesion. Each coat of polyurethane needs to bond well with the layer beneath it. If the surface is too smooth or contaminated with dust or oils, the next coat might not stick properly. This can lead to problems down the road, like peeling or delamination, especially in high-traffic areas. The light abrasion and thorough cleaning ensure that each new layer of finish can chemically bond with the previous one, creating a strong, unified film. This multi-layer system is what gives your floor its long-lasting durability and protection. It’s the foundation for a finish that will look great for years to come.
Factors Influencing Polyurethane Coat Requirements
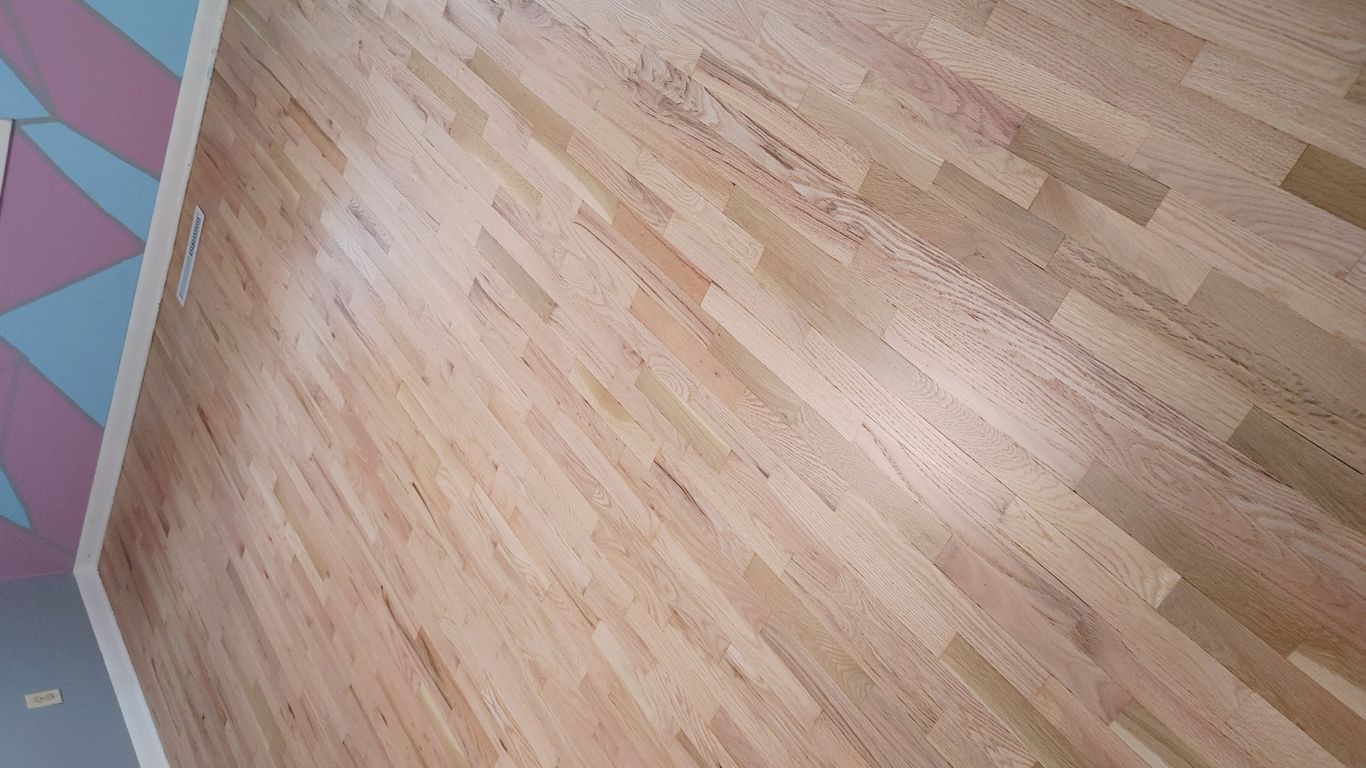
Wood Species and Porosity
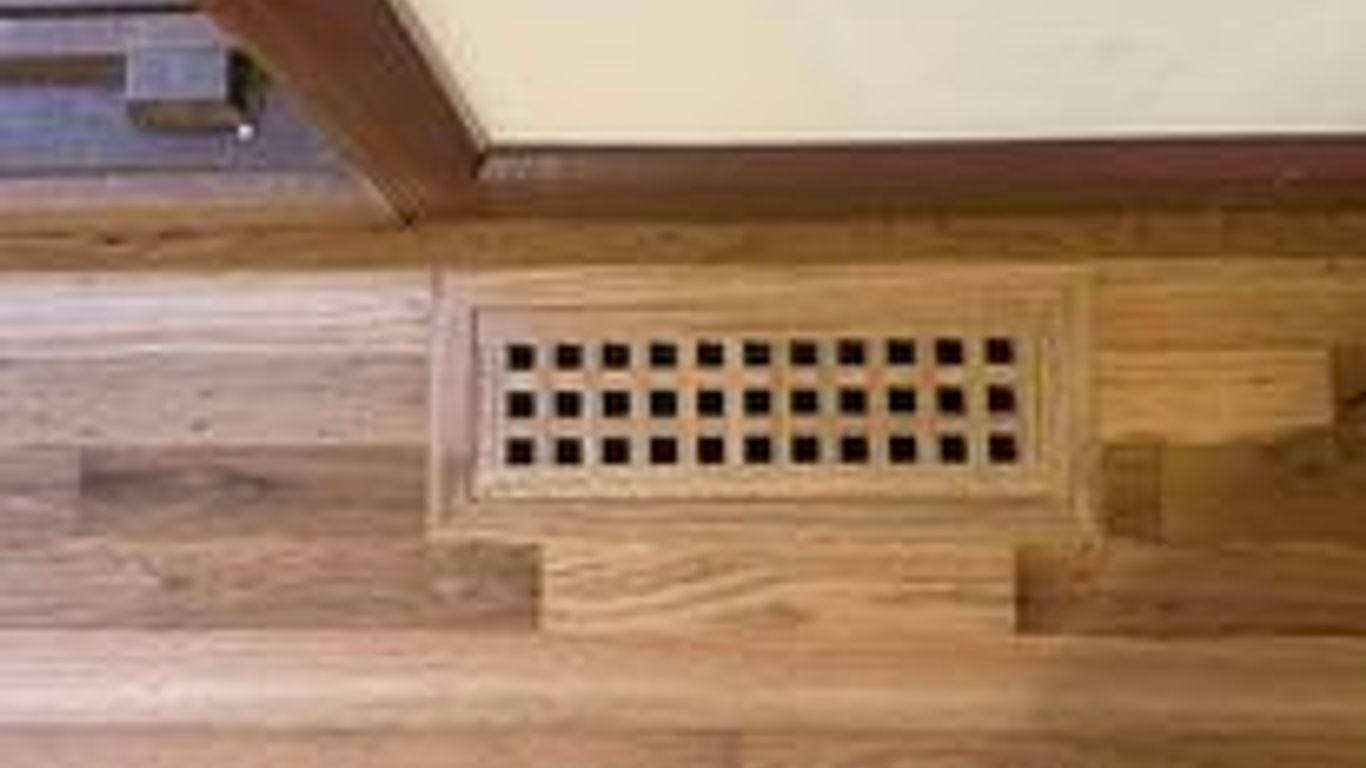
Different types of wood have varying densities and pore structures, which directly impacts how much finish they can absorb. Denser woods like oak or maple tend to have tighter grain and absorb less finish per coat, meaning you might need more coats to build up adequate protection. Softer woods, like pine, can be more porous and might soak up the first coat quickly. This means the first coat acts almost like a sealer, and subsequent coats will sit more on the surface. For very porous woods, you might even consider a dedicated wood filler, like Patch-Quick, to fill larger voids before you even start with the polyurethane. This helps create a more uniform surface for the finish to adhere to and prevents excessive absorption.
Desired Sheen Level
The sheen you choose for your floor finish isn't just about looks; it can also affect durability and maintenance. Gloss finishes tend to show imperfections and scratches more readily because the light reflects off them. Satin and semi-gloss finishes offer a bit more forgiveness in this regard. While higher sheens might seem more durable due to a thicker-looking film, the actual protective qualities are more about the total film thickness and the quality of the polyurethane itself, rather than just the shine. Generally, for high-traffic areas, you're looking for a robust build-up of coats regardless of sheen.
Environmental Conditions During Application
Temperature and humidity play a big role in how polyurethane dries and cures. Applying finish in too cold or too humid conditions can lead to problems like a hazy appearance, slow drying times, or even poor adhesion. It's best to follow the manufacturer's recommendations for application temperature and humidity, typically aiming for a stable environment. For instance, many water-based finishes perform best between 65-75°F with relative humidity around 40-60%. If your shop or home environment is outside these ranges, you might need to adjust your application schedule or use climate control. This is why professionals often check the weather forecast before starting a job.
| Factor | Ideal Range | Potential Issues if Outside Range |
|---|---|---|
| Temperature | 65-75°F (18-24°C) | Too cold: Slow cure, hazing. Too hot: Fast dry, poor leveling. |
| Relative Humidity | 40-60% | Too high: Slow cure, potential moisture trapping. Too low: Static, dust issues. |
Proper environmental control is key to achieving a smooth, durable finish. Rushing the process or applying in adverse conditions can compromise the integrity of the polyurethane, leading to premature wear or aesthetic flaws. Always check the product data sheet for specific environmental requirements.
The Impact of Sheen on Durability and Maintenance
Gloss Finish Characteristics
A gloss finish on your hardwood floors really makes them shine. It's super reflective, almost like a mirror. This high shine can make a room feel brighter and more open. However, that super glossy look can also show every little scratch, scuff, and dust bunny. So, while it looks fancy, it might mean more frequent cleaning and touch-ups to keep it looking its best. It's tough, but the imperfections are more noticeable.
Satin and Matte Finish Properties
Satin and matte finishes offer a more subdued look. Satin has a soft luster, not too shiny, which hides minor wear and tear pretty well. It's a popular choice because it balances appearance with practicality. Matte finishes go a step further, offering a very low sheen that looks almost like the wood is unfinished. This is great for hiding imperfections and giving a natural, modern feel. Both satin and matte are generally easier to maintain than gloss because they don't highlight every little mark as much.
Semi-Gloss as a Balanced Option
Semi-gloss strikes a nice middle ground. It has a noticeable sheen, more than satin but less than full gloss. This means it reflects some light, adding a bit of brightness to the room, but it's not so reflective that every single speck of dust or minor scratch screams for attention. For many homeowners, semi-gloss is the sweet spot. It offers a good level of protection and a pleasing appearance without demanding constant, obsessive cleaning. It's a solid, dependable choice for most residential settings, providing a good balance between looking good and being easy to live with. When you're looking for durability and a finish that doesn't require constant fuss, semi-gloss is often the way to go. It’s a practical choice for busy households. For a finish that holds up well and looks great, consider the Loba Easy Finish Polyurethane in a satin or semi-gloss. It’s a professional-grade product that’s also user-friendly for DIY projects, offering excellent wear resistance and a beautiful, low-maintenance sheen.
When to Consider Additional Coats
Refinishing Previously Coated Floors
Sometimes, you might think you need an extra coat of polyurethane, but it's actually time for a full refinish. If the existing finish is heavily scratched, worn through in spots, or has a cloudy appearance that buffing won't fix, adding more coats on top isn't the best solution. It can lead to an uneven look and potential adhesion problems down the road. Instead, a proper sanding and recoating process is usually the way to go. This gives you a fresh start and ensures the new finish bonds correctly. For those looking to refresh an existing finish without a full sand, some products are designed for this, but it's important to check compatibility. If you're dealing with a floor that's seen better days, it might be worth looking into professional-grade finishes like those from Bailey Flooring Supplies, which are built for durability even on older floors. They offer systems that can revitalize your wood.
Protecting High-Wear Areas Like Entryways
Entryways, hallways, and areas around furniture are usually the first to show wear and tear. If you notice these spots looking dull or slightly scratched after a year or two, it's a good sign you might benefit from an extra coat of polyurethane in those specific zones. Applying an additional layer in these high-traffic areas can significantly boost their resistance to abrasion and foot traffic. Think of it like adding extra armor where it's needed most. When applying, make sure to feather the edges of the extra coat into the surrounding area to avoid noticeable lines. For really tough spots, consider a more robust finish system. Bailey Flooring Supplies has options that are specifically designed for commercial use, which means they can handle even the most demanding residential traffic.
Achieving a Specific Aesthetic or Build
Beyond just durability, sometimes you want more coats for the look. A higher sheen level, for instance, often requires more coats to achieve that deep, glossy finish. Conversely, if you're aiming for a very natural, matte look, you might still opt for multiple thin coats to build up protection without adding too much sheen. Some wood species, like pine, are softer and might benefit from an extra layer or two to achieve the same level of protection as a harder wood. It's all about balancing the desired appearance with the practical need for protection. Remember, each coat adds a slight build, so planning your aesthetic goals from the start is key. If you're unsure, consulting the product data sheets or reaching out to experts at Bailey Flooring Supplies can provide clarity on how different numbers of coats affect the final look and feel.
Long-Term Floor Care and Maintenance
Regular Cleaning Practices
Keeping your hardwood floors looking good long-term is all about consistent, gentle cleaning. You don't need fancy stuff, just a good routine. Start by sweeping or vacuuming regularly to pick up all the grit and dust that can scratch the finish over time. Think of it like dusting your furniture – it just needs to be done often. A good quality microfiber mop is also your best friend here for daily touch-ups. The key is to avoid anything that can leave a residue or dull the finish.
Using Approved Maintenance Products
When it's time for a deeper clean, stick to products specifically made for hardwood floors. You know, the ones that won't strip the finish or leave a sticky film behind. For water-based finishes like the ones from Bailey Flooring Supplies, a pH-balanced cleaner is usually the way to go. Something like LOBA Parkett Soap R2U is a solid choice because it's ready to use and won't mess with the protective layer on your floor. It cleans well without leaving any dulling residue, which is exactly what you want. Using the wrong cleaner is a quick way to ruin a good finish.
Protecting Floors from Furniture and Foot Traffic
Little things make a big difference. Put felt pads on the bottom of all your furniture legs – chairs, tables, sofas, you name it. This stops them from scratching the floor when you move them. It’s a simple step that saves a lot of headaches down the road. For high-traffic areas, consider using rugs or runners. This is especially true for entryways or areas where people tend to shuffle their feet. It’s a practical way to reduce wear and tear. If you're looking for some good application tools, check out the Microfiber Pads for cleaning and maintenance.
Professional Guidance for Your Project
Consulting with Flooring Experts
When you're deep into a hardwood floor project, whether it's a full refinish or just a touch-up, sometimes you just need to talk to someone who really knows their stuff. That's where flooring pros come in. They've seen it all, from tricky wood types to weird humidity issues. They can help you figure out the best finish system for your specific situation. It's not just about picking a can off the shelf; it's about getting advice tailored to your floor's needs. They can steer you toward products that will actually last and look good, saving you headaches down the road. Don't hesitate to reach out to them for help.
Understanding Product Data Sheets
Every finish product comes with a data sheet, and while they might look intimidating at first, they're packed with important info. Think of them as the product's instruction manual. They'll tell you exactly how to apply it, what temperatures and humidity levels are best, and how long to wait between coats. You'll also find details on coverage rates, which helps you figure out how much product to buy. Reading these sheets before you start is a game-changer for getting professional results. It might seem like a small step, but it prevents a lot of common mistakes.
Choosing the Right Finish System
Picking the right finish isn't a one-size-fits-all deal. You've got to consider a few things. How much foot traffic does the floor get? Are there pets or kids running around? What kind of wood is it? And what look are you going for – super shiny or more natural? For example, a busy family home with pets might need a tougher, more durable finish, maybe a two-component system. If you're going for that modern, natural look, you'll want something that doesn't add a lot of color or shine. Bailey Flooring Supplies has a good selection of water-based finishes that professionals trust for their durability and ease of use, offering options for different needs and aesthetics. Making the right choice upfront means your floors will look great for years to come.
Need some expert advice for your project? We've got you covered. Our team offers top-notch guidance to help you succeed. Visit our website today to get the professional support you need!
Wrapping It Up
So, when it comes down to it, how many coats of polyurethane are really needed on your hardwood floors? For most homes, two to three coats should do the trick, giving you a solid layer of protection without going overboard. If you've got a busy household with kids, pets, or just a lot of foot traffic, leaning towards that third coat is a smart move. Commercial spaces? You'll want to bump that up to three or even four coats to really stand up to the heavy use. Using a good quality, professional-grade finish, like the water-based options we've talked about, makes a big difference too. They're built tough and dry faster. Just remember, proper prep work before you even open the can is key, no matter how many coats you end up putting down. Get that right, apply your coats evenly, and let them cure properly, and you'll have floors that look great and last for years.
Frequently Asked Questions
How many coats of polyurethane do I really need for my wood floor?
For most homes, two to three coats of polyurethane are usually enough to protect your wood floors. If your floors get a lot of action, like in a busy house with kids and pets or a commercial building, you might want to add an extra coat or two for better protection.
What's the difference between water-based and oil-based polyurethane?
Water-based polyurethane dries faster, has less smell, and stays clear without turning yellow over time. Oil-based polyurethane takes longer to dry, has a stronger smell, and gives a warmer, amber color to the wood. Both offer good protection, but water-based is often preferred for its quick drying and clear finish.
Does the type of wood matter when deciding on polyurethane coats?
Yes, it can. Softer woods or woods with more open pores might soak up the first coat more, meaning you might need an extra coat to get the same level of protection as on a denser wood. It's always good to check the product's instructions.
What does 'sheen' mean for floor finishes?
Sheen refers to how shiny the finish is. Gloss is very shiny, like a mirror. Satin and semi-gloss are less shiny, offering a softer look. Matte finishes have very little shine, giving the floor a more natural, unpolished appearance. Higher sheens can sometimes show scratches more easily than lower sheens.
Is it important to sand between coats of polyurethane?
Yes, lightly sanding or buffing between coats, and then cleaning up all the dust, is a crucial step. It helps the next coat stick better and creates a smoother, more even finish by removing any tiny bumps or imperfections from the previous layer.
How long does it take for polyurethane to fully dry and harden?
Polyurethane usually dries enough to walk on lightly within 24 hours. However, it takes much longer, often up to 30 days, to fully harden and reach its maximum durability. During this time, it's best to be gentle with the floors and avoid heavy furniture or rugs.
Can I use a 'professional-grade' finish on my own floor?
Absolutely! Professional-grade finishes, like two-component (2K) systems, are designed for superior durability and are often easier to apply evenly than older types of finishes. They offer better protection, especially in busy areas. Just be sure to follow the application instructions carefully.
What's the best way to take care of my newly finished wood floors?
To keep your floors looking great, sweep or vacuum them regularly. Use cleaning products specifically made for wood floors and avoid harsh chemicals or too much water. Putting felt pads under furniture legs also helps prevent scratches.
0 comments